To send a claim head on over to the generate claims page.
Navigation: Billing > Generate Claims
Here you will see claims that are generated by generating timesheets in the schedule approvals page.
These claims are in the ![]() tab.
tab.
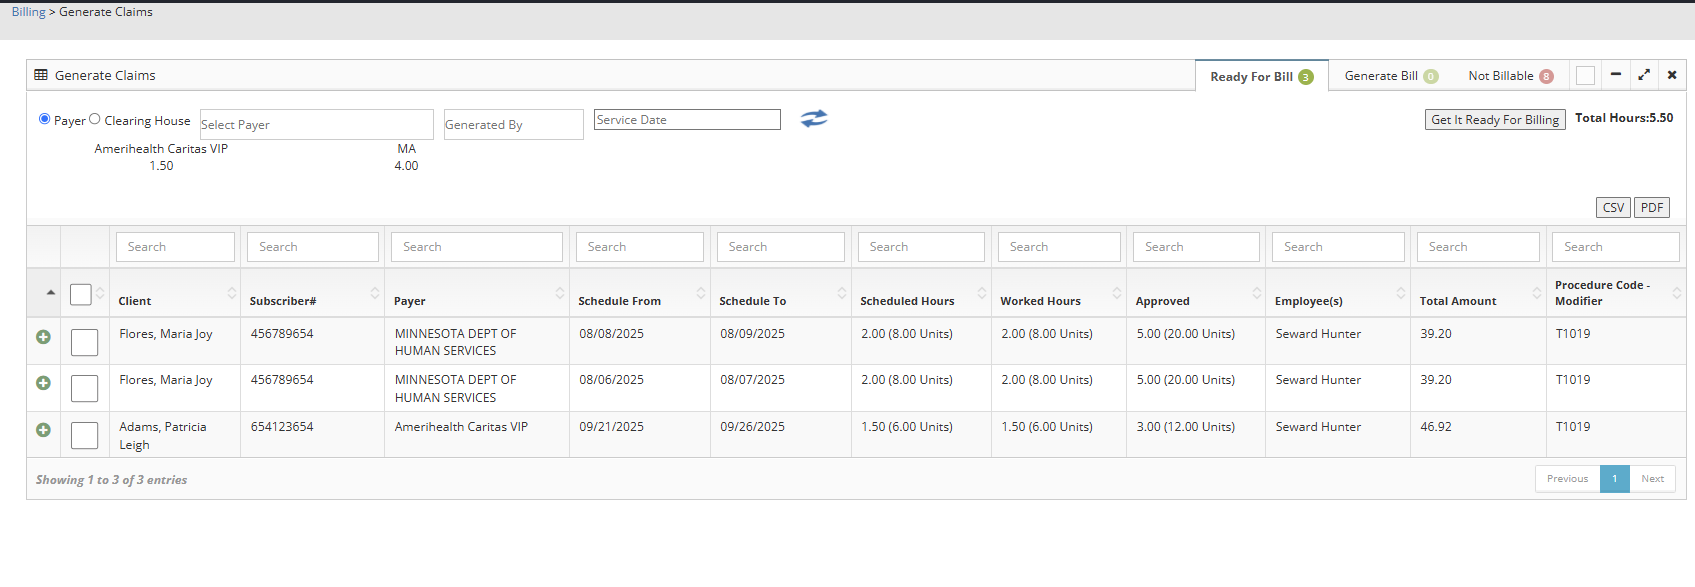
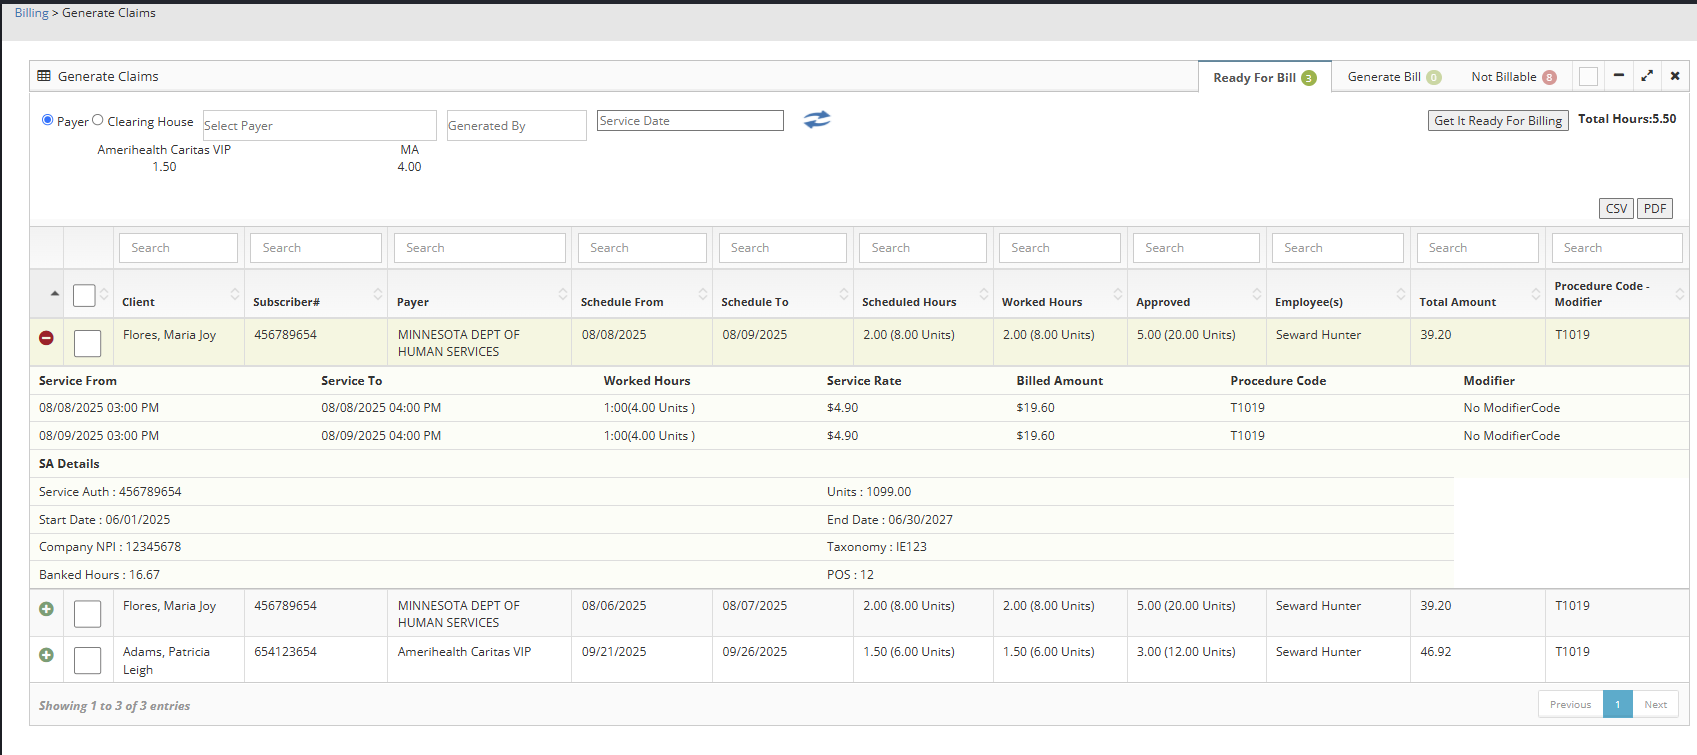
Here you can click on the  to see the details of each claim.
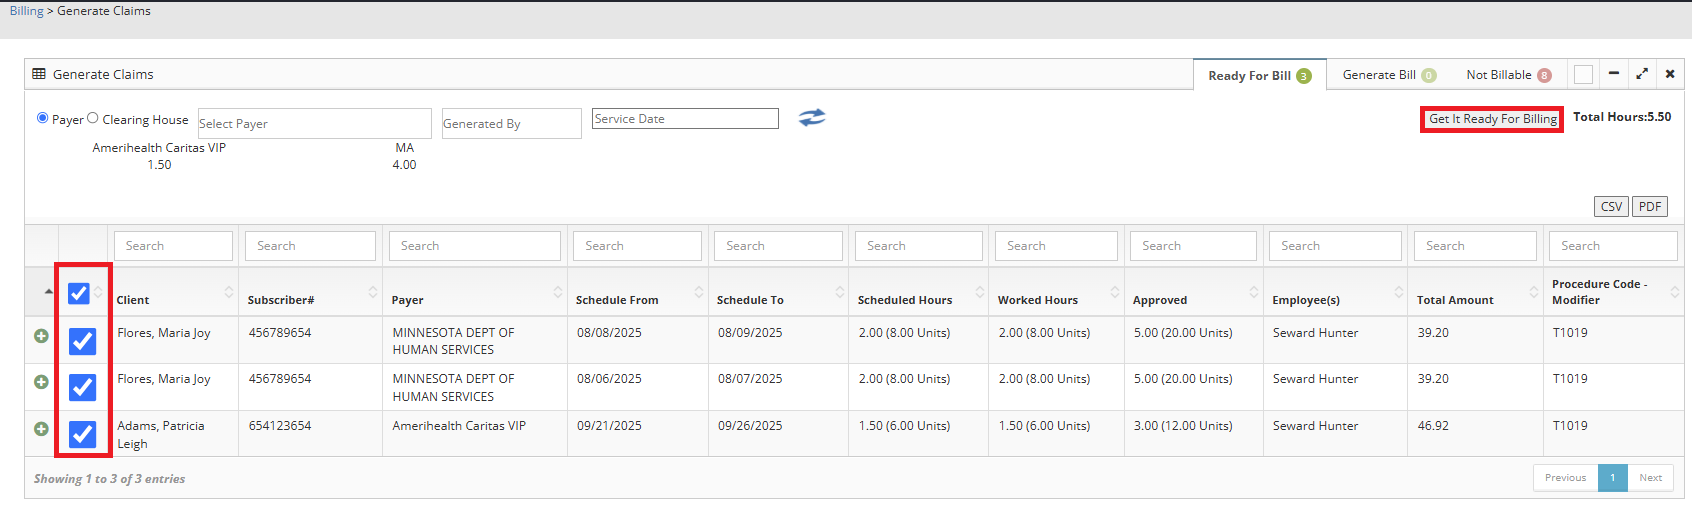
Click the  for each claim that you would like to get ready for billing, or click the
  at the top left of the screen to select all.
Once you are satisfied with your selection click the  button.
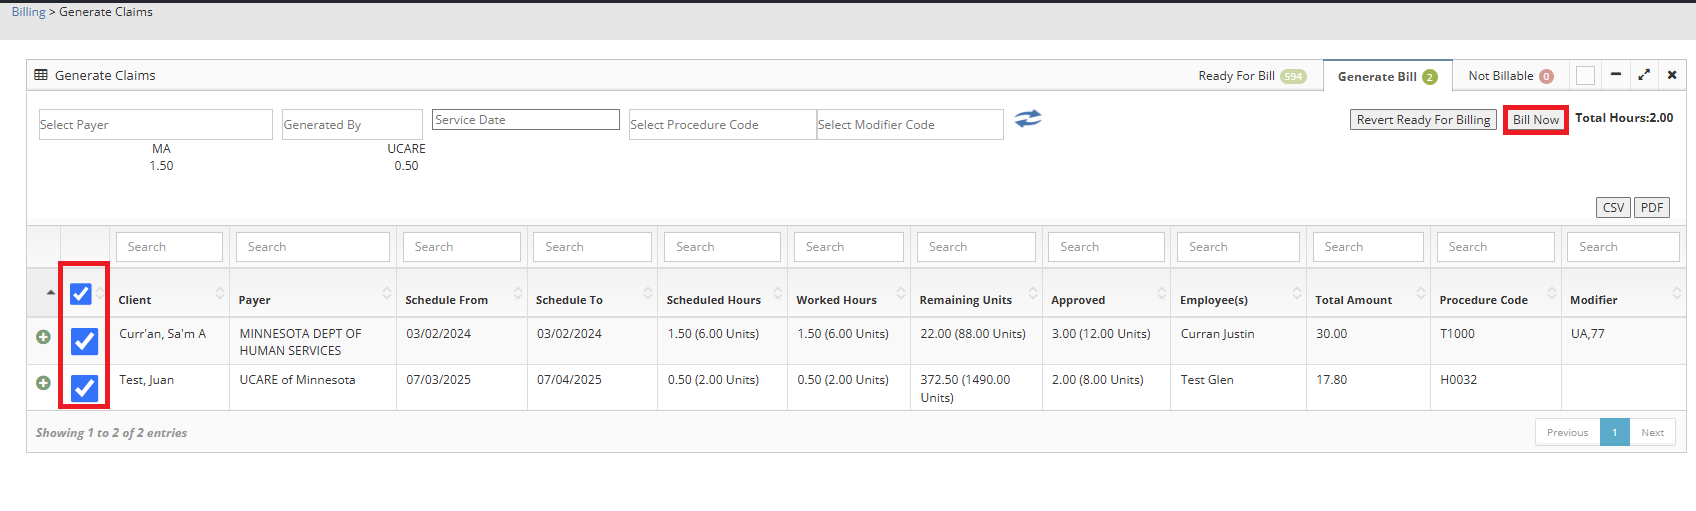
The claims have now moved the the  tab.
tab.
Here you can click on the to see the details of each claim.
If you see an error in the claim you can click on the  button to get it back to the
  tab.
tab.
Click the for each claim that you would like to bill, or click the at the top left of the screen to select all.
Once you are ready to bill click on the  button.
Once you have clicked the claim are sent.
you can view them in the claim detail report.
To learn more about the claim detail report, please visit our page: Claim Detail Report.