Claim Detail Report
Use the claim detail report to review claims, request status updates, resolve denied claims and finally download reports.
No real client or employee information was used.
Jump to:
Accessing and Navigating the Claim Detail Report
Voided Claims
Generating Reports
Accessing and Navigating the Claim Detail Report
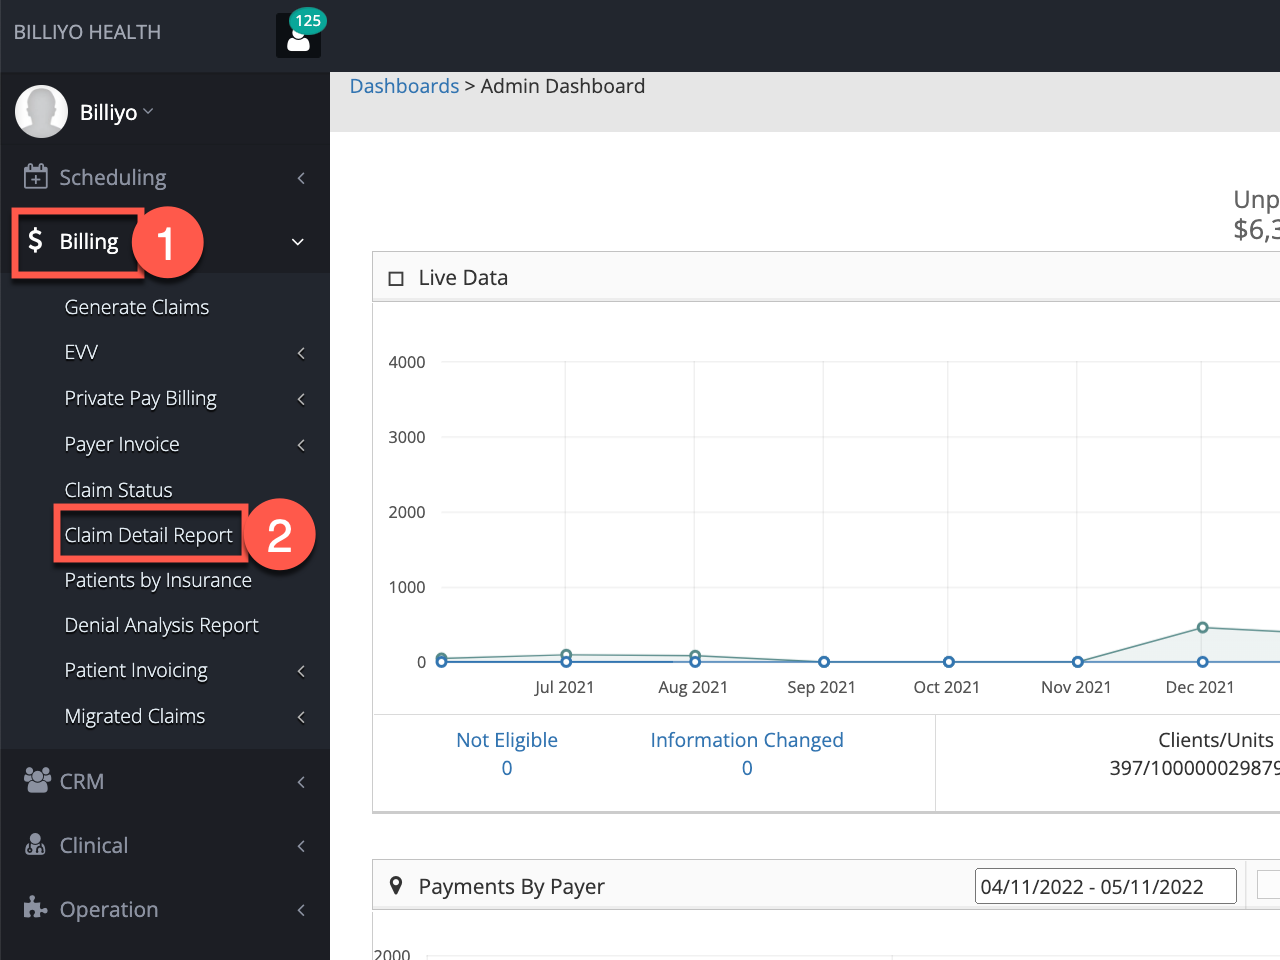
To access the claim detail report, navigate to Billing > Claim Detail Report.
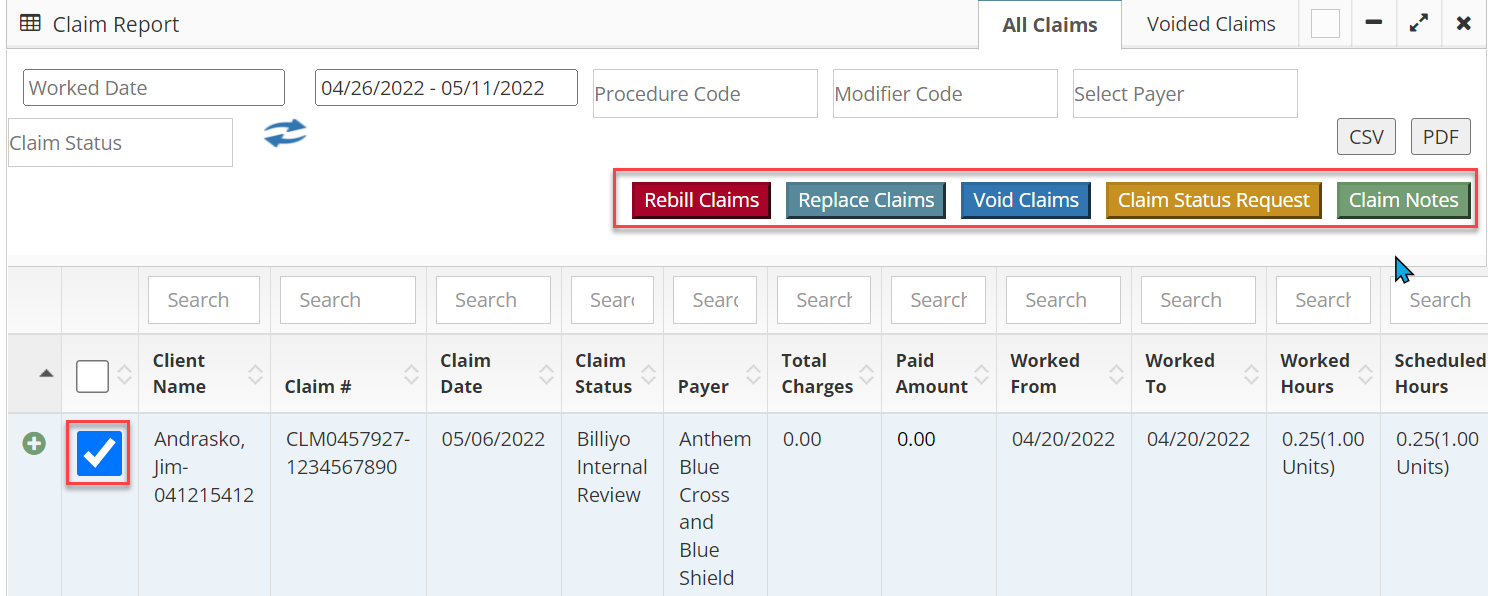
Within the claim detail report page there will be two tabs, "All Claims" and "Voided Claims".

Claims in the "Paying" Status will have the Dollar Amount in Blue
Claims in the "Claim is Paid" Status will have the Dollar Amount in Black

Claims in the Paying Status reflect the Amount that you can expect to receive for that claim. Claims in the Claim is Paid Status is the Amount we have Confirmed has been Paid.
Select the desired filters and click the refresh arrows. 
To view the details of a claim, click on the plus sign next to the client's name.
To view the actions you can take with a claim, click the check box next to the client's name.
Claims can be sent on a monthly basis while timesheet's are based on pay periods. Sometimes timesheets can be in 2 different claims. To alter a schedule, every claim that includes the timesheet will need to be voided.
Claim Notes Panel
Clicking on the + sign to the left of a client's name will reveal additional options, such as the "Claim Notes" button. Within the claim notes pop-up the claim status, payer claim number and notes can be added.

Claim Notes
This option provides the ability to add notes to the claim. For example, if you want to note the reason for an action on the claim. These notes can be viewed in other pages, like Claim Denial Analysis.
Payer Change
Change details, including service authorization and care plan.
Payer Claim Number
Enter a Payer Claim Number if it is not already in Billiyo. You can find this number in your payer's system.
Rebill/Replace Claim
Depending on if the claim has been paid or not these buttons will resubmit the claim with the edits you have made.
Claim Actions
After clicking on the checkbox to the left of a claim, several options will appear in the top right.
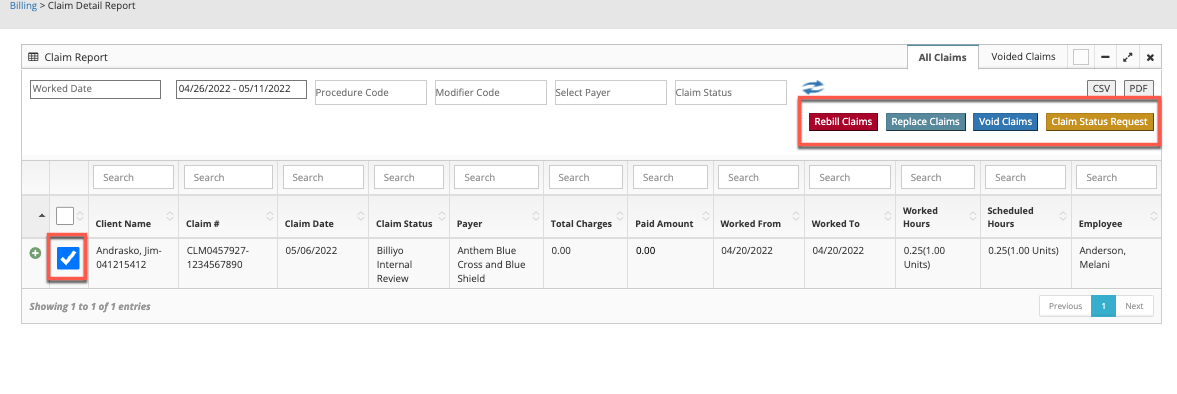
Here is a breakdown of each button function:
Rebill Claims
If a claim has been processed, and gets denied, this option would be used to resend the claim after the information has been corrected.
Commonly use when a field in the Client or Employee Profile is incorrect
When rebilling a claim, the original claim's information will be replaced by the new claim's information.
If the timesheet is split into 2 different claims, the "Rebill Claims" button will not appear. Both claims will need to be voided.
Replace Claims
If a claim was paid, or partially paid, and you want to resubmit it this option would be used to replace the claim in the payer's system.
When replacing, the original claim's information will be replaced by the new claim's information.
The payer claim number may need to be input in order to replace, read more about the payer claim number under the "Voided Claims" heading below.
Claim Status Request
If the payer is MN DHS, this option can be used to request the status of a recently submitted claim if nothing has been for 24 hours.
Void Claims
In some cases, like if there is an incorrect timesheet, claims may need to be voided. For example, if money needs to be returned or a schedule, then you would void the claim and revert it back to an approved timesheet. From there you can reprocess the timesheet as necessary.
Check out how to delete schedules when a timesheet and/or claim was submitted here.

To be able to void a claim, the Payer Claim Number needs to be put into the claim notes. The Payer Claim Number is the number that is assigned by the payer to identify a claim and can be found within the payer’s system.
Once the Payer Claim Number has been obtained, locate the claim and click on the + sign to the left of the client’s name. Then, click on the “Claim Notes” button that appears and on the pop-up that appears click on the pencil icon to paste/type in the Payer Claim Number. Make sure to click on the checkmark to save.
When a claim is voided, it will appear in the “Voided Claims” tab.
Voided Claims
To review voided claims, click on the "Voided Claims" tab.

For additional information about the claim, click on the plus sign next to a client's name.

After clicking on the + sign, additional buttons will appear. Here is information about these buttons:
Claim Notes
Use this button to add and review notes on the claim, edit the payer claim number, and edit the claim status.
Rebill Claim
If the claim was voided as changes were needed to be made to the schedules, after the updates have been made and the timesheet regenerated in the Timesheet page, use this button to rebill the claim with the newly updated information.
Restore Claim
If a claim was voided by accident, using the "Restore Claim" button will restore the claim — sending an exact replica of the initially voided claim to the payer to be paid after it was taken back.
Archive Claim
Archives the claim. Once a claim has been archived, it can be found when changing the filter option to "Archived Claims".
Clicking on the + sign to the left of the archived claim, a button to "Unarchive Claim" will appear.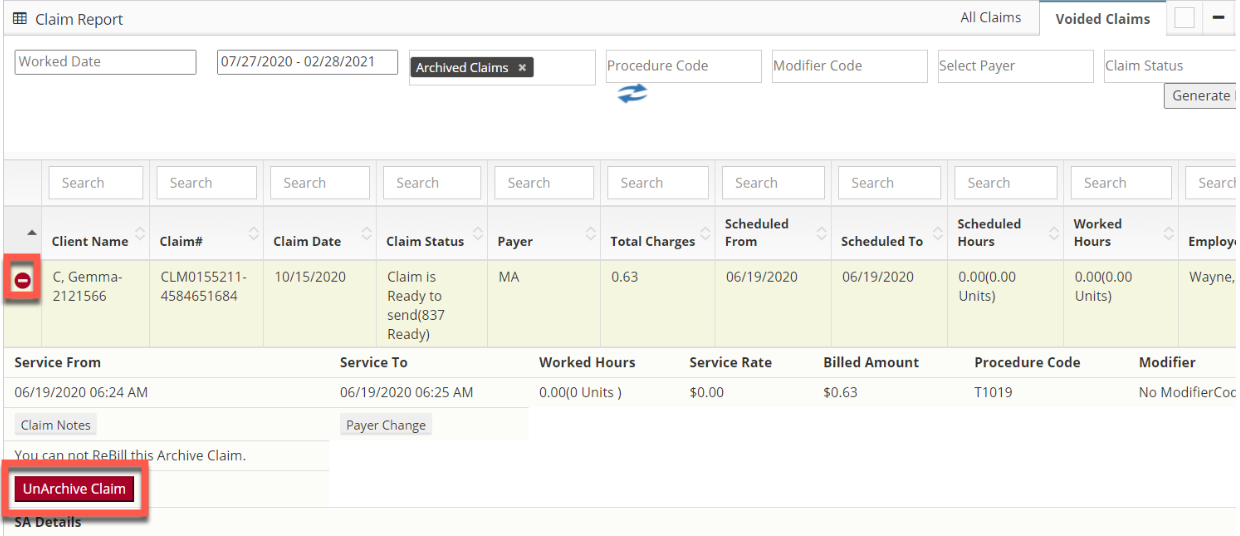
Unarchiving the claim will place it back in a void status.
Generating Reports
To generate a report under the "All Claims" or "Voided Claims" tabs, use the CSV or PDF buttons.
CSV's automatically start downloading while a PDF report gets generated and is sent to the Download Documents page.
Once the PDF is generated it can be found under Reports > Download Documents.
Depending on the size of the report, it could take 5-15 minutes to generate.
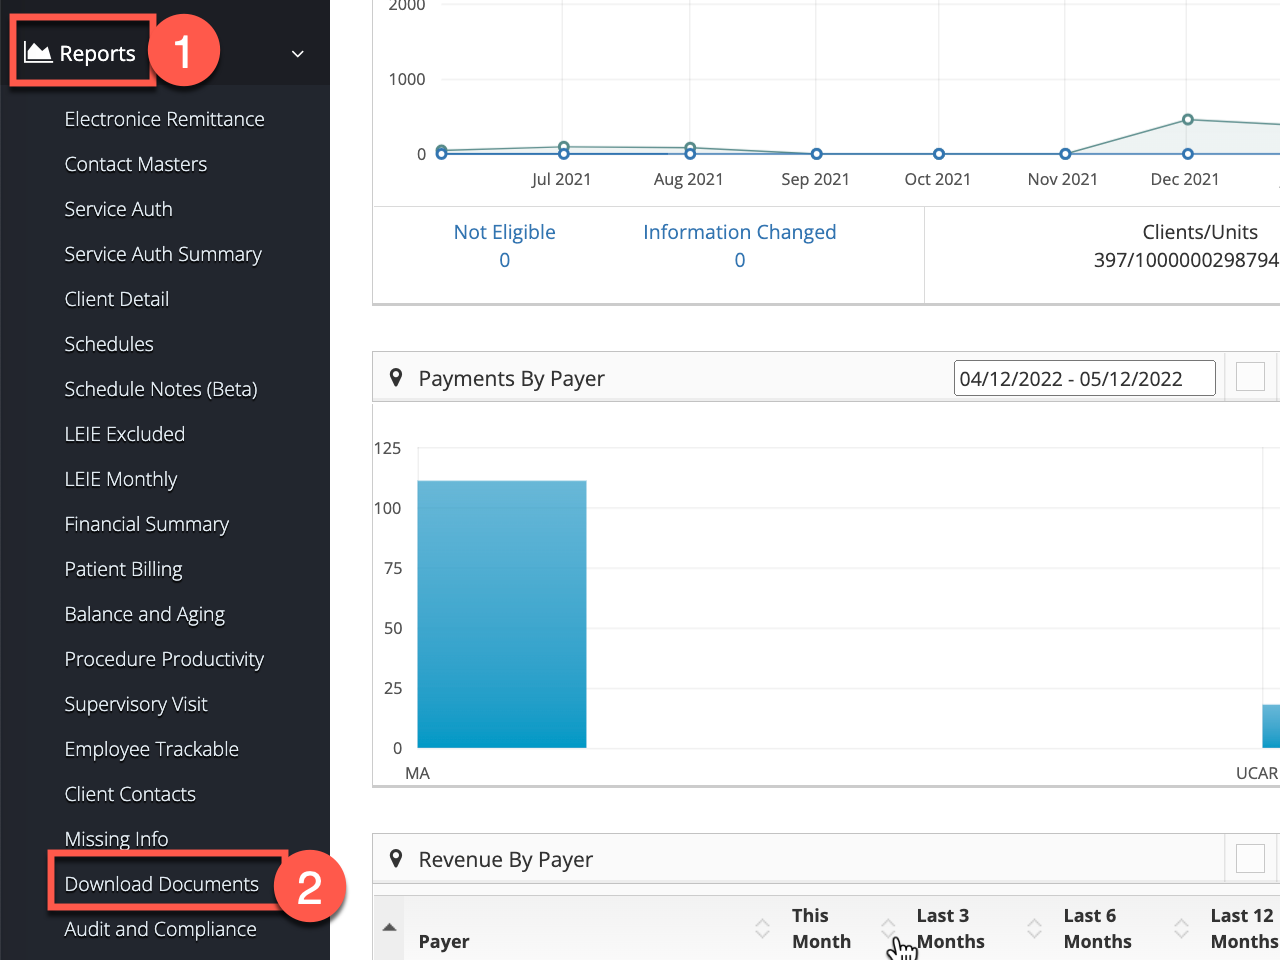
Find the Report to Download as a PDF and select Download Report
Example:

