Let's say that our agency's performed a 24-hour support for a client and was on call for them all weekend. However, unbeknownst to us, the patient was hospitalized and unavailable for service. As a result, the claim we sent got denied. Unfortunately, even though the claim was denied, we still used units from the Service Auth to make the schedule. So, when the client is discharged and we resume services, we may not have enough hours for them. Normally, we could just delete the visits and regain their units; however, because these schedules are attached to a claim, its not that simple.
Brief Overview
Once a claim is billed, its timesheet's information gets locked in place so it reflects the claim. This means that we cannot edit or delete the timesheet until the claim is voided. This will take back the claim from our payer and free up the timesheet up for deletion. Once the timesheet is deleted we can reject its hours in the Schedule Approval page and ultimately remove the visits hours from Billiyo.
Step By Step: Voiding Claims
- Begin by voiding the claim you submitted. Navigate to Billing > Claim Detail Report.

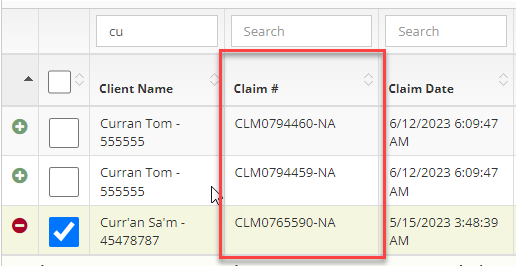
- Search for the Client and click the
 icon next to their name.
 - If you already have a Payer Claim Number we can Jump to #7. We can see the payer claim number in the "Claim Number" column. A Payer Claim Number it will look like this format (xxxxxxxxx-yyyyyyyyyy).
- xxxxx indicates Billiyo Internal claim number.
- yyyyy indicates Payer Claim Number (Payer Control Number).
- If the claim does not have a payer claim number we can add one by hitting Claim Notes.

- We will then see a pop-up where you can add the Payer Claim Number by clicking the edit button


- The Payer Claim Number is provided by the payer/clearing house.
- Copy the payer control number .
- Paste number in the Payer Claim Number field in Billiyo.
- Make sure to click the checkmark to save the number.
- Go back to the Claim Detail Report, place a blue checkmark next to the Client’s name and select Void Claims.

Step By Step: Deleting Timesheets
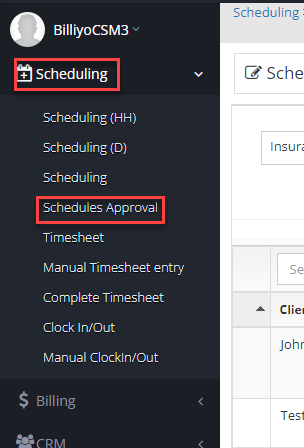
- To delete the timesheet we should navigate to to Scheduling > Timesheet.

- Us the search filters near the top of the screen to locate the correct timesheet.
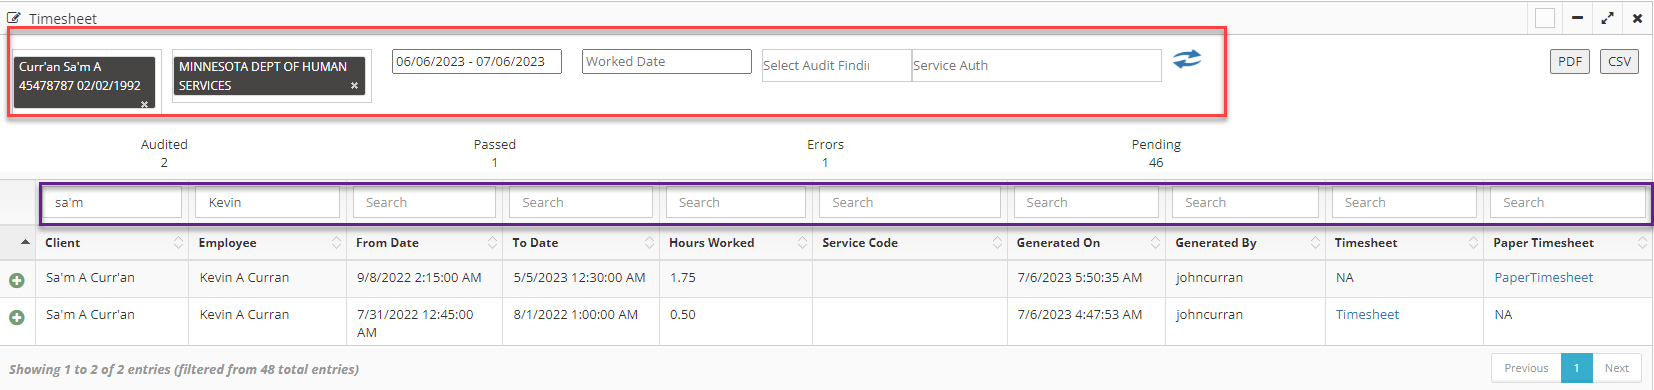
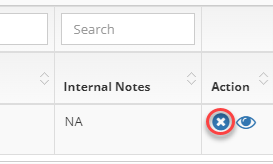
- Click the
 icon next to the Client name
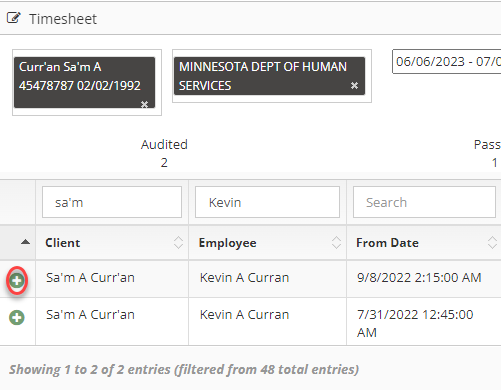
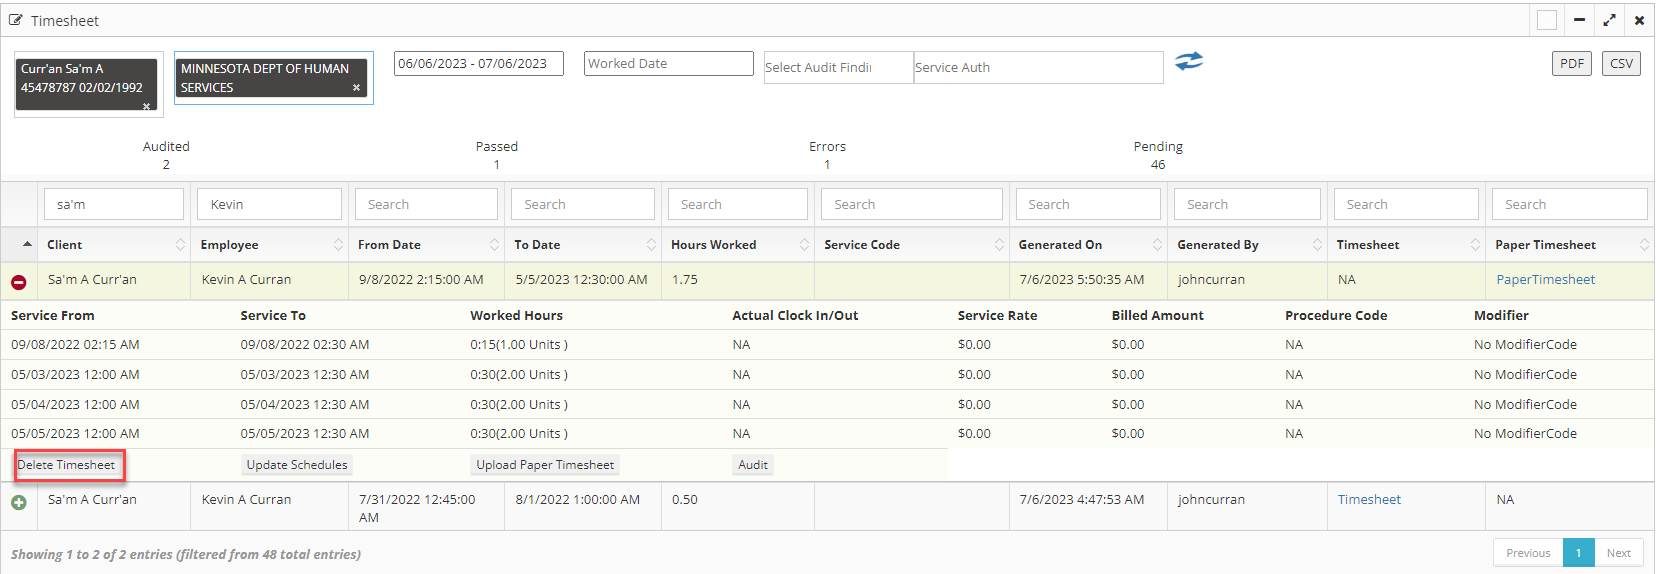
- Click Delete Timesheet. If the "Delete Timesheet" button does not appear, this means that there are still claims that have been submitted from the timesheet. All claims from the timesheet will need to be voided in order to delete it.
Step By Step: Rejecting Hours
- Next, go to Scheduling > Schedules Approval.
- Then select the Client and, if you are using "two step approval" set the status to "Approved." Next, click the blue refresh
 arrows.
- If you are using two step approval: Click the blue X to unapproved the visit. Then change the status to Waiting for Approval.
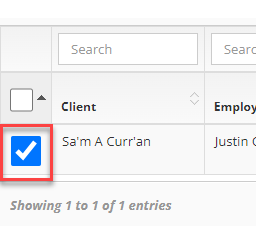
- Check the box next to the Client’s name
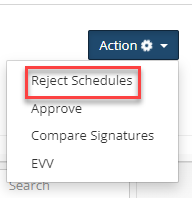
- Click on the blue action box and then select Reject Schedules.
Your rejected schedules will be sent back to the caregiver's app. If they want to rework their visits they can, otherwise you can delete the visits off their phone by removing them from the scheduling page.
Step By Step: Deleting Visits
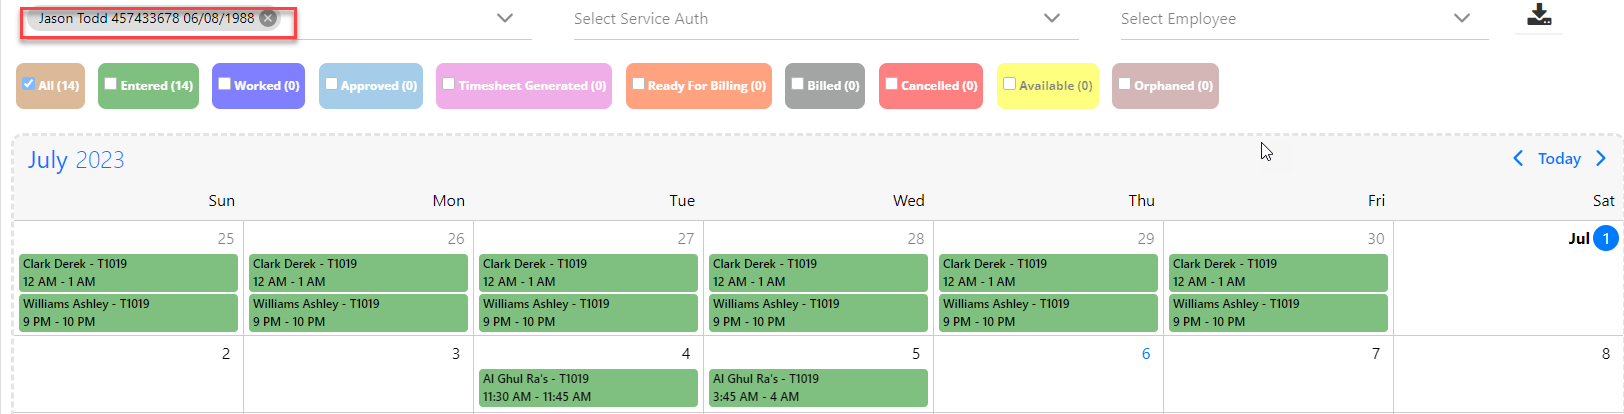
- Navigate to Scheduling > Scheduling.
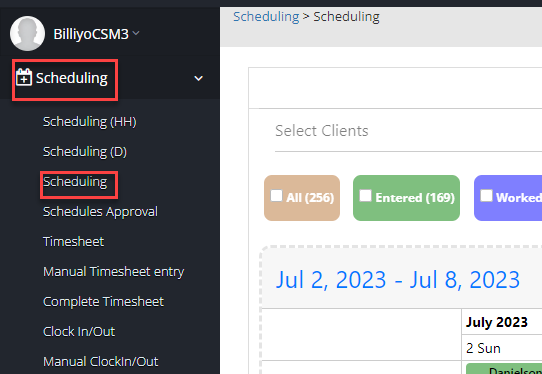
- Then use the Search Client bar to locate the schedules that need to be deleted.
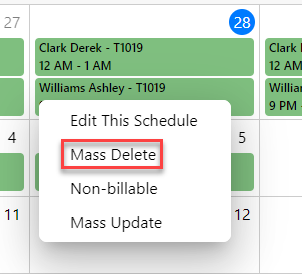
- To delete multiple visits at once click on a schedule and then select Mass Delete?
- In the new pop up window select the time frame you want to delete
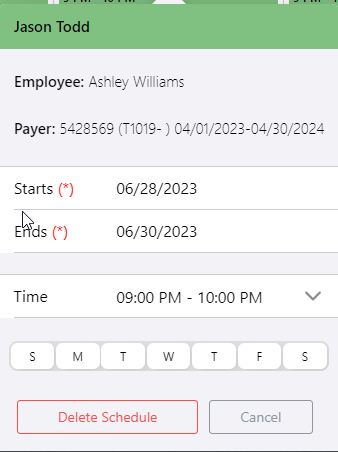
- Start: The first date that you want to delete
- End: The last date you want to delete
- Every day between the Start and End dates will be deleted
- Time: The time that the visits occurred.
- This field autofills to match the schedule that you clicked on.
- Days: The days that are highlighted will be deleted.
- By default all dates are selected (will be deleted) and to spare them we can unselect the day.
- By default all dates are selected (will be deleted) and to spare them we can unselect the day.
- Finally hit "Delete Schedule" and then, in the resulting pop up, confirm that you want to end delte the vists.
You can only delete green "entered" visits
We have now deleted schedules that were previously billed for. The units these schedules had used have been freed up and we can use them to edit, or create, new visits.