Jump To:
How to Access the Timesheet Page
Reviewing Timesheets
Delete a Timesheet
Update Schedules
Upload a Paper Timesheet
Audit
Regenerate Timesheet
Downloading Information
FAQs
How to Access the Timesheet Page
To access the Timesheet page, head to Scheduling > Timesheet. 
Reviewing Timesheets
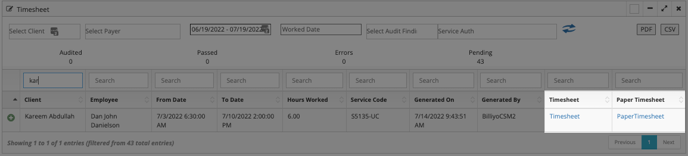
Use the filter and search fields to help locate a specific timesheet.
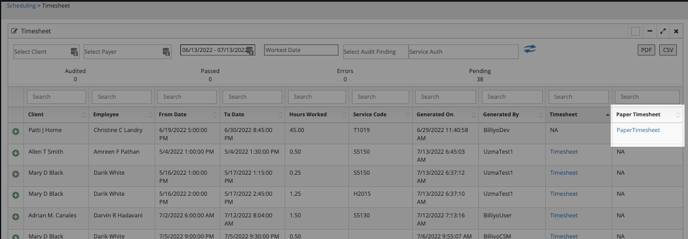
There are two types of timesheets that can be found in Billiyo, paper and electronic. Paper timesheets are added via the Manual Timesheet Entry page, electronic timesheets are generated within Billiyo in the Schedules Approval page for schedules that were submitted via our apps.
When a paper timesheet is added, under the Paper Timesheet table heading there will be a blue link to click on. After clicking on the timesheet link, the timesheet will appear to be able to review, download, and print it.
The download and print options may not appear if the timesheet uploaded was not in a PDF format.
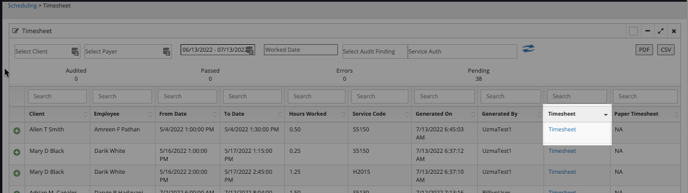
When a timesheet is electronically generated, under the Timesheet table heading there will be a blue link to click on. After clicking on the timesheet link, the timesheet will appear to be able to reviewed, download, and print it.
Delete a Timesheet
If the "Delete Timesheet" button does not appear, this means claims have been submitted from the timesheet. All claims from the timesheet will need to be voided in order to delete it.

Once the timesheet is deleted, the schedules will appear under the Schedules Approval page in the approved status.
Update Schedules
If a schedule in a timesheet needs to be updated, it can be done from this page using the “Update Schedules” button.
To locate this button, click on the + sign to the left of the client’s name. Under the expanded information, the “Update Schedules” button will be found.
-
Service Auth — If you need to select an expired service authorization, make sure to click the “Show All” checkbox before making a selection for this field.
-
Care Plan
-
From Date(s)
-
To Date(s)
-
Worked Hours — This information will auto-populate based on what’s selected in the “From Date” and “To Date” fields.
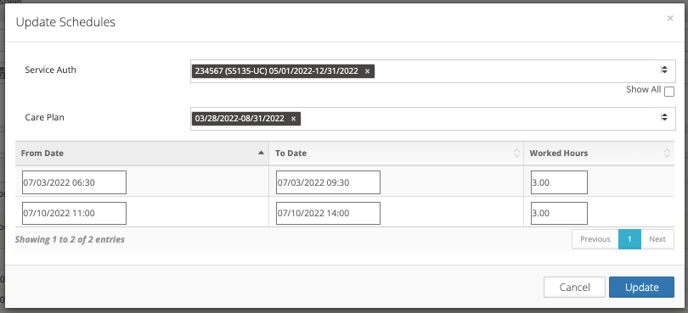
After making any necessary changes, click the “Update” button to update the schedule. Then, make sure to regenerate the timesheet.

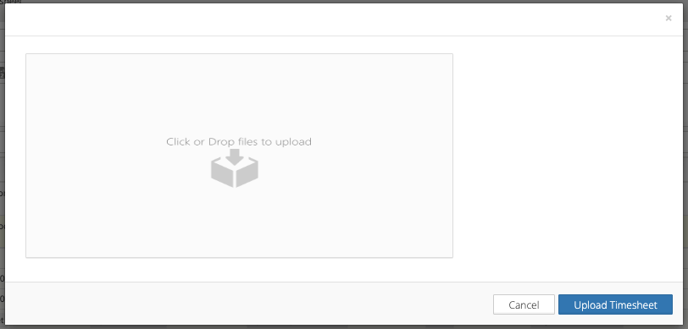
Upload a Paper Timesheet
If you’d like to replace a paper timesheet that has been added, or attach a paper timesheet to an electronically generated one, use the “Upload Paper Timesheet” button to do so.
To locate this button, click on the + sign to the left of the client’s name. Under the expanded information, the “Upload Paper Timesheet” button will be found.

If there was an electronically generated timesheet before, the electronically generated timesheet will remain and the paper timesheet will also be added — a link will appear under both the “Timesheet” and “Paper Timesheet” headings now.
Audit
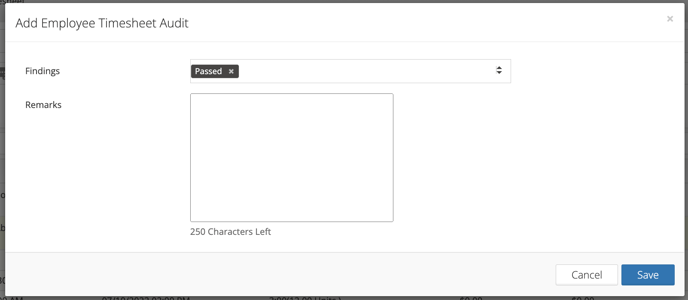
If you’ve audited your timesheets, using the “Audit” button you can mark whether the timesheet passed or errors were found and notate.
To locate this button, click on the + sign to the left of the client’s name. Under the expanded information, the “Audit” button will be found.

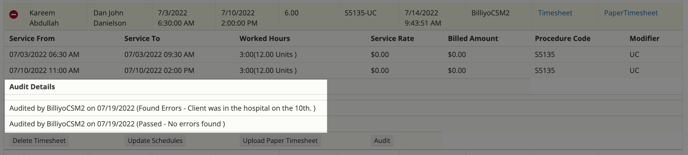
On the pop-up that appears, select either “Passed” or “Found Errors” in the Findings field. Then, leave any remarks and click the “Save” button.
Once an audit has been performed, the audit details will appear to review.
Regenerate Timesheet
If schedules were updated, the timesheet will need to be regenerated. The “Regenerate Timesheet” button can be used for this.
To locate this button, click on the + sign to the left of the client’s name. Under the expanded information, the “Regenerate Timesheet” button will appear.
After a timesheet has been regenerated, the “Generated On” heading in the table should update to the date is was regenerated.
If a paper timesheet was added, the “Regenerate Timesheet” button will not appear.

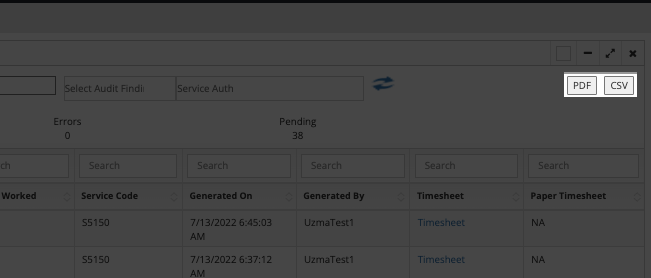
Downloading Information
On this page there are options to download a PDF or CSV file of the filtered information. These buttons will appear towards the top right corner of the screen. Clicking on either of these buttons will allow you to save the file to your device.
In order to download Multiple Timesheets, Head on over to the Audit and Compliance Report in the Reports Tab. Here you can download Multiple Timesheets by Client or Employee.
FAQs
Q. Why am I not seeing the "Delete Timesheet" button appearing?
A. A claim has been submitted for the timesheet. In order to be able to delete a timesheet, all claims tied to the timesheet must be voided.