Quick Links:
Manual Timesheet Entry
Schedules Approval
Generating Electronic Timesheets
Timesheet Management
Generating Claims
Viewing the Claim Detail Report
Viewing the Batch Detail Report
Manual Timesheet Entry
To add a manual timesheet, head to Scheduling > Manual Timesheet Entry.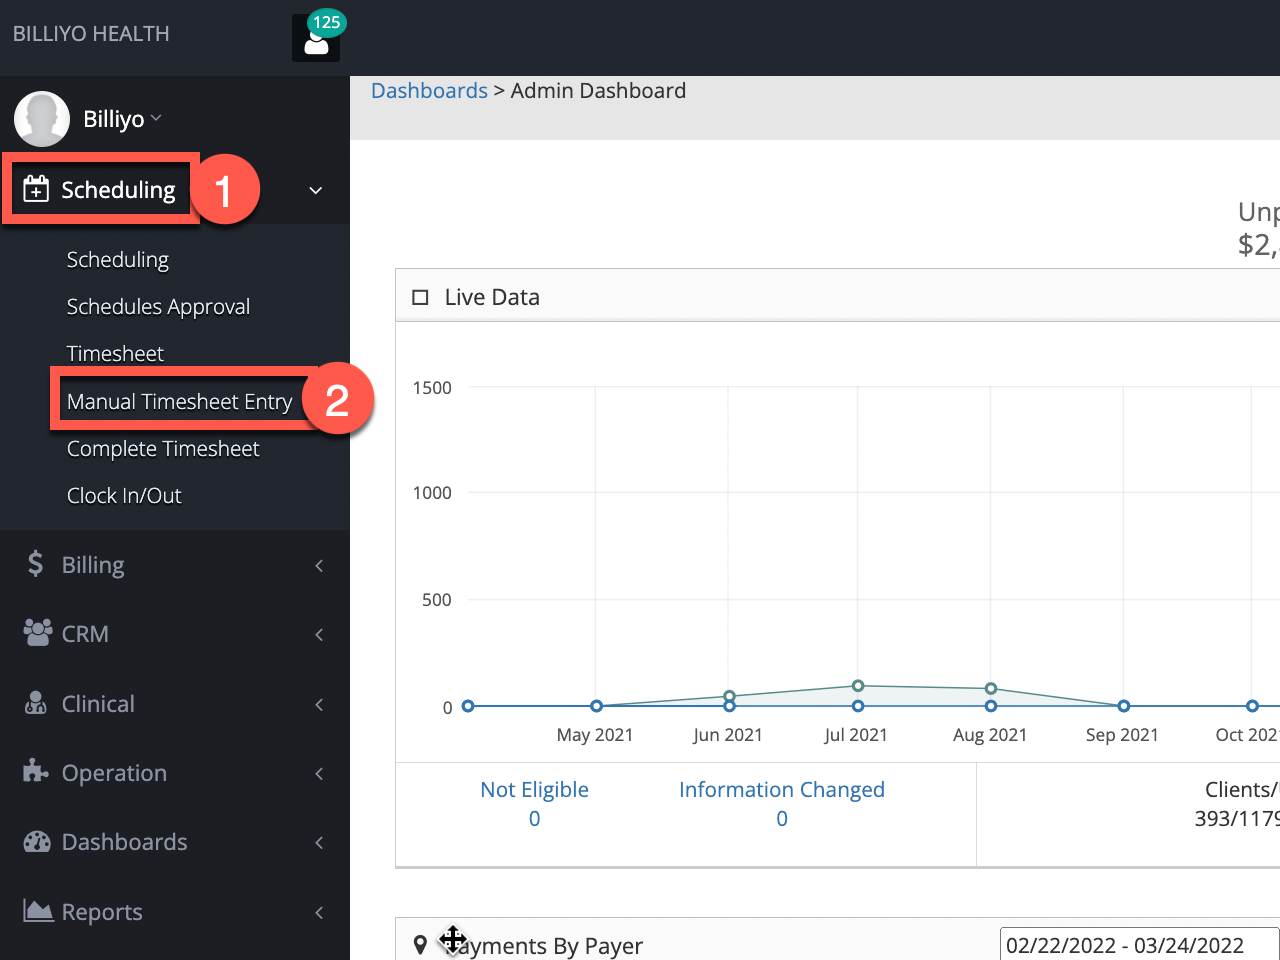
All filter fields need to be filled out and the blue refresh arrows clicked. For the date range, select the date range of the paper timesheet.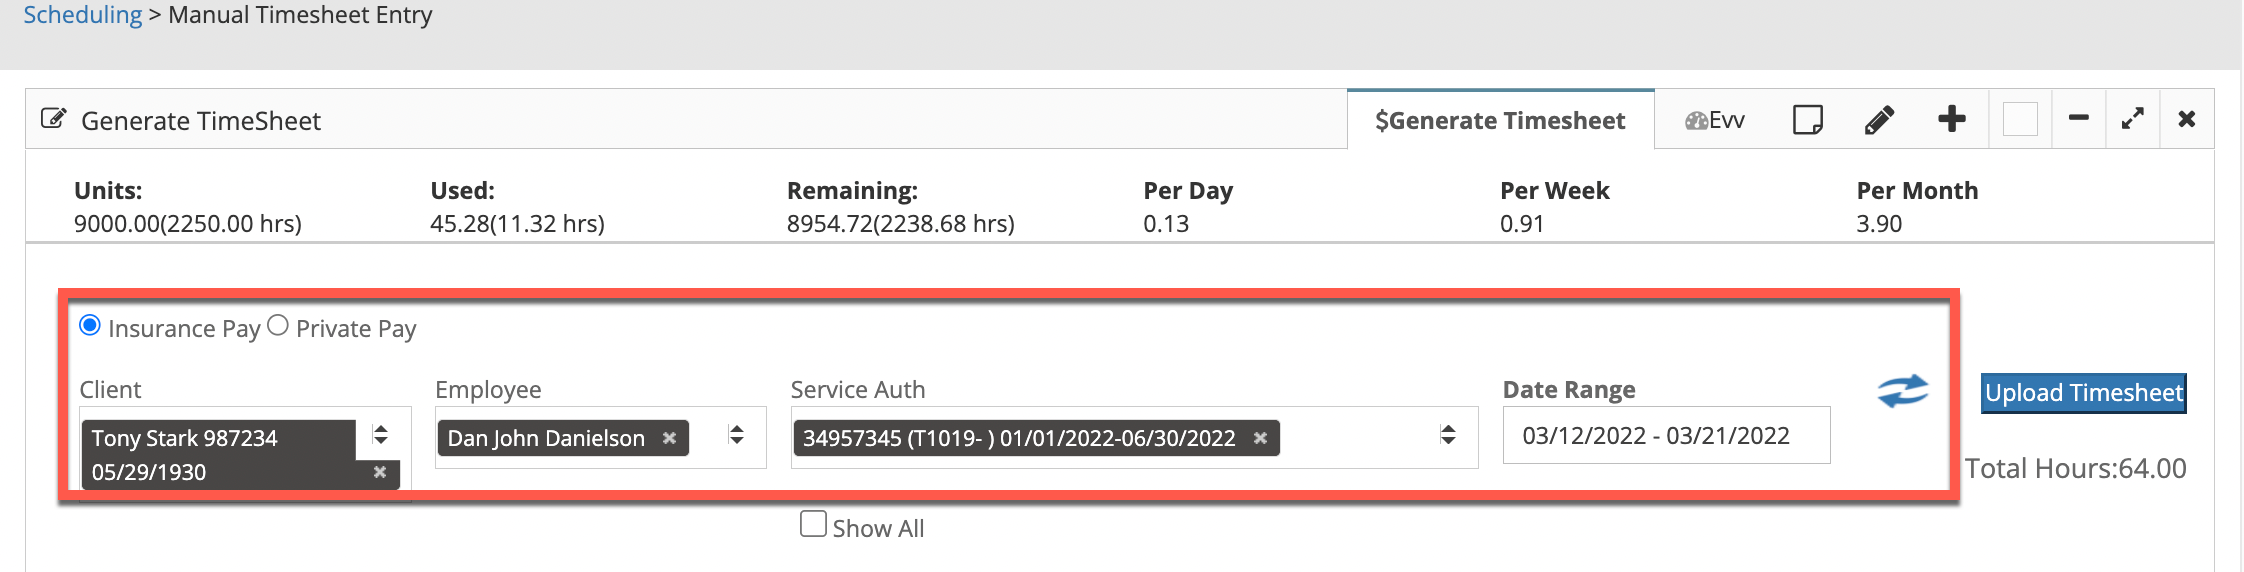
To view previous Service Auths, check the "Show All" checkbox below the Service Auth field.
Click on the Upload Timesheet button and select the PDF version of the timesheet that is saved to your device. Then, click on the Upload Timesheet button.
More about manual timesheet entry can be found here.
Schedules Approval
To approve schedules that were submitted via our Billiyo apps, head to Scheduling > Schedules Approval.
Fill out all of the filter fields, leaving the "Waiting for Approval" as is, and click on the blue refresh arrows.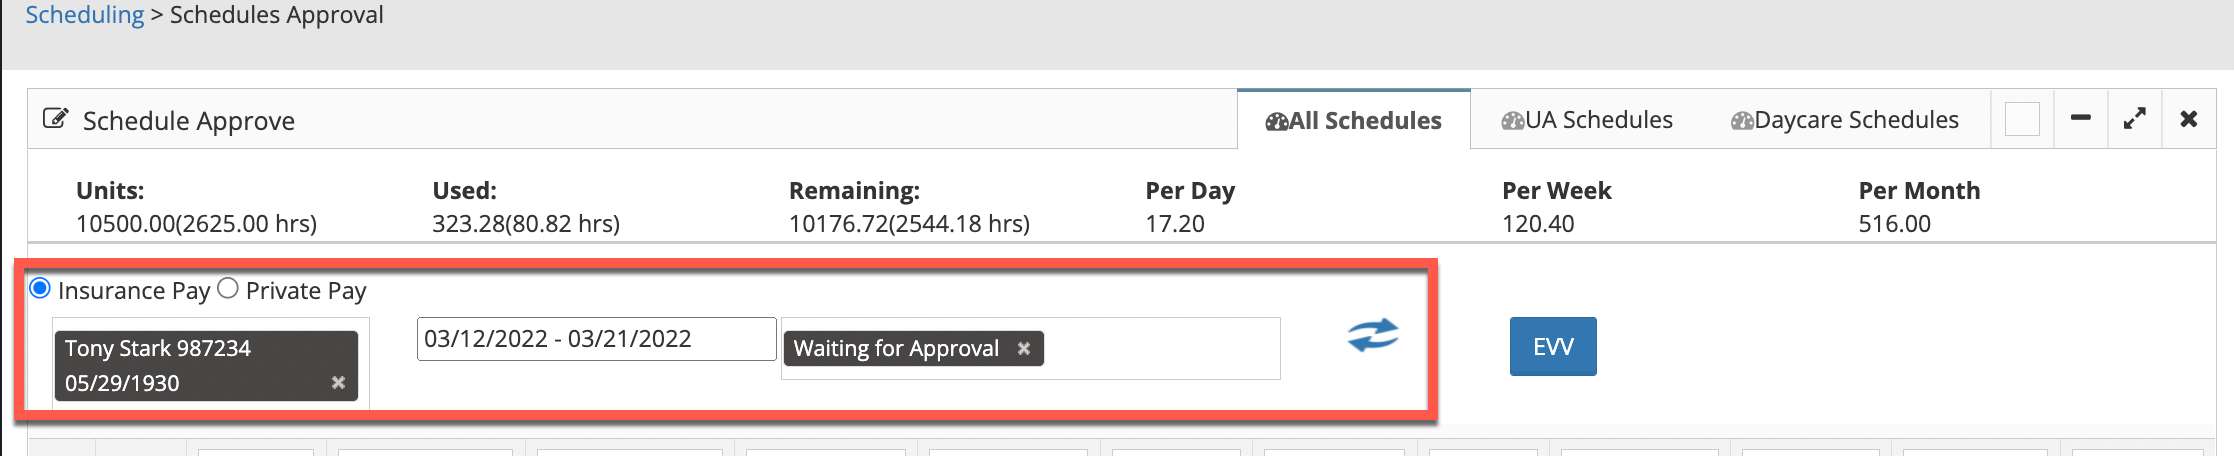
After reviewing the schedules, verifying the information is correct, click on the checkbox next to each schedule to approve and then the Approve button.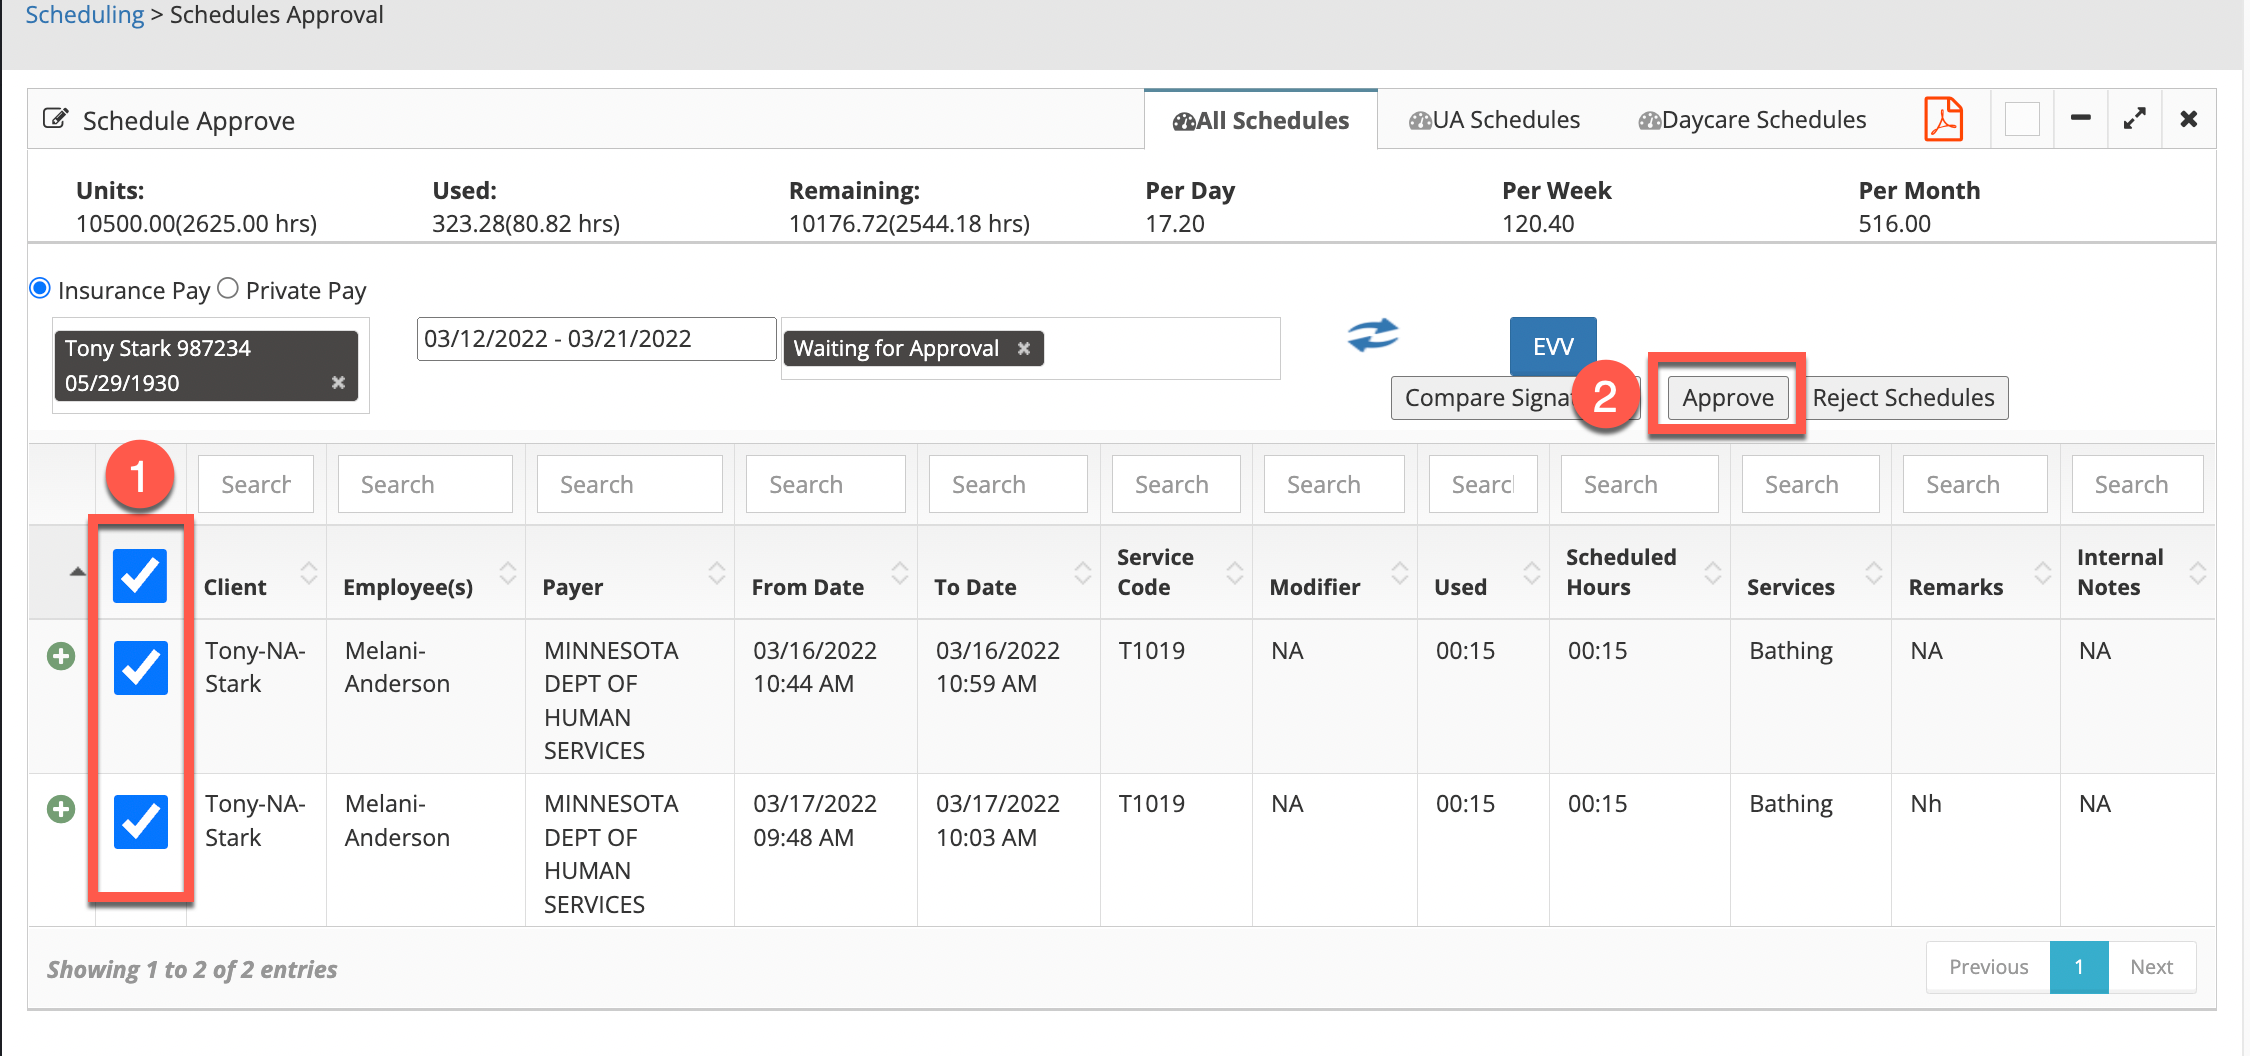
More about schedules approval can be found here.
Generating Electronic Timesheets
After schedules have been approved, an electronic timesheet can be generated. To do this, head to Scheduling > Schedules Approval.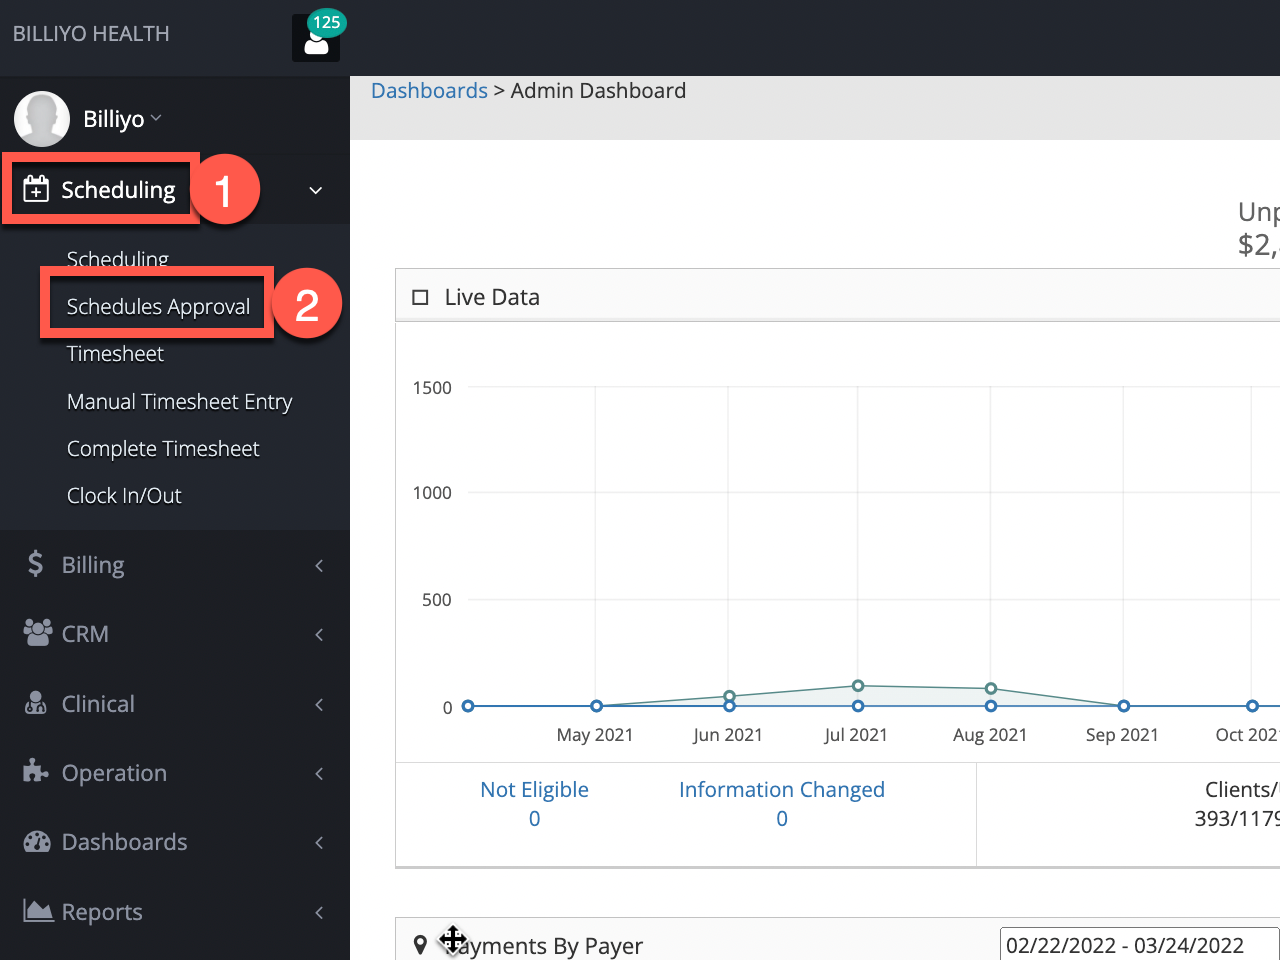
Fill out all of the filter fields, changing the "Waiting for Approval" to "Approved", and click on the blue refresh arrows. 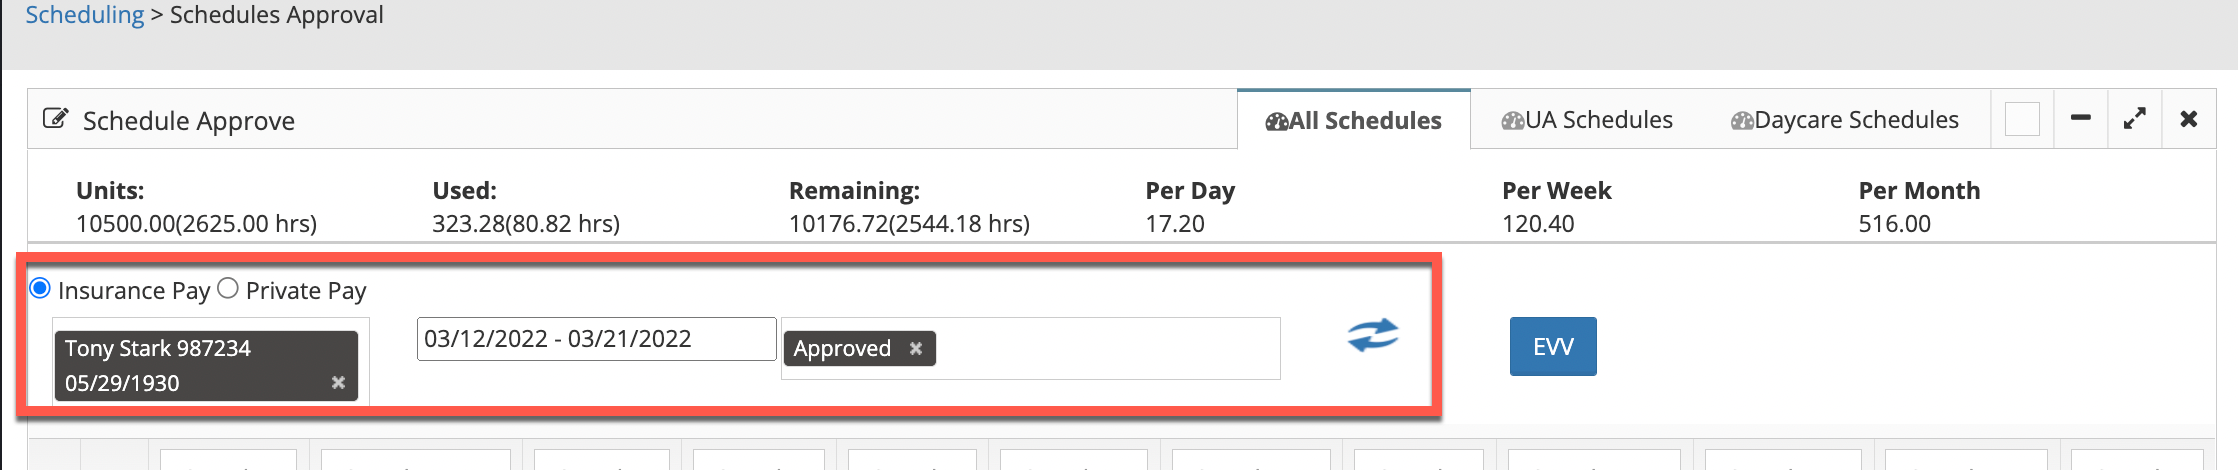
After reviewing the schedules, verifying the information is correct, select the checkbox next to each schedule to be included on the timesheet and then click on the Generate Timesheet button.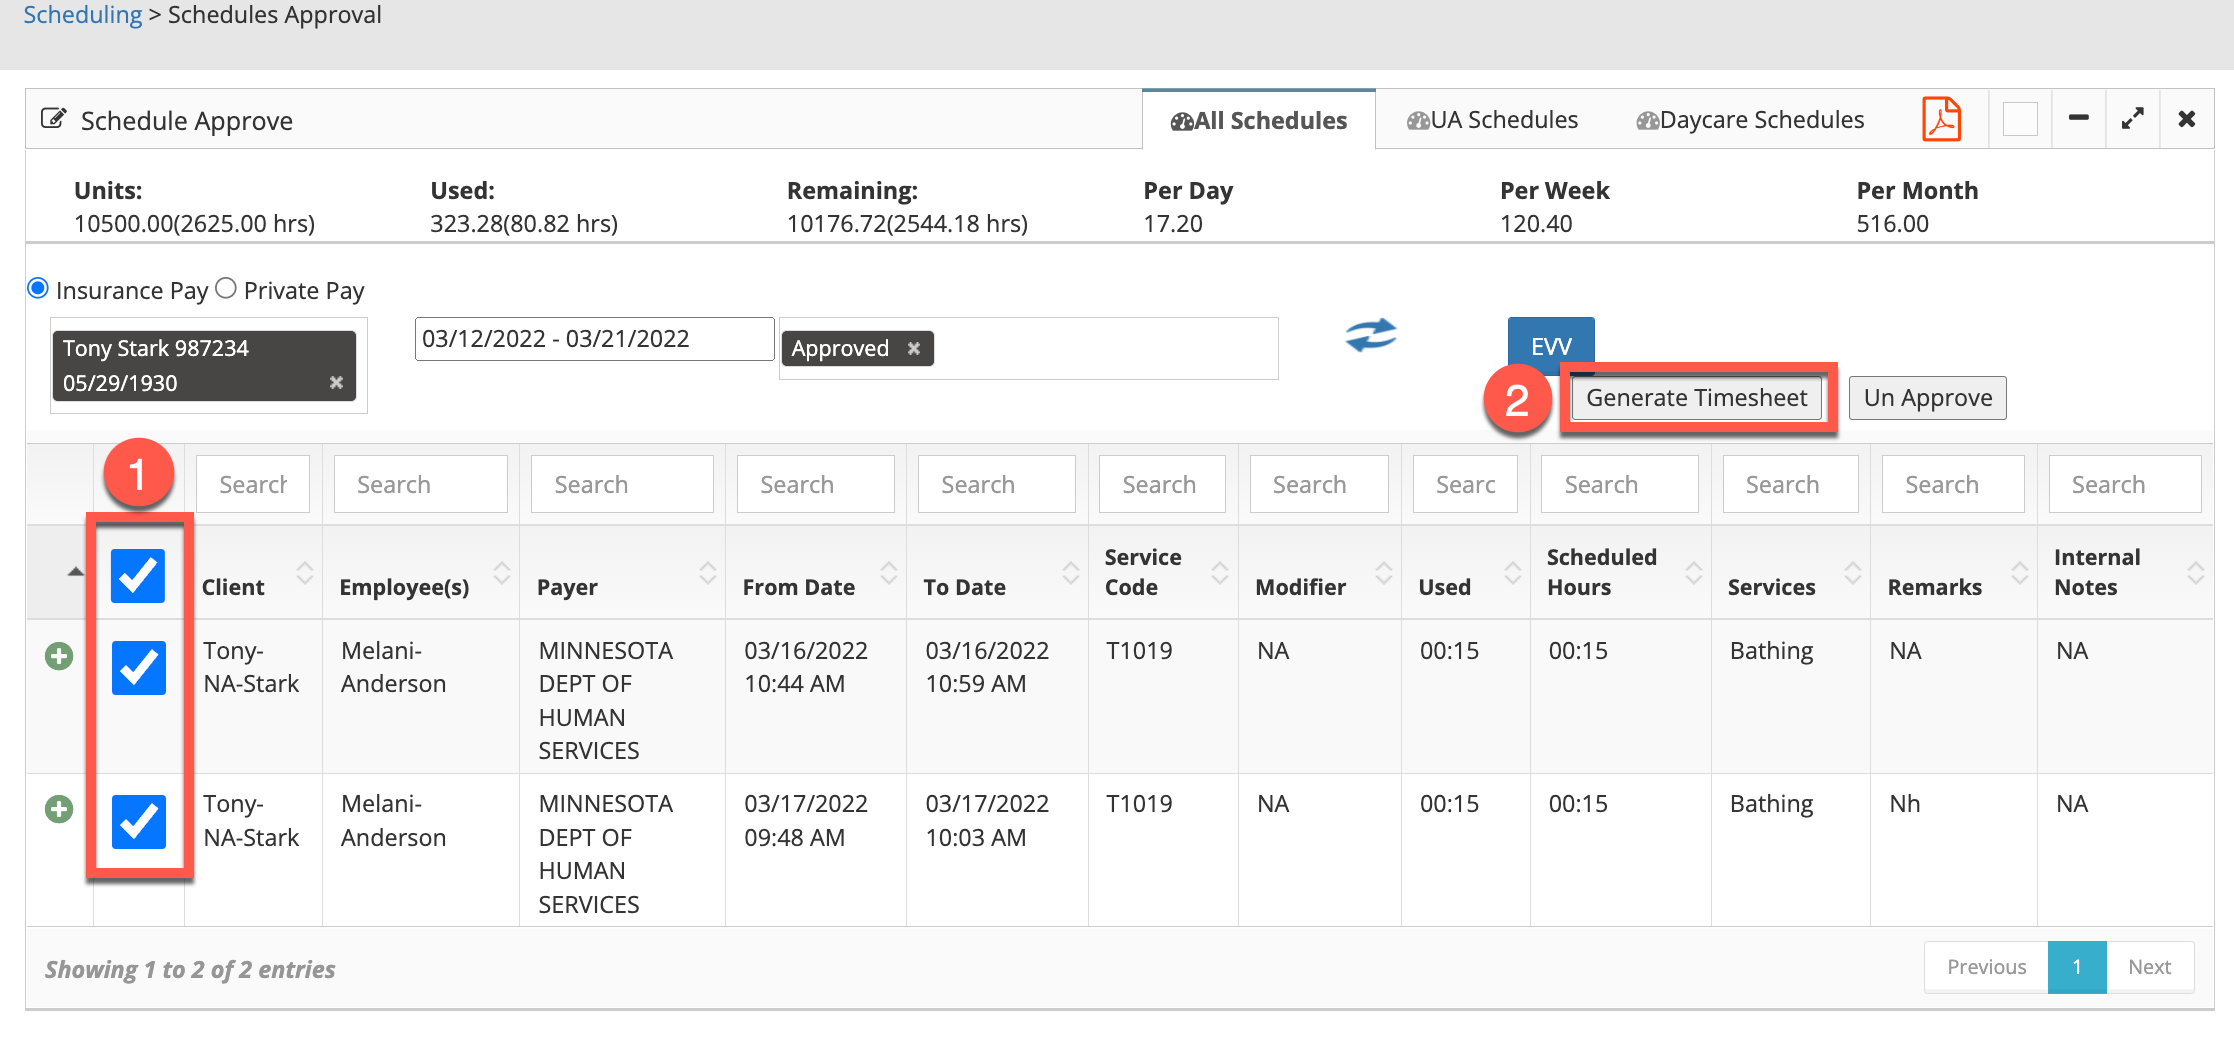
When working with UA schedules, make sure to click over to the UA Schedules tab on the top right.
More on generating e-timesheets can be found here.
Timesheet Management
After timesheets have been added or generated, they will be housed under Scheduling > Timesheet. 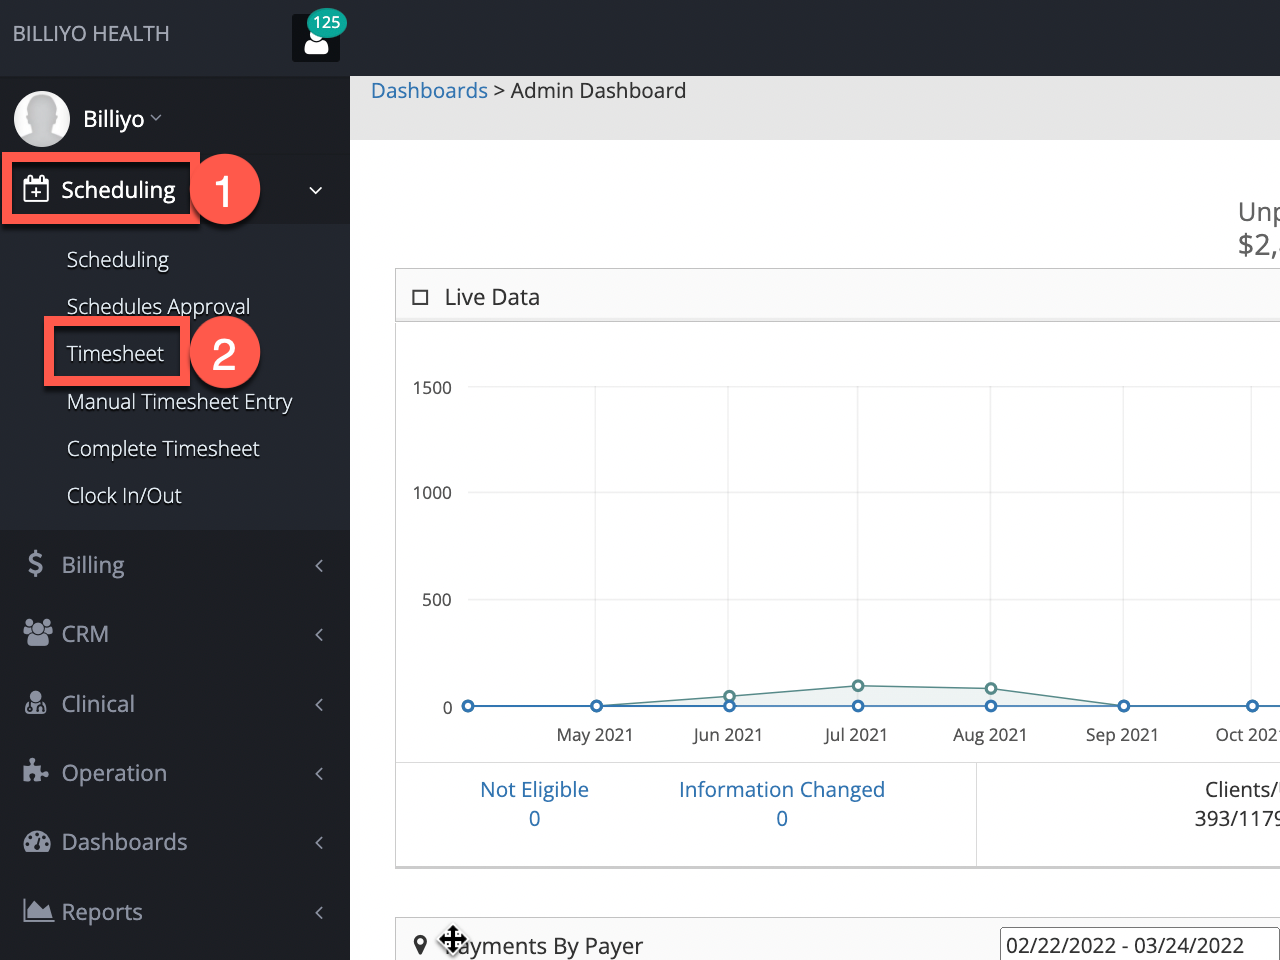
Click on the link under the Timesheet or Paper Timesheet headings to be able to view, download, and print the timesheet. 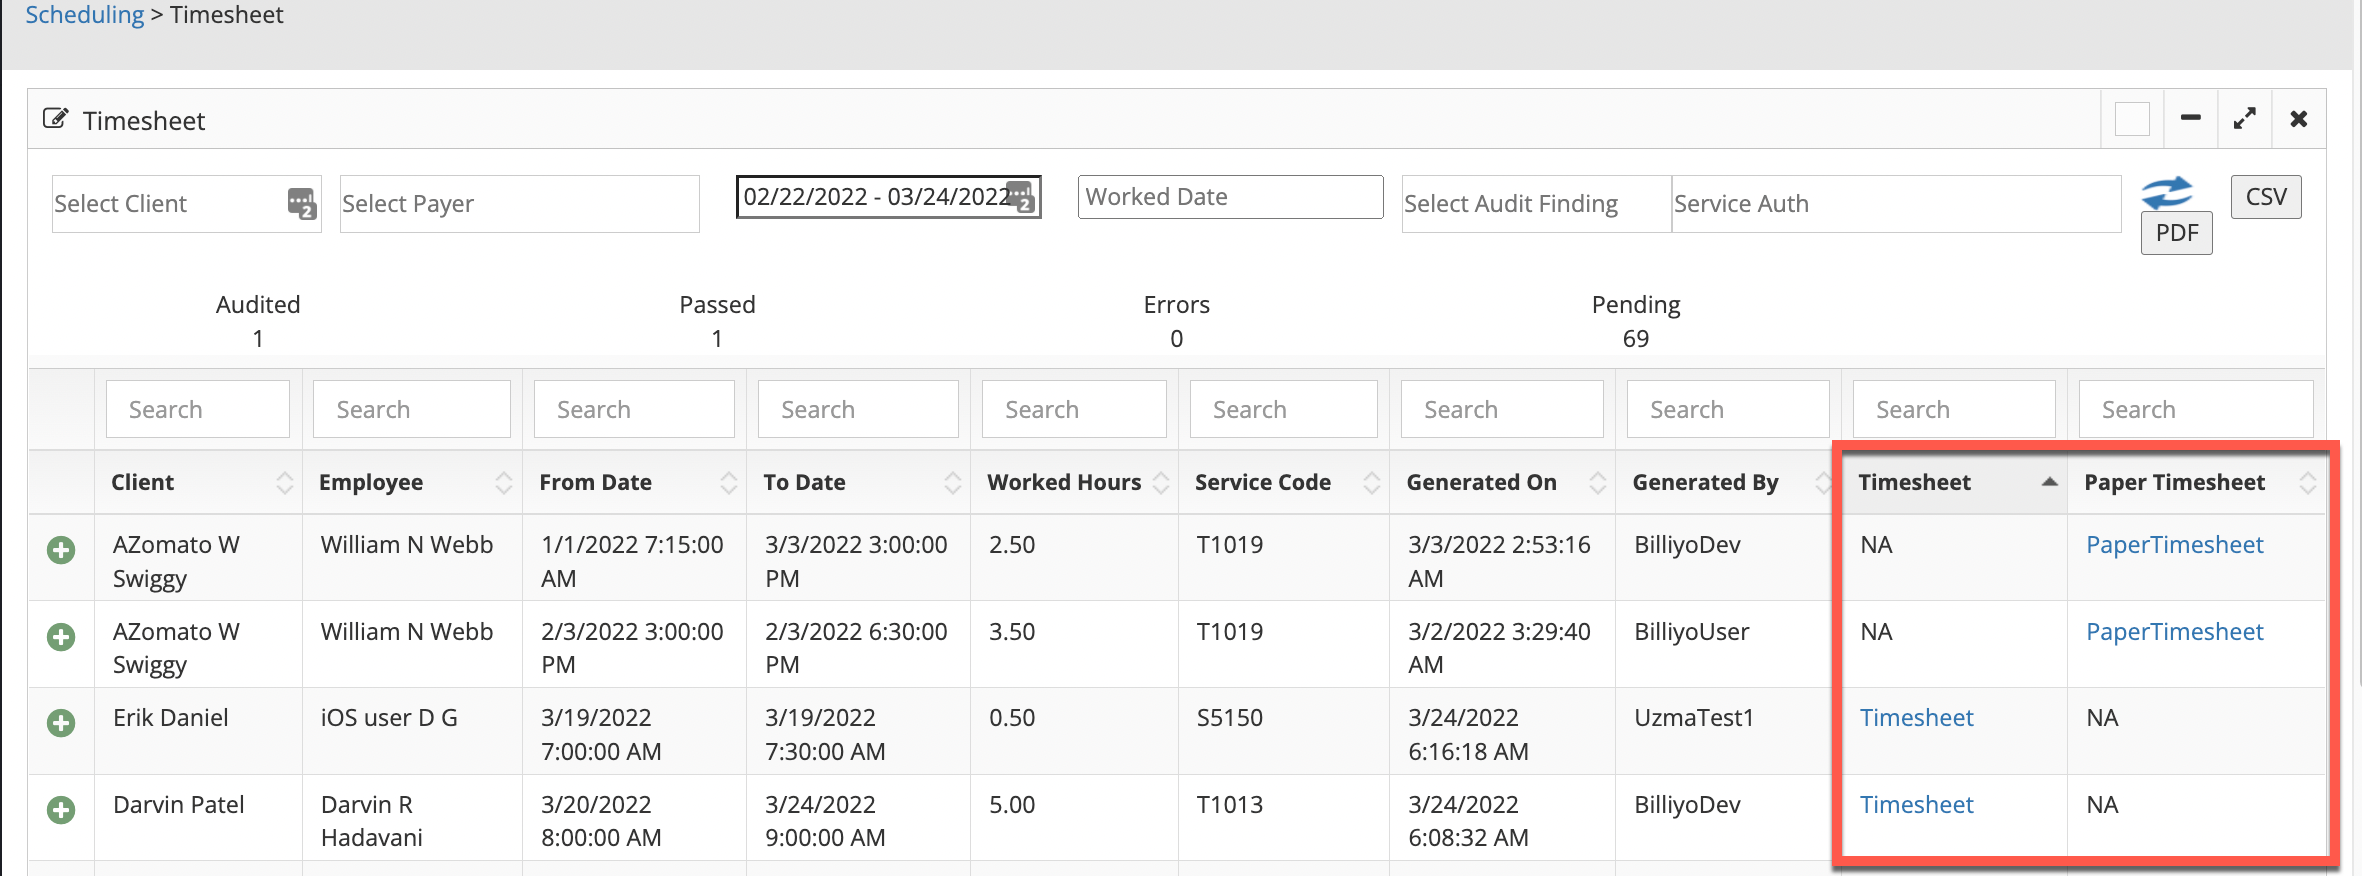
Click on the + sign to the left of the client's name to be able to review the timecard schedules, delete the timesheet, update the schedules, upload a paper timesheet, and audit.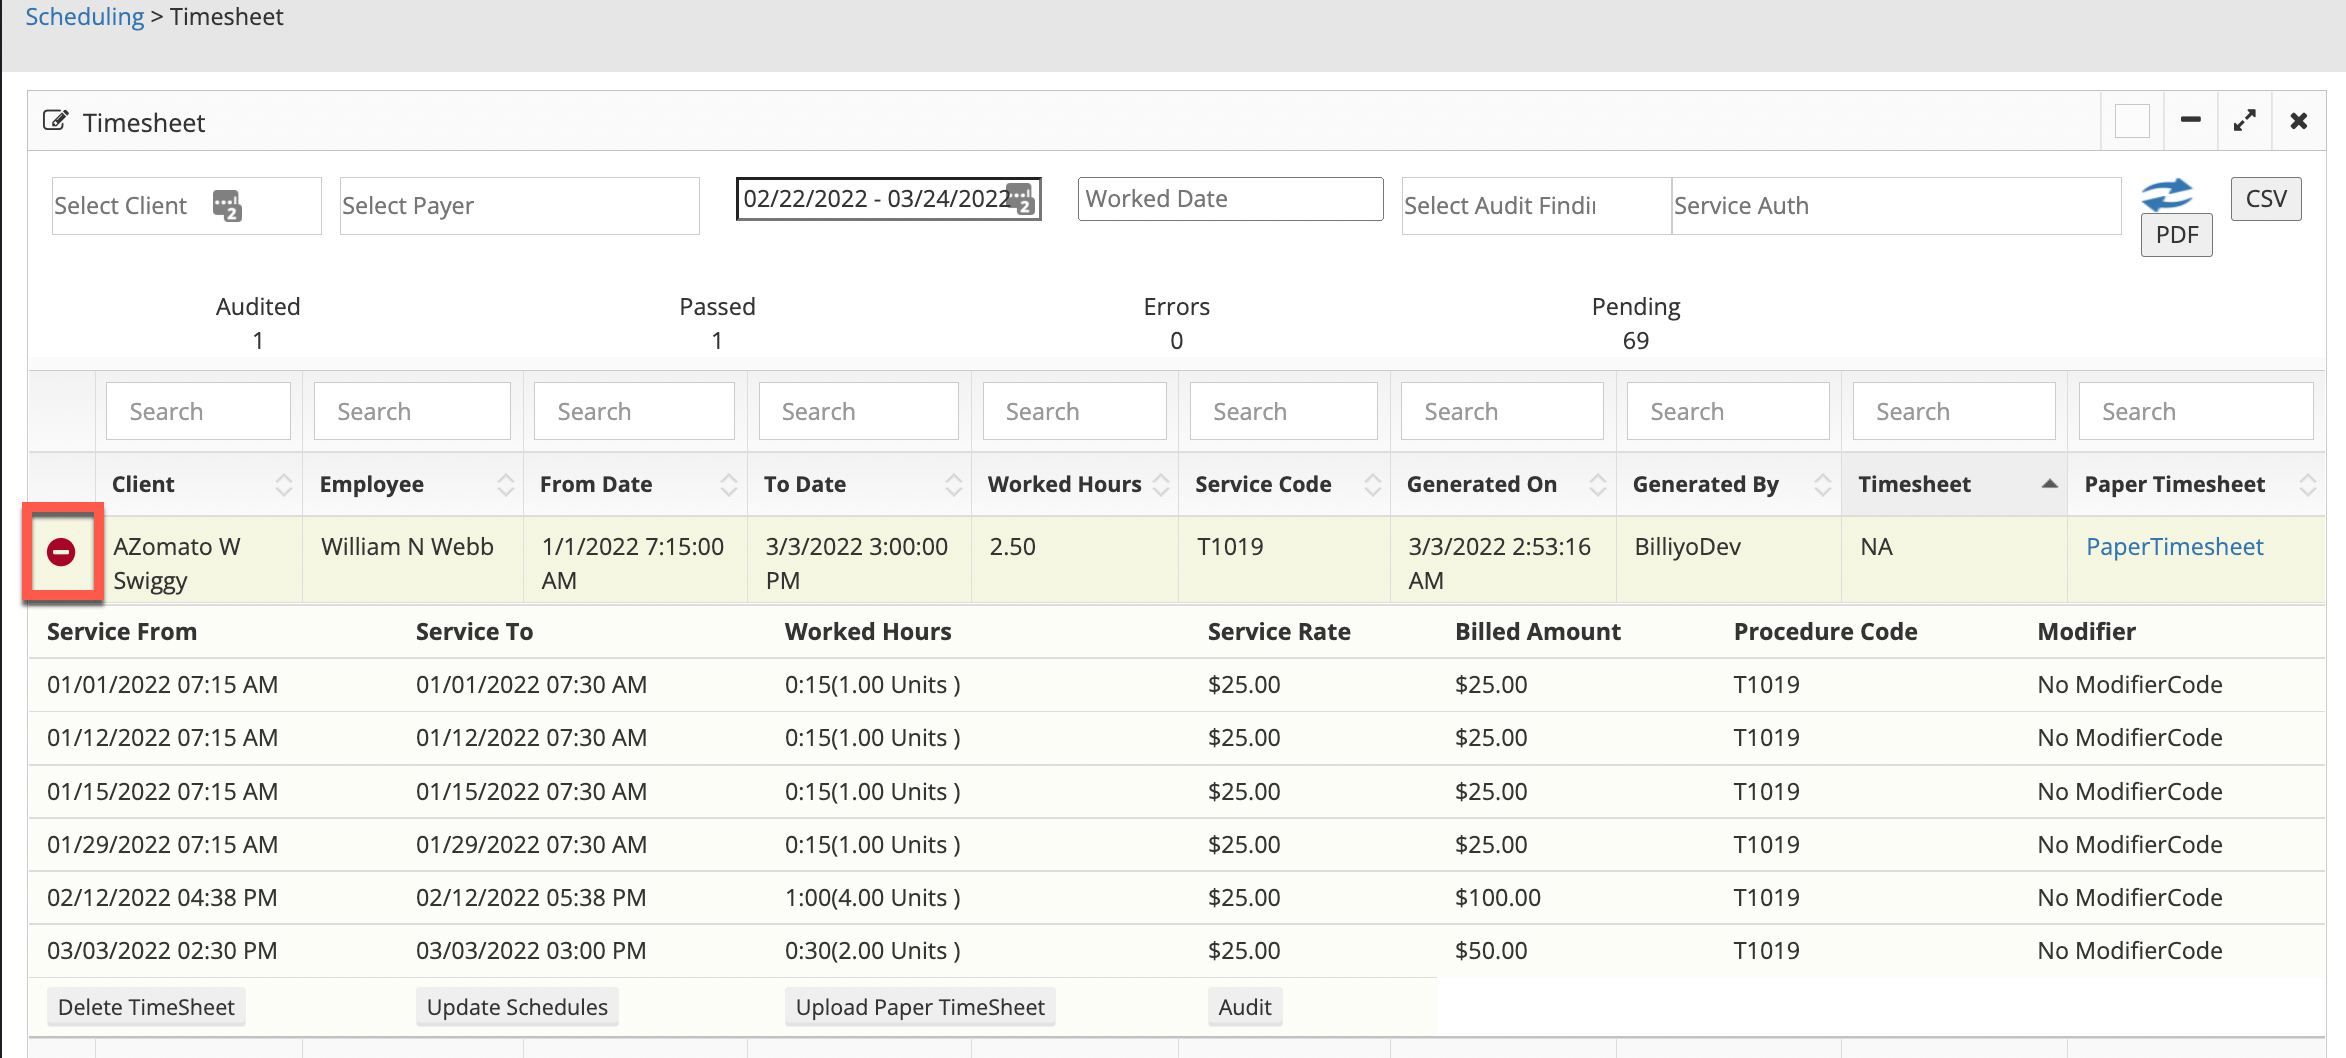
More about timesheet management can be found here.
Generating Claims
Once a timesheet has been made or added, a claim can be generated. Head to Billing > Generate Claims for this.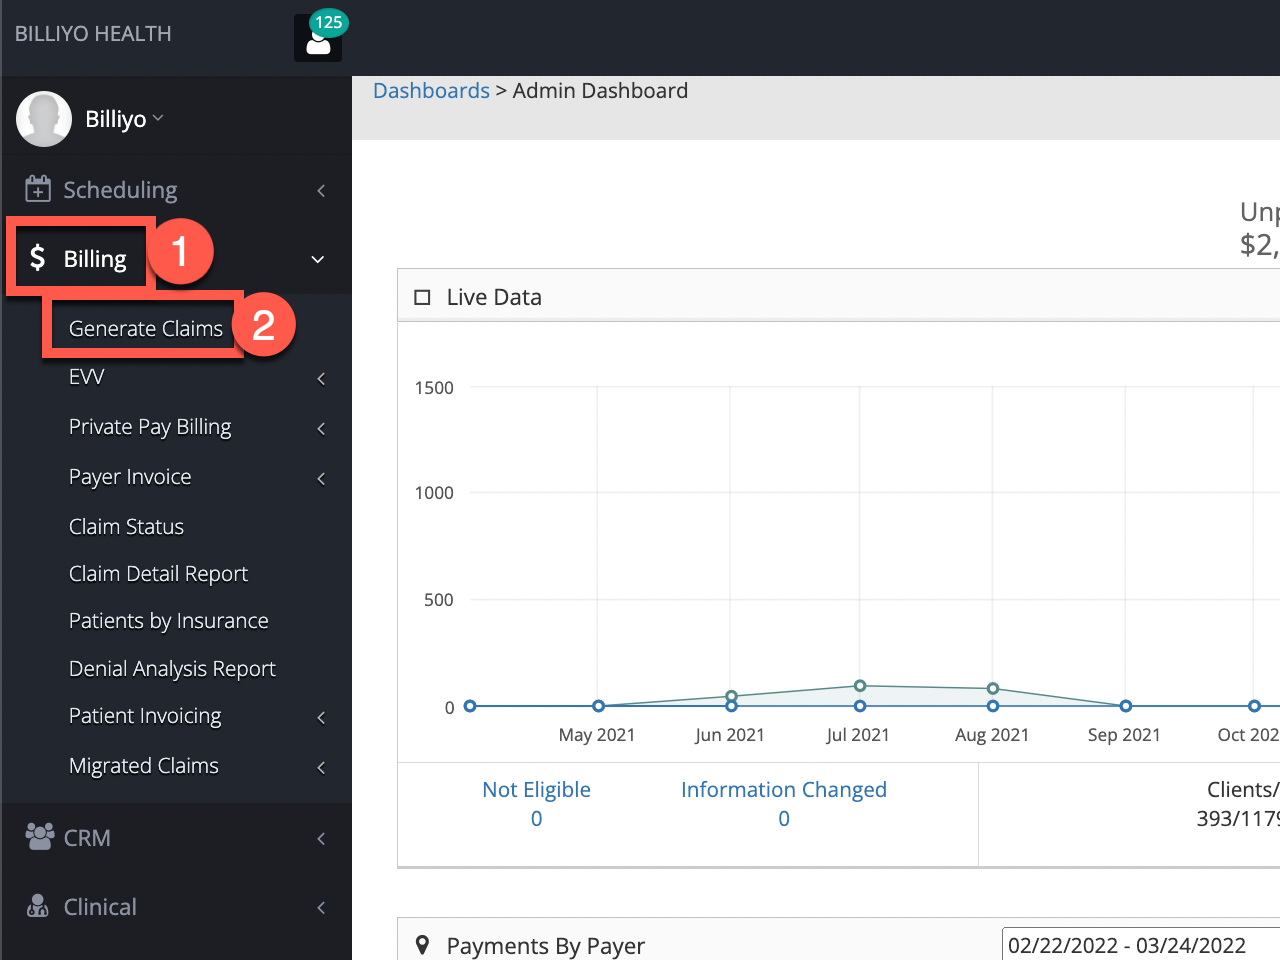
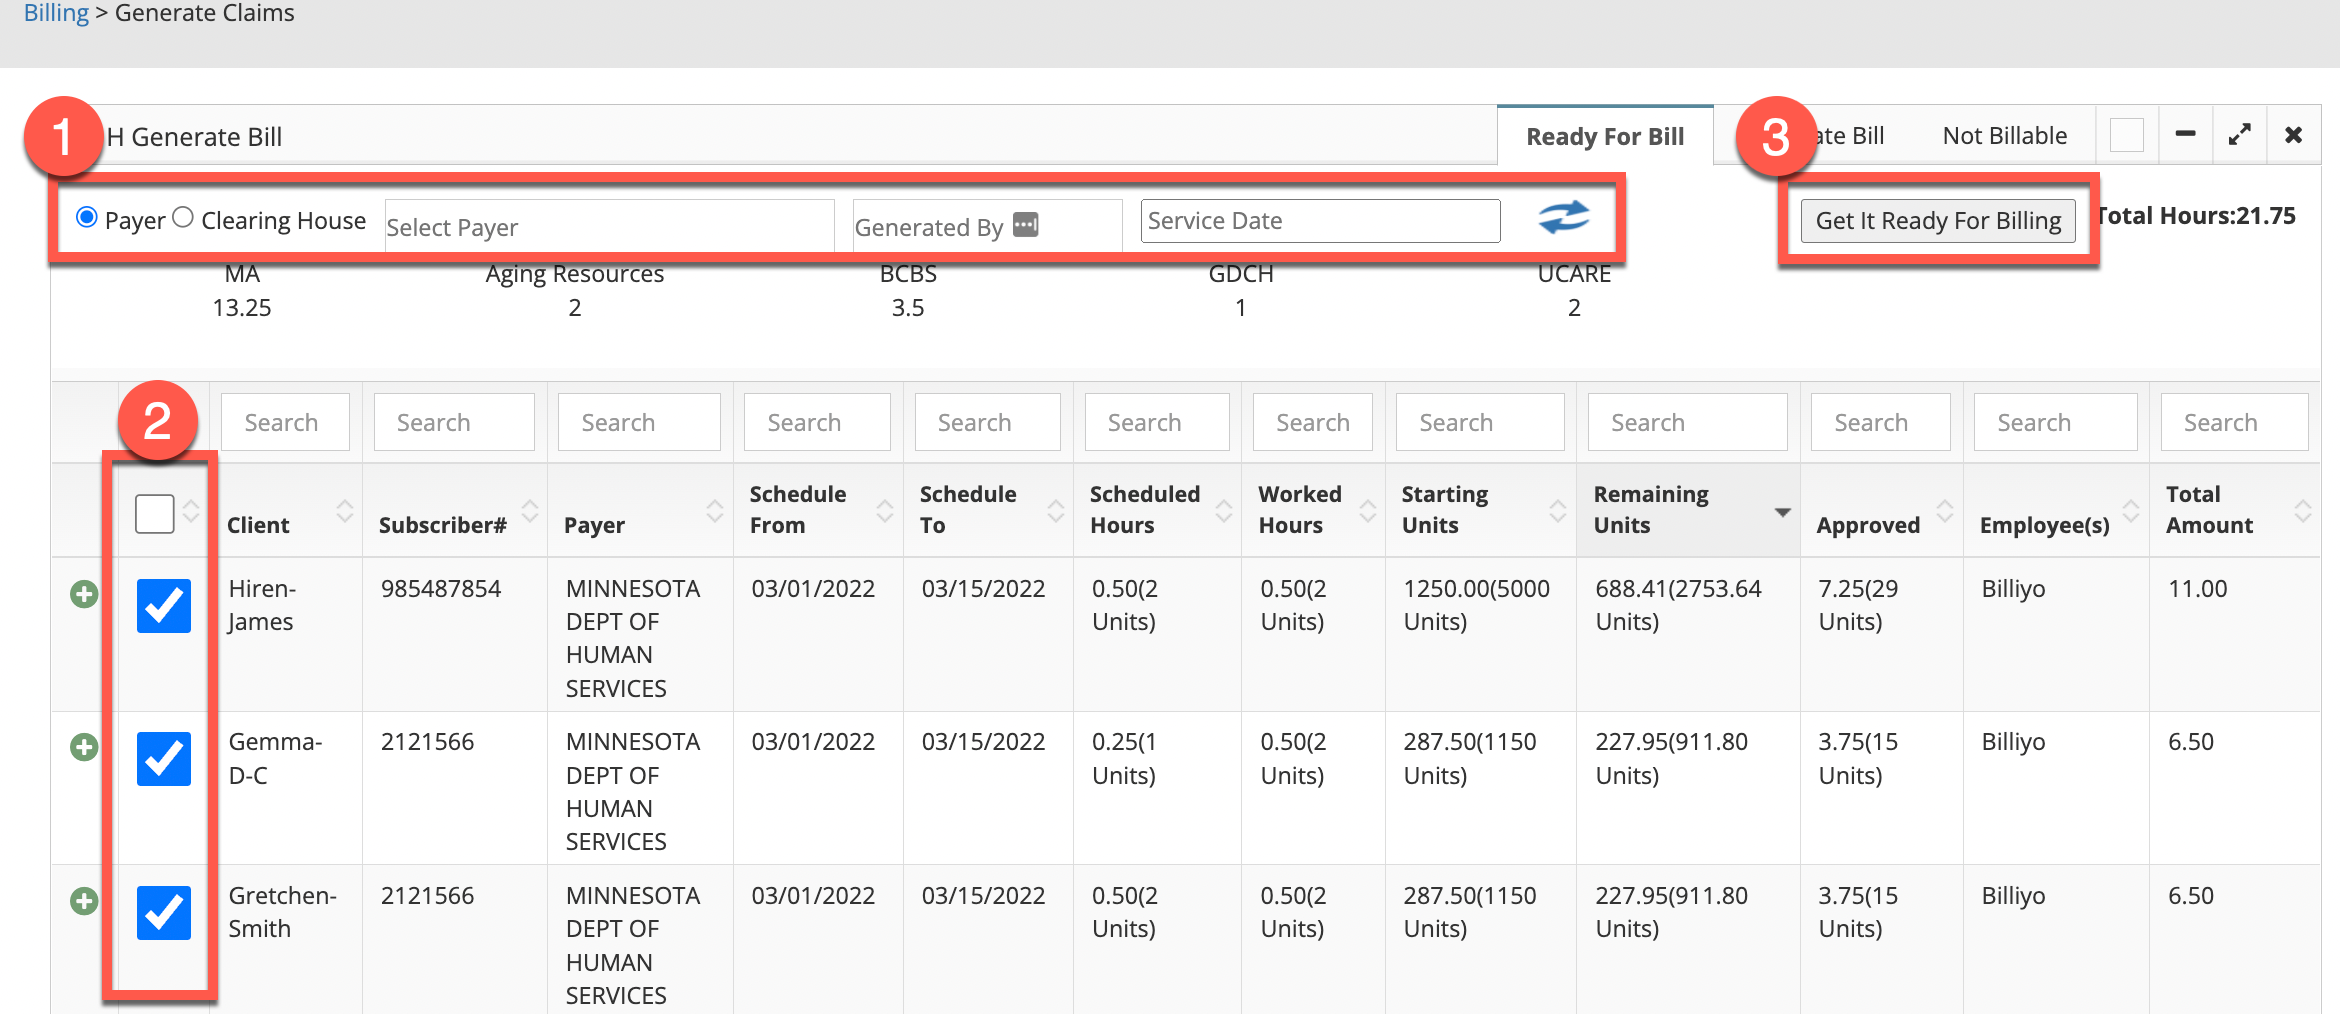
Use the filter fields to locate the claim to bill and click on the blue refresh arrows. Then, after reviewing, using the + sign to the left of the client's name to see more detail, click on the checkbox to the left of the claim and then the Get It Ready For Billing button.
Multiple claims can be selected during this step.
The claim will then be sent to either the Generate Bill or Not Billable tabs. If the claim appears in the Not Billable tab, click on the + sign to the left of the client's name to see the missing details to correct. Once the missing details have been corrected, the claim will be removed from the Not Billable tab.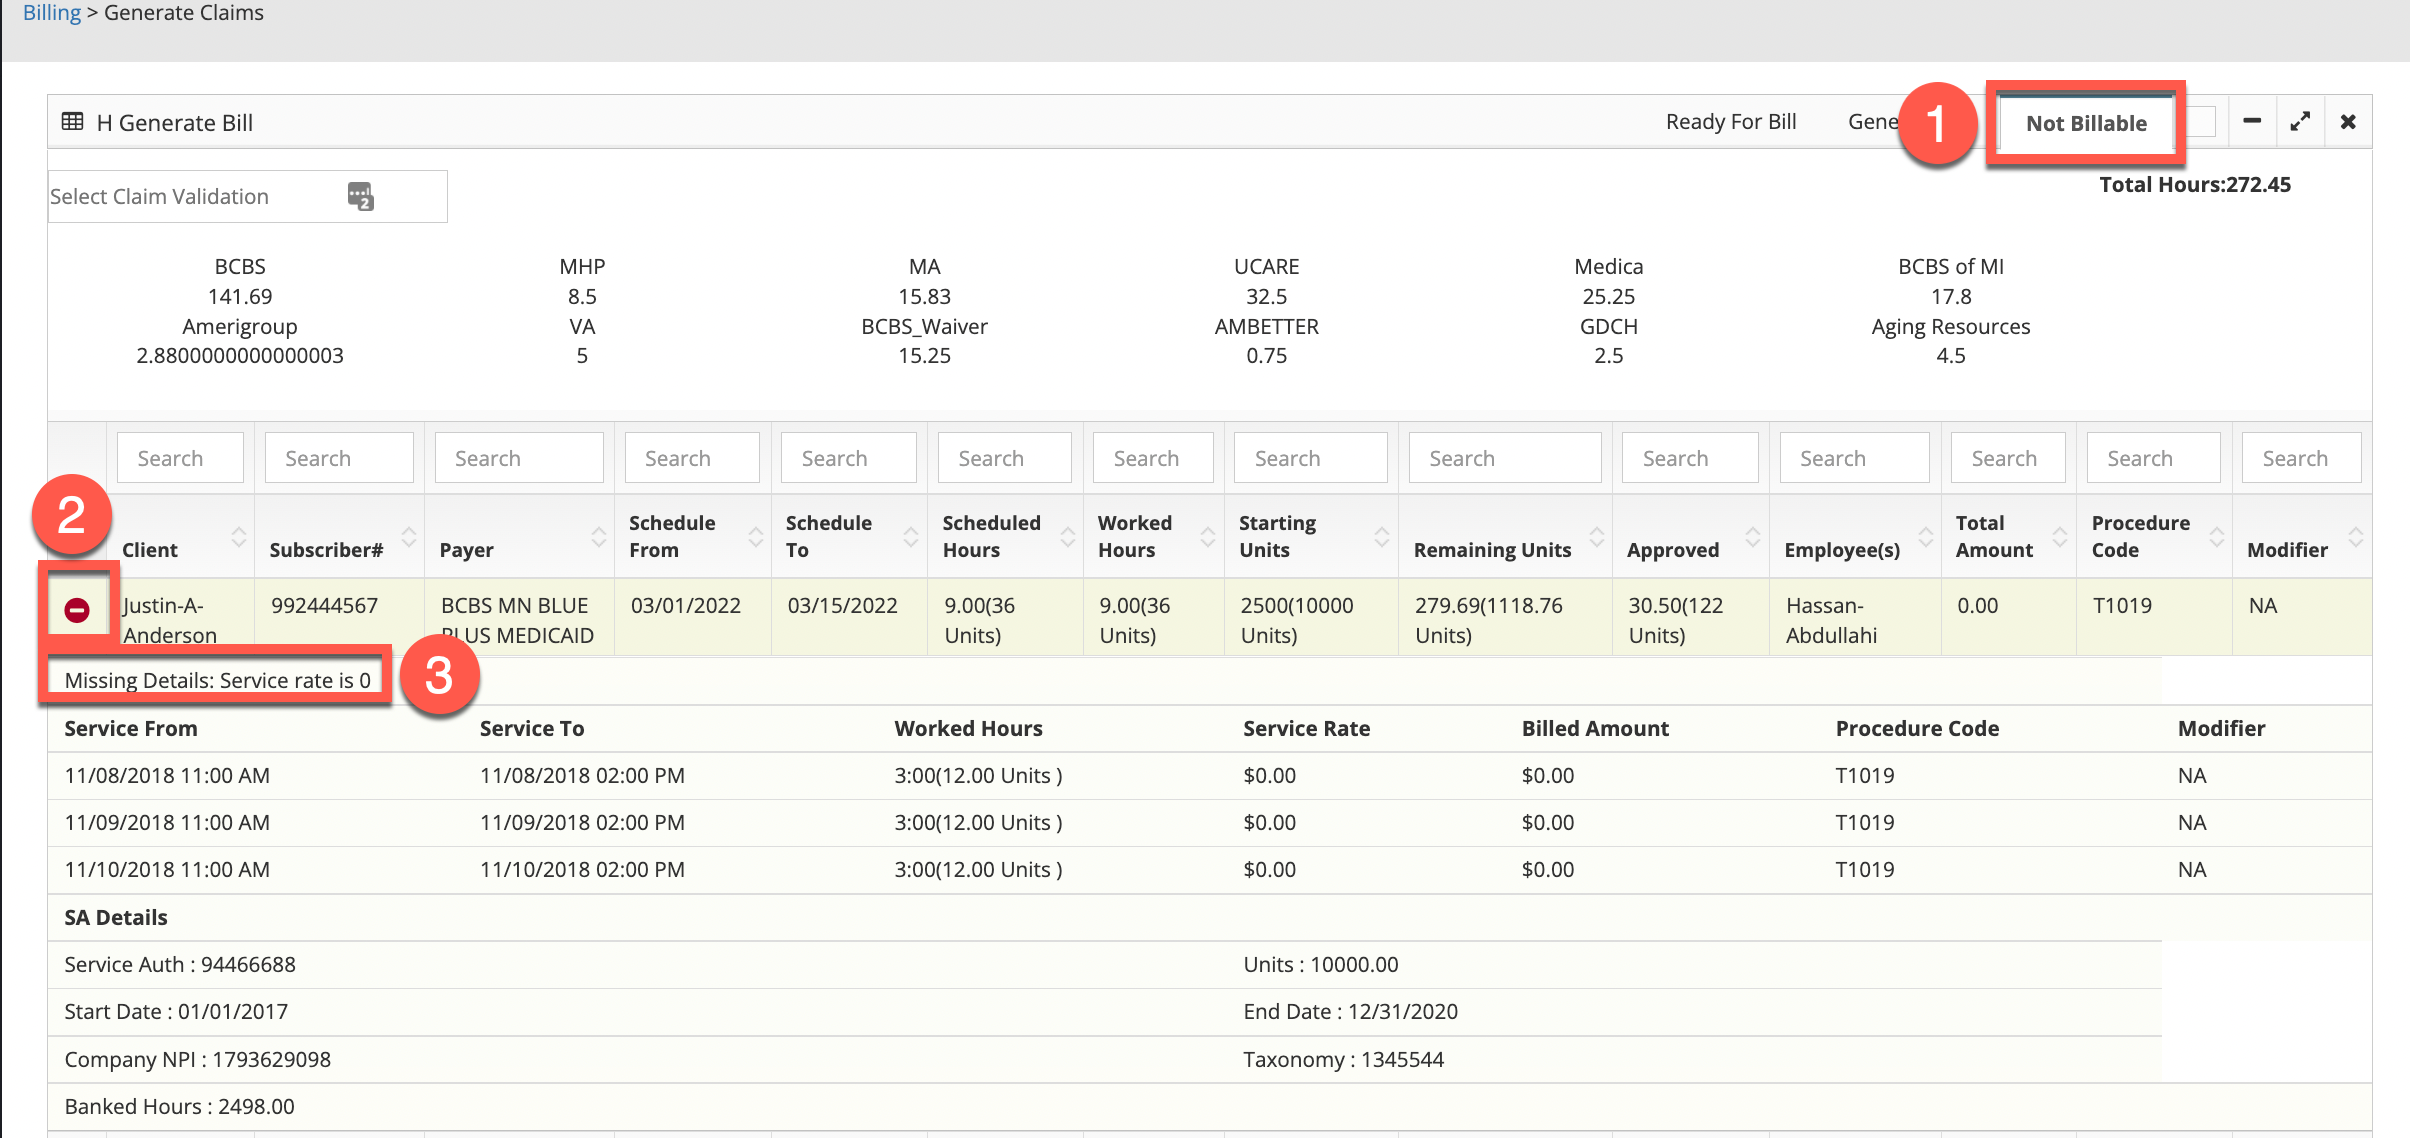
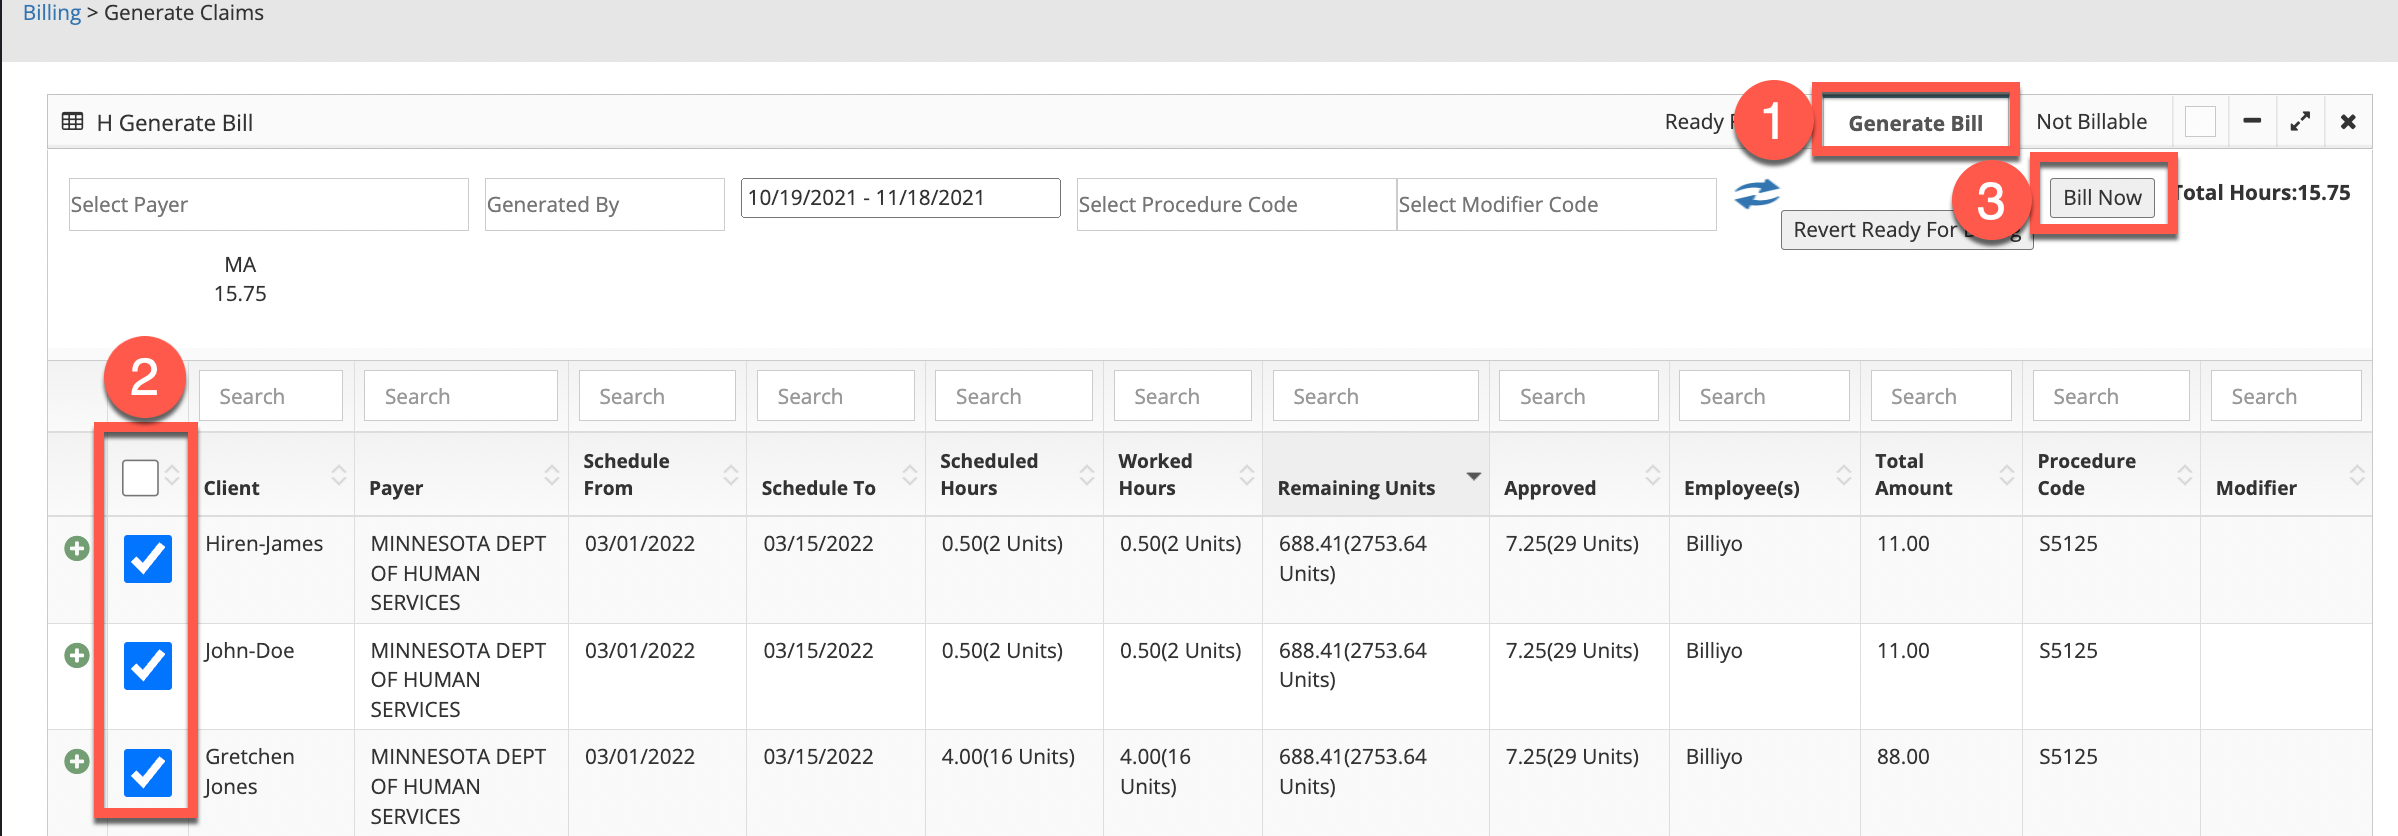
Once the claim appears in the Generate Bill tab, check the box to the left of the client's name and click the Bill Now button.
Multiple claims can be selected during this step. If the times of the claims span across different months, the Bill Now button will need to be clicked once for each month.
More on generating claims can be found here.
Viewing the Claim Detail Report
After a claim has been submitted, review it's status in the claim detail report found by going to Billing > Claim Detail Report.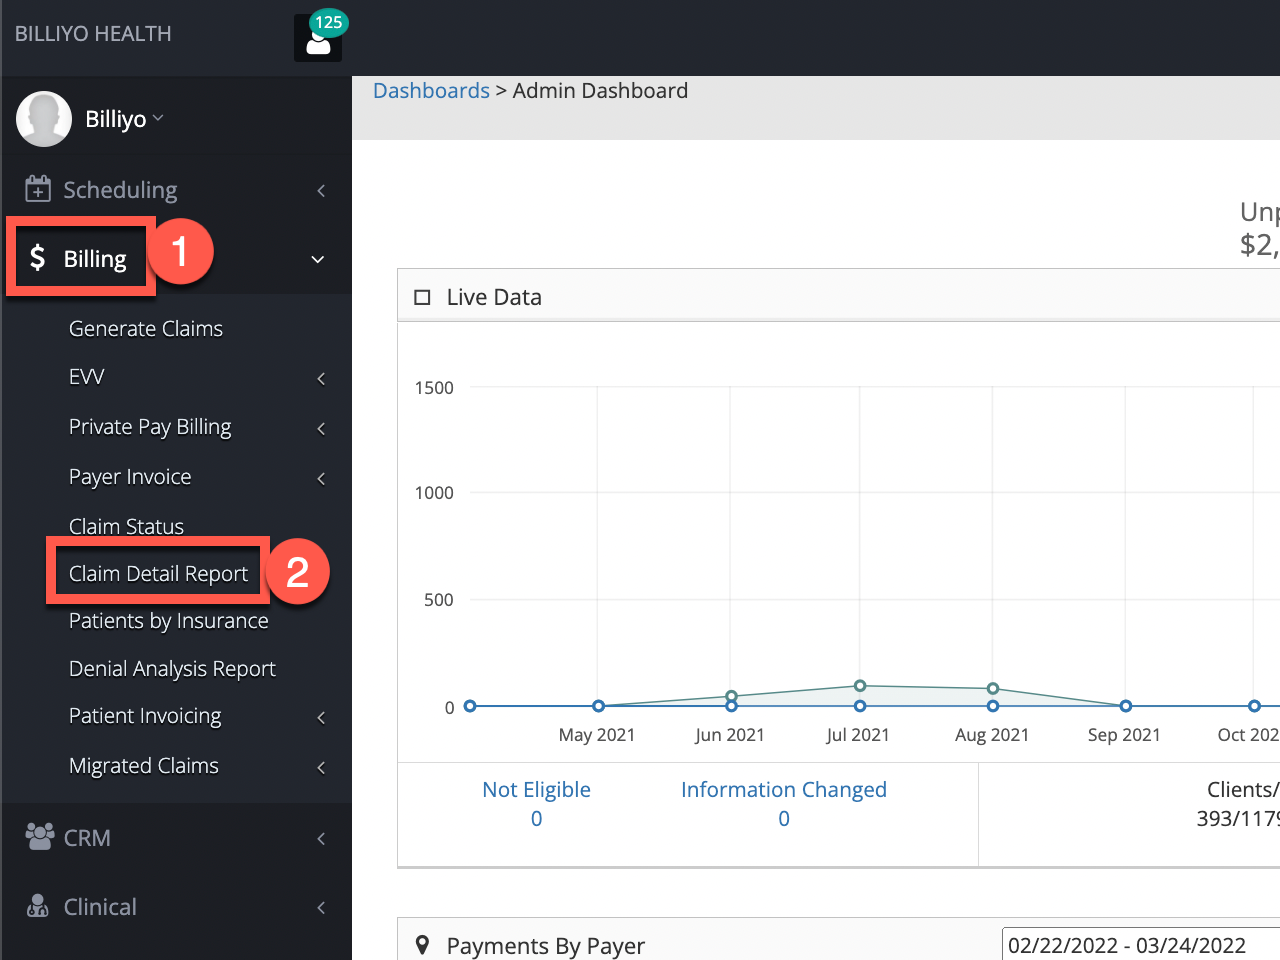
Claim details can be reviewed by clicking on the + sign to the left of the client's name.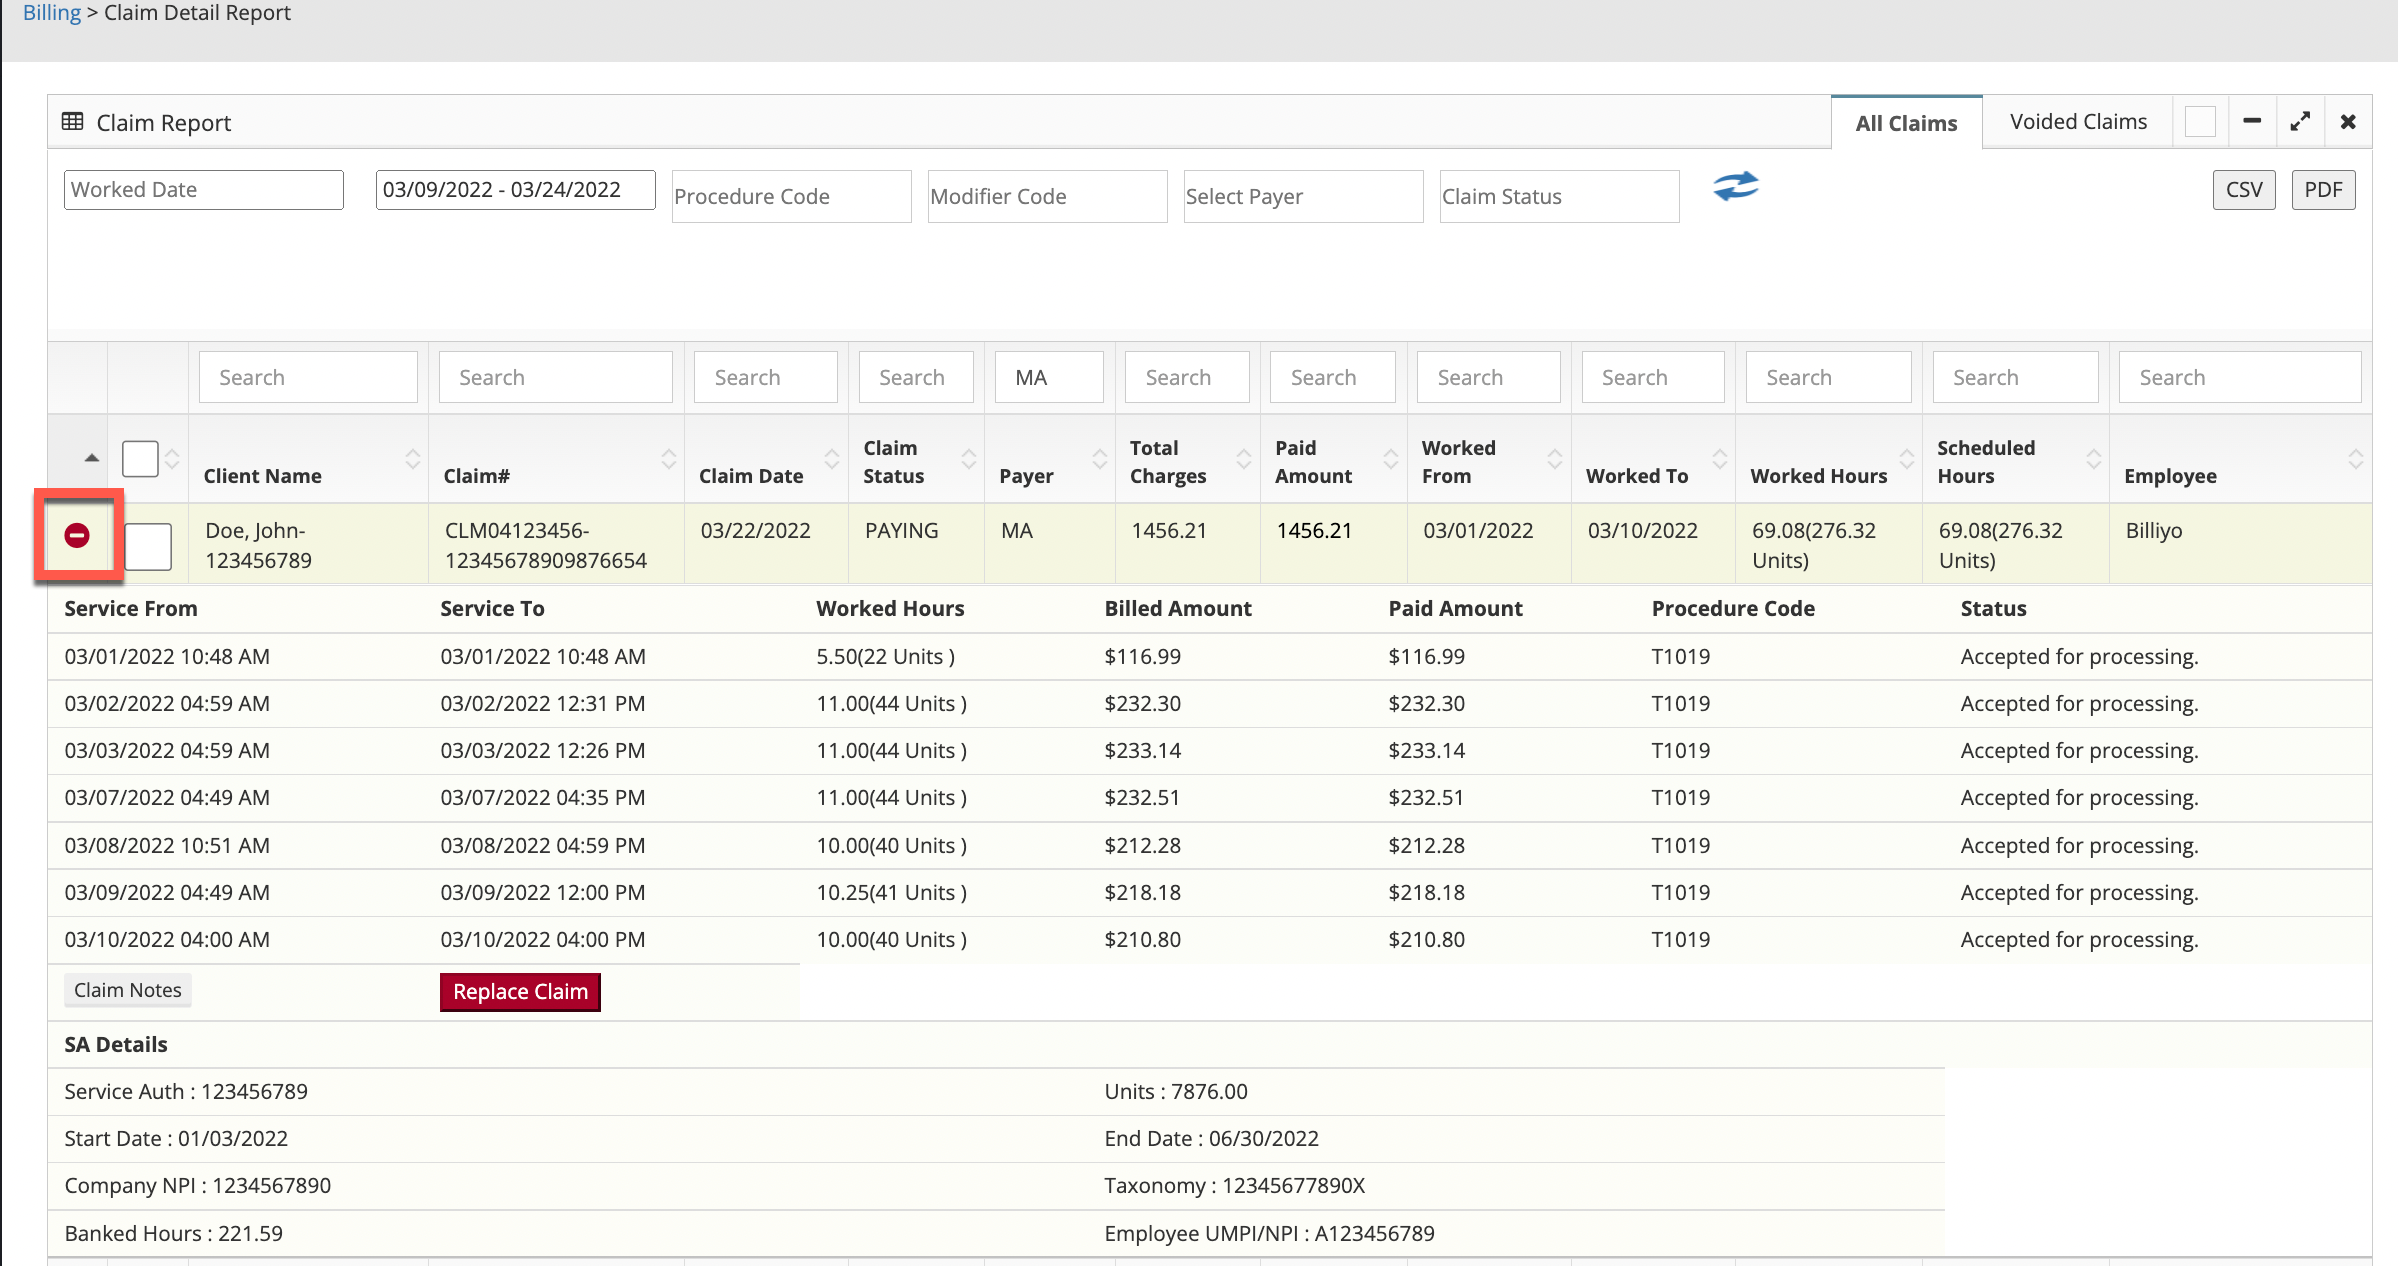
Check the box to the left of a claim to be able to rebill, replace, void, and request claim status.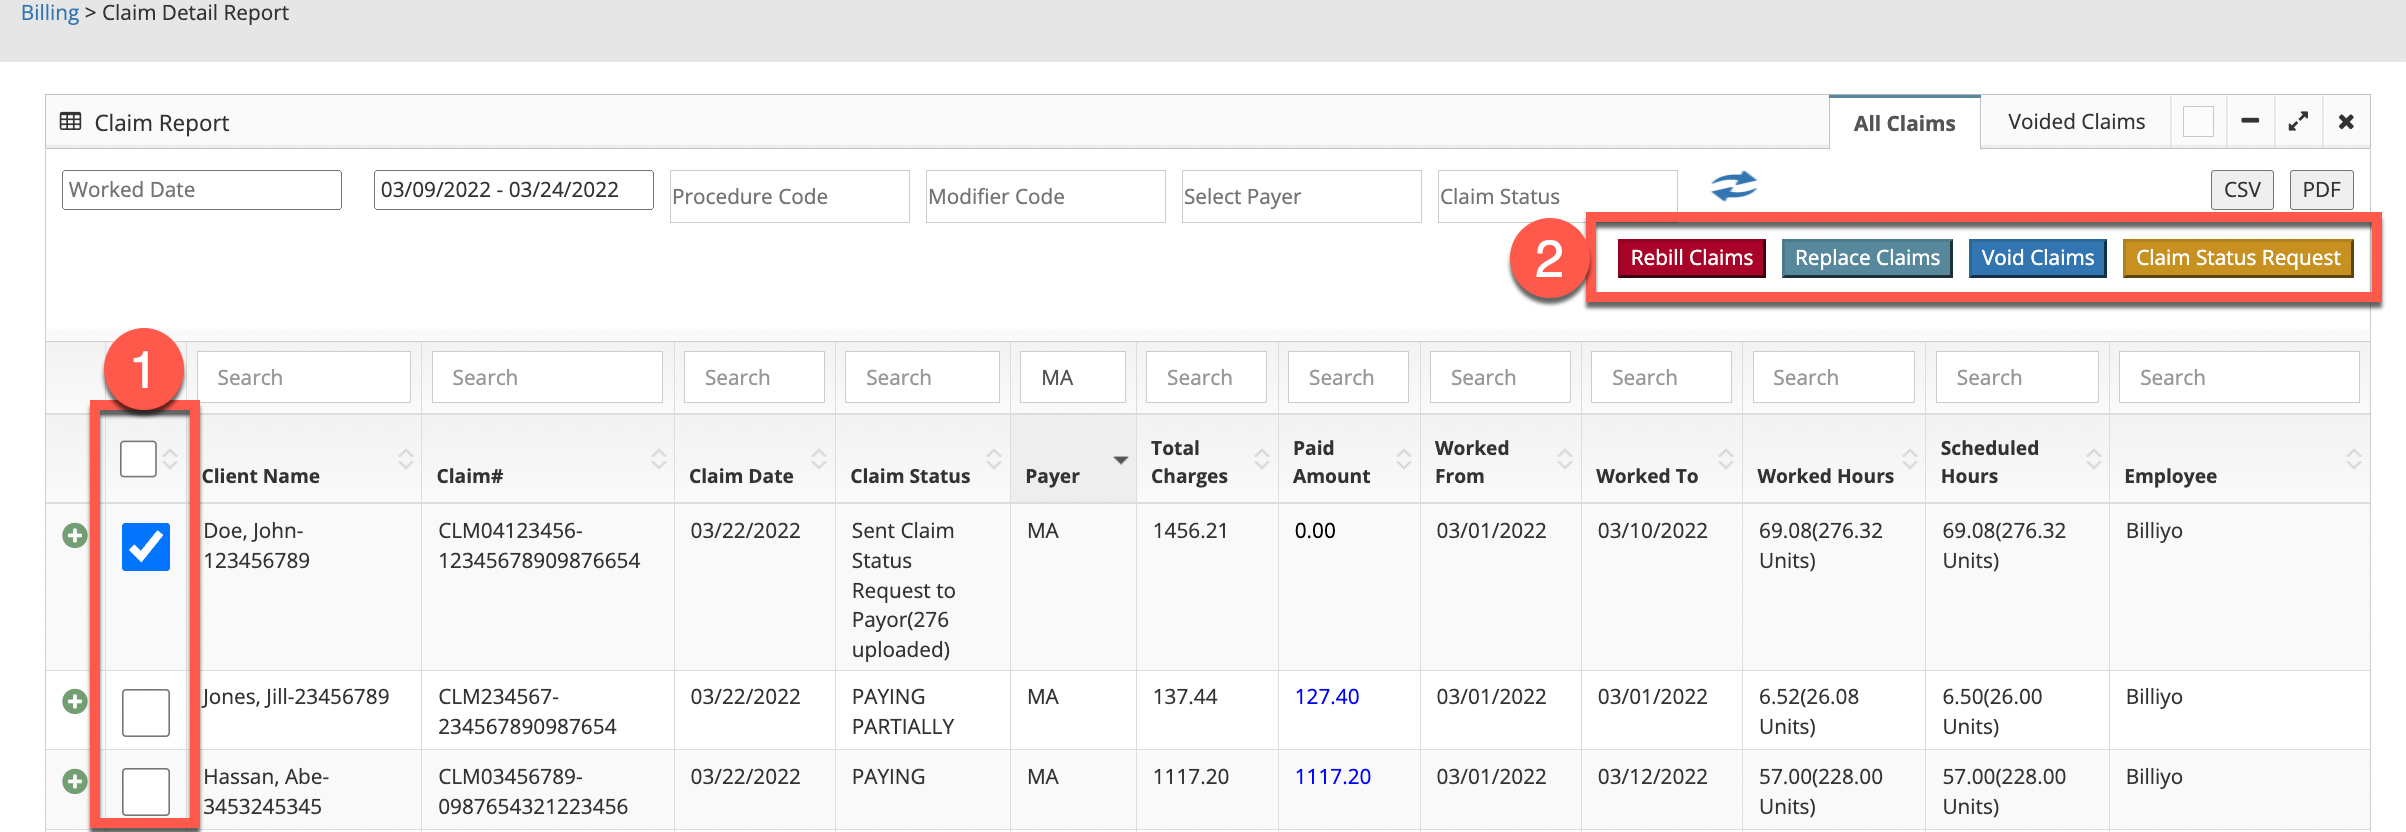
More about the claim detail report can be found here.
Viewing the Batch Detail Report
The batch detail report helps to track claim statuses as well. To view this report, head to Reports > Batch Detail. 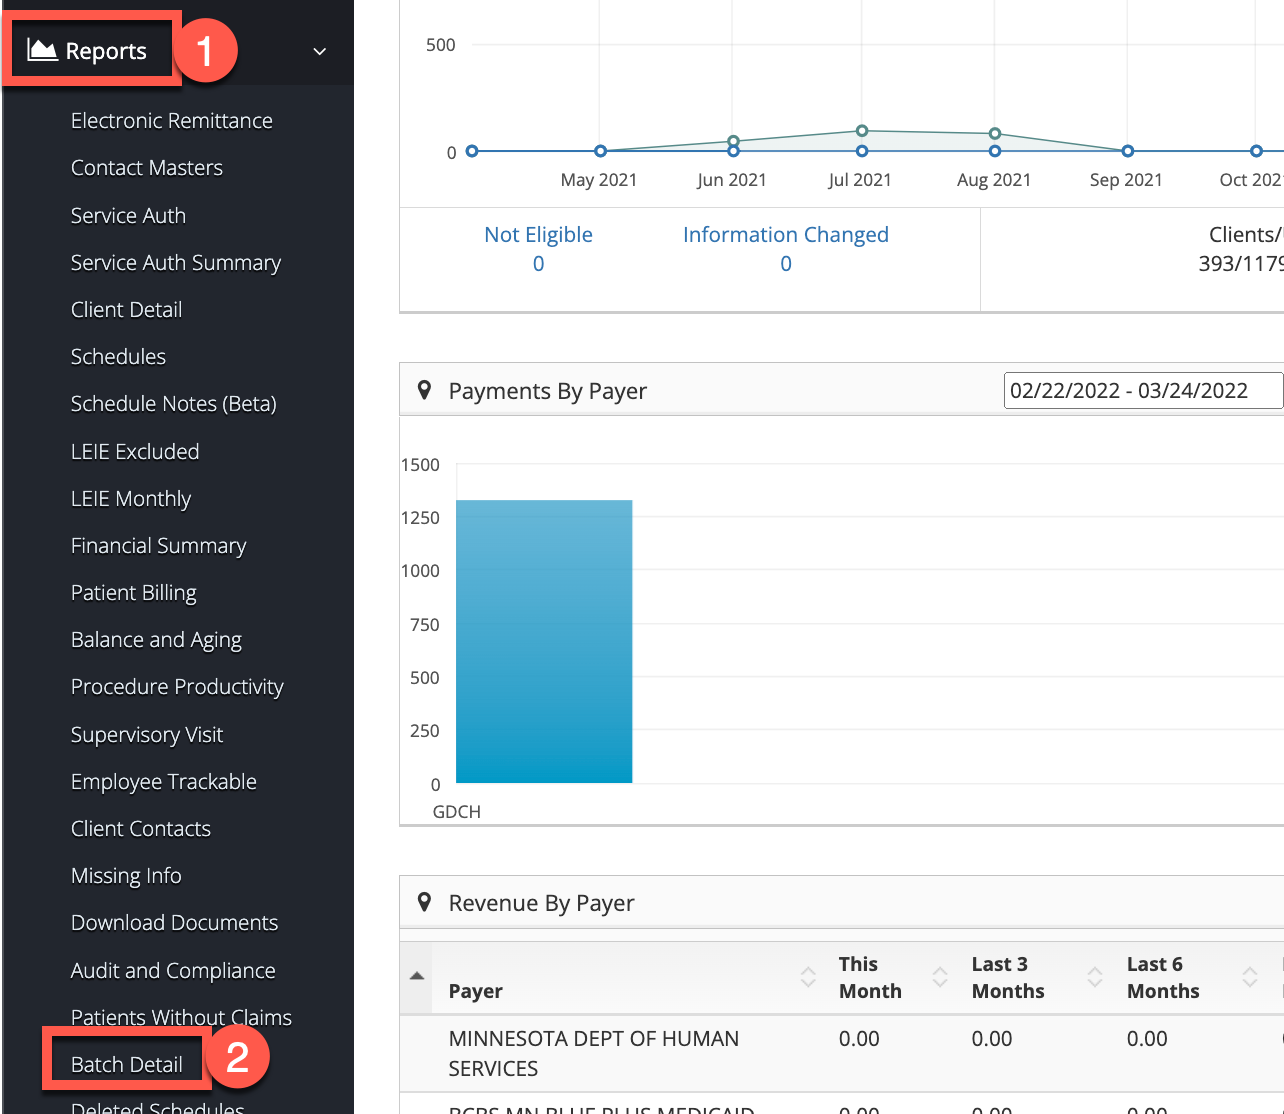
If a batch shows a status of "Error in Submission", click on the + sign to the left and then the Reprocess button.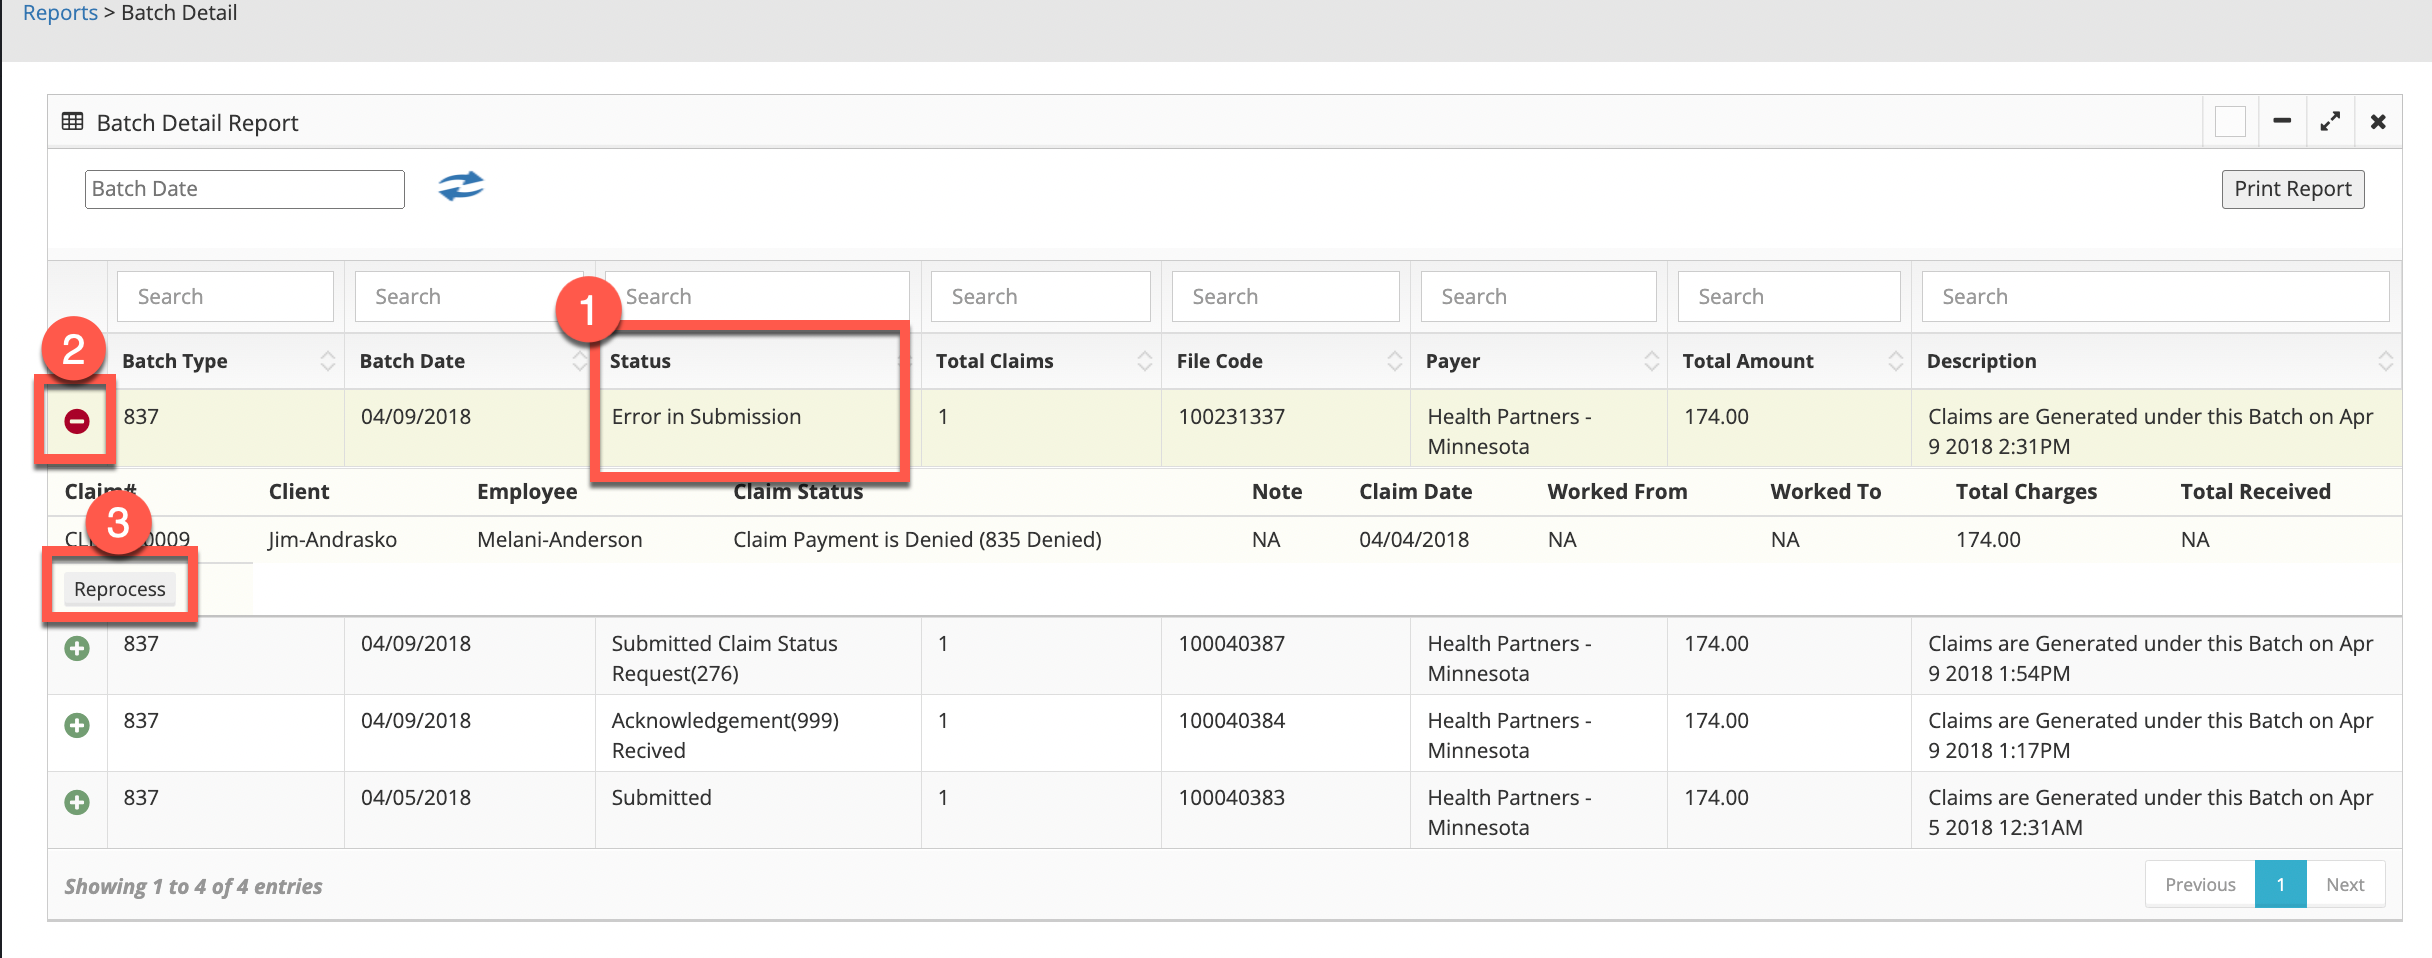
More about the batch detail report can be found here.
No real client or employee information was used.