Company Settings
Review and adjust settings for your Billiyo account.
Jump To:
Accessing the Company Settings PageThe Employee Document Type Tab
The Client Document Type Tab
The Service Plans Tab
The Onboarding Document Tab
The Expense Category Tab
The Configurations Tab
The Onboarding Checklist Tab
The Pay Period Tab
Accessing the Company Settings Page
To access this page, head to More > Company > Company Settings in the left menu.
.gif?width=688&name=Company%20Settings%20(2).gif)
The Employee Document Type Tab
Within the company settings page, click on the Employee Document Type tab on the left side of the screen to view a list of any employee documents that have been digitalized for your agency.
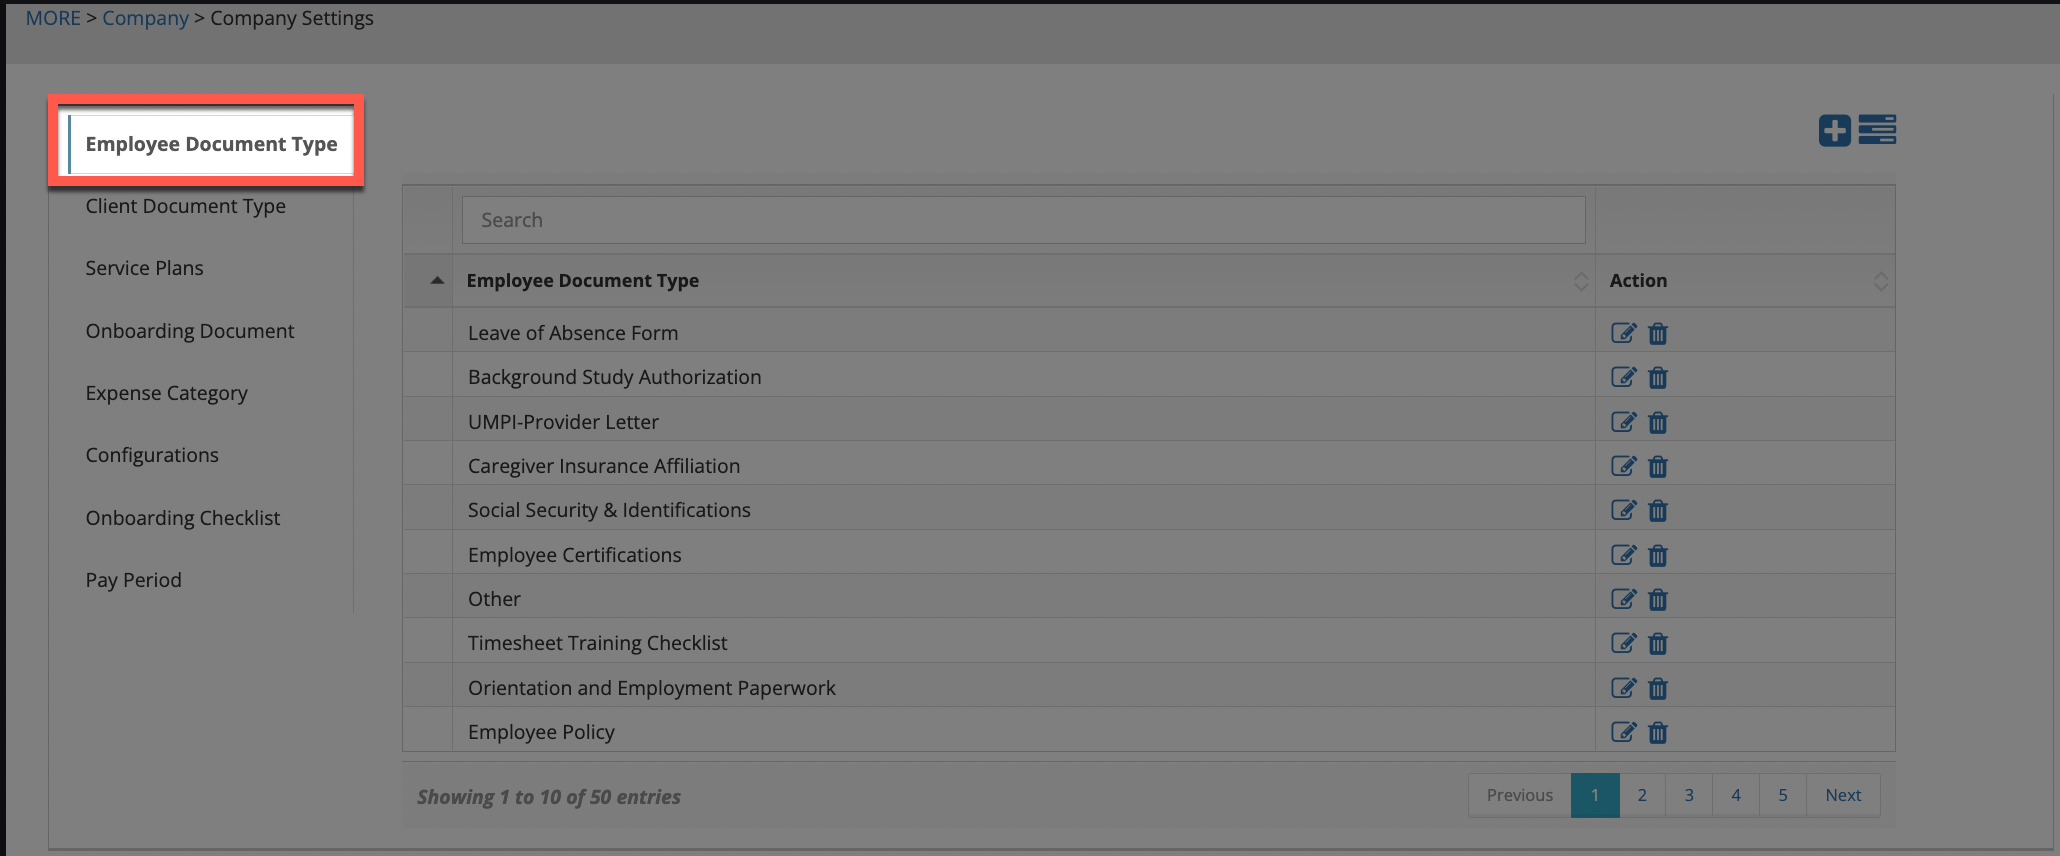
To edit the name of a document, click on the pencil icon under the Action column in the document line.

A pop-up will appear and the document name will show in the field under the Employee Document Type text. If any changes are made, click on the Save button.
Keep in mind that names will truncate if they are too long and no special characters are able to be added.
The option to delete a document will also appear, as a trash can icon under the Action column in the document line.

Clicking this icon, and confirming the deletion on the pop-up that appears, will entirely remove the document from the account.
If a document is deleted, the only way to get it back would be by talking with your Customer Success Manager about re-digitalizing it. Please know that you may need to resend the original file again, as a PDF or Word document, in this case.
When uploading a document under the Documents tab in an employee's profile, if the name of the document does not appear, coming to this screen will provide the option to add the document name. To add a document name, click on the + sign in the top right corner above the table.

Upon doing so, a pop-up will appear. In the field below the text Employee Document Type, input in the name of the document. Click the Save button to add the document name.
Keep in mind that names will truncate if they are too long and no special characters are able to be added.
The Client Document Type Tab
Within the company settings page, click on the Employee Document Type tab on the left side of the screen to view a list of any client documents that have been digitalized for your agency.
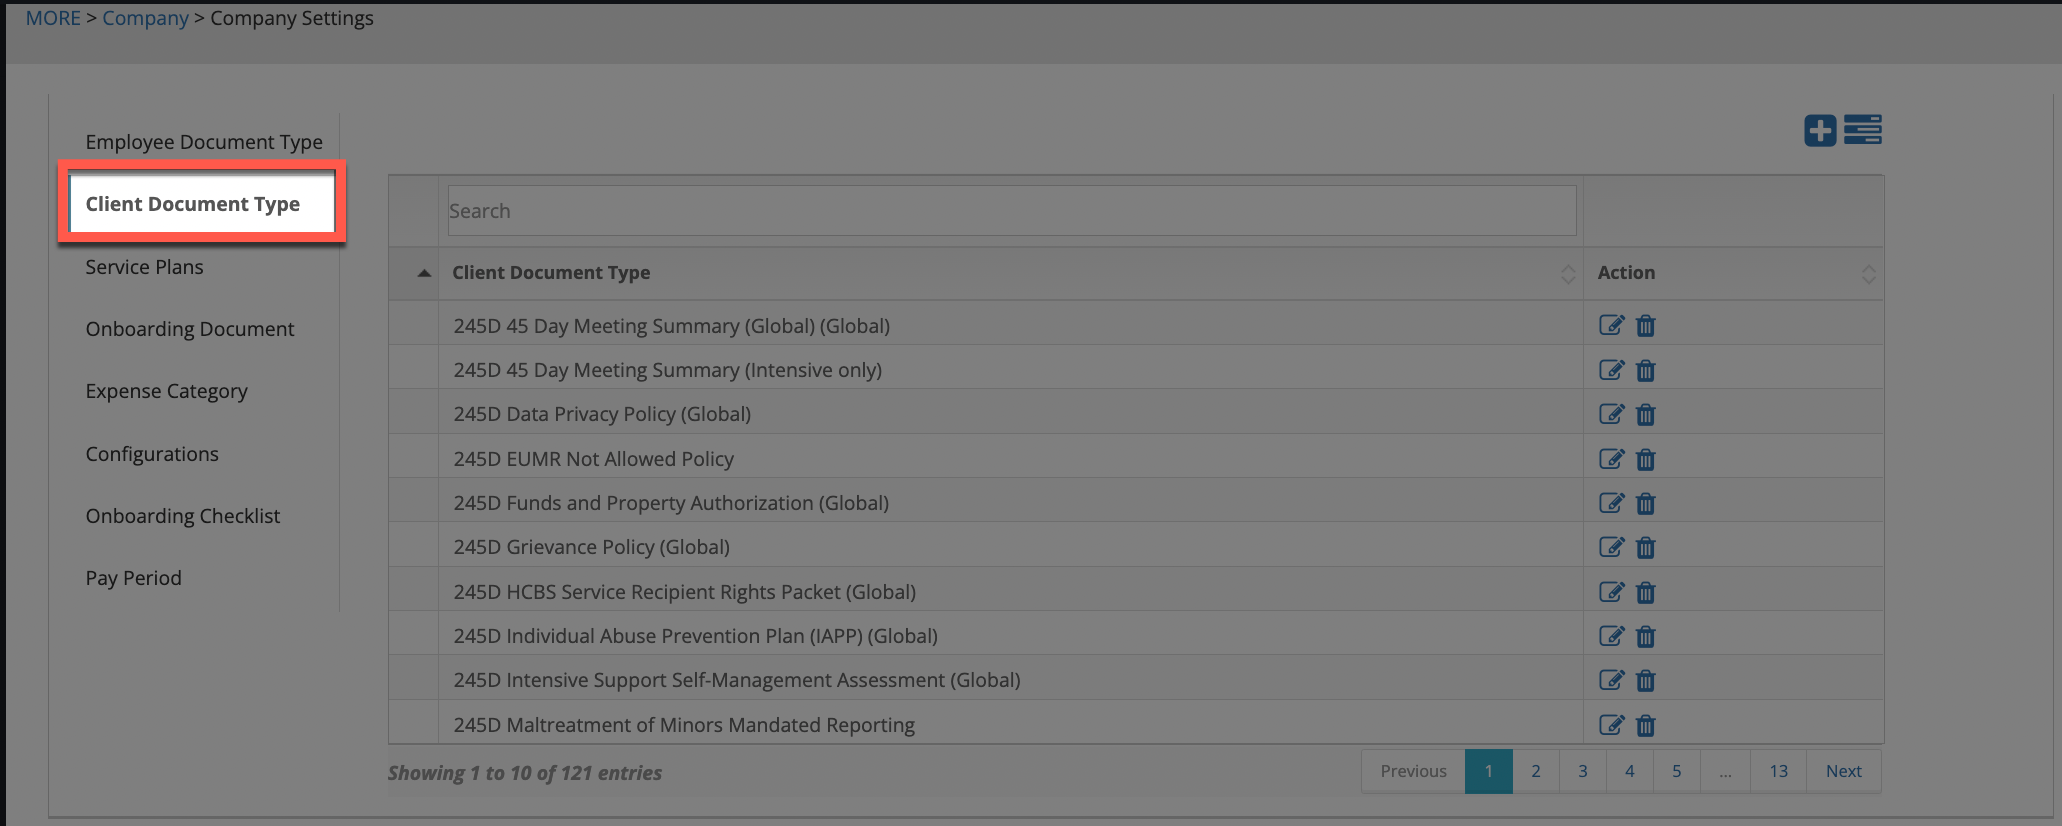
To edit the name of a document, click on the pencil icon under the Action column in the document line.

A pop-up will appear and the document name will show in the field under the Client Document Type text. If any changes are made, click on the Save button.
Keep in mind that names will truncate if they are too long and no special characters are able to be added.
The option to delete a document will also appear, as a trash can icon under the Action column in the document line.

Clicking this icon, and confirming the deletion on the pop-up that appears, will entirely remove the document from the account.
If a document is deleted the only way to get it back would be by talking with your Customer Success Manager about re-digitalizing it. Please know that you may need to resend the original file, as a PDF or Word document, again in this case.
When uploading a document into the Documents tab in a clients's profile, if the name of the document does not appear, coming to this screen will provide the option to add the document name. To add a document name, click on the + sign in the top right corner above the table.

Upon doing so, a pop-up will appear. In the field below the text Client Document Type, input in the name of the document. Click the Save button to add the document name.
Keep in mind that names will truncate if they are too long and no special characters are able to be added.
The Service Plans Tab
Within the company settings page, click on the Service Plans tab on the left side of the screen to view and edit the services that appear to select from when creating a care plan.
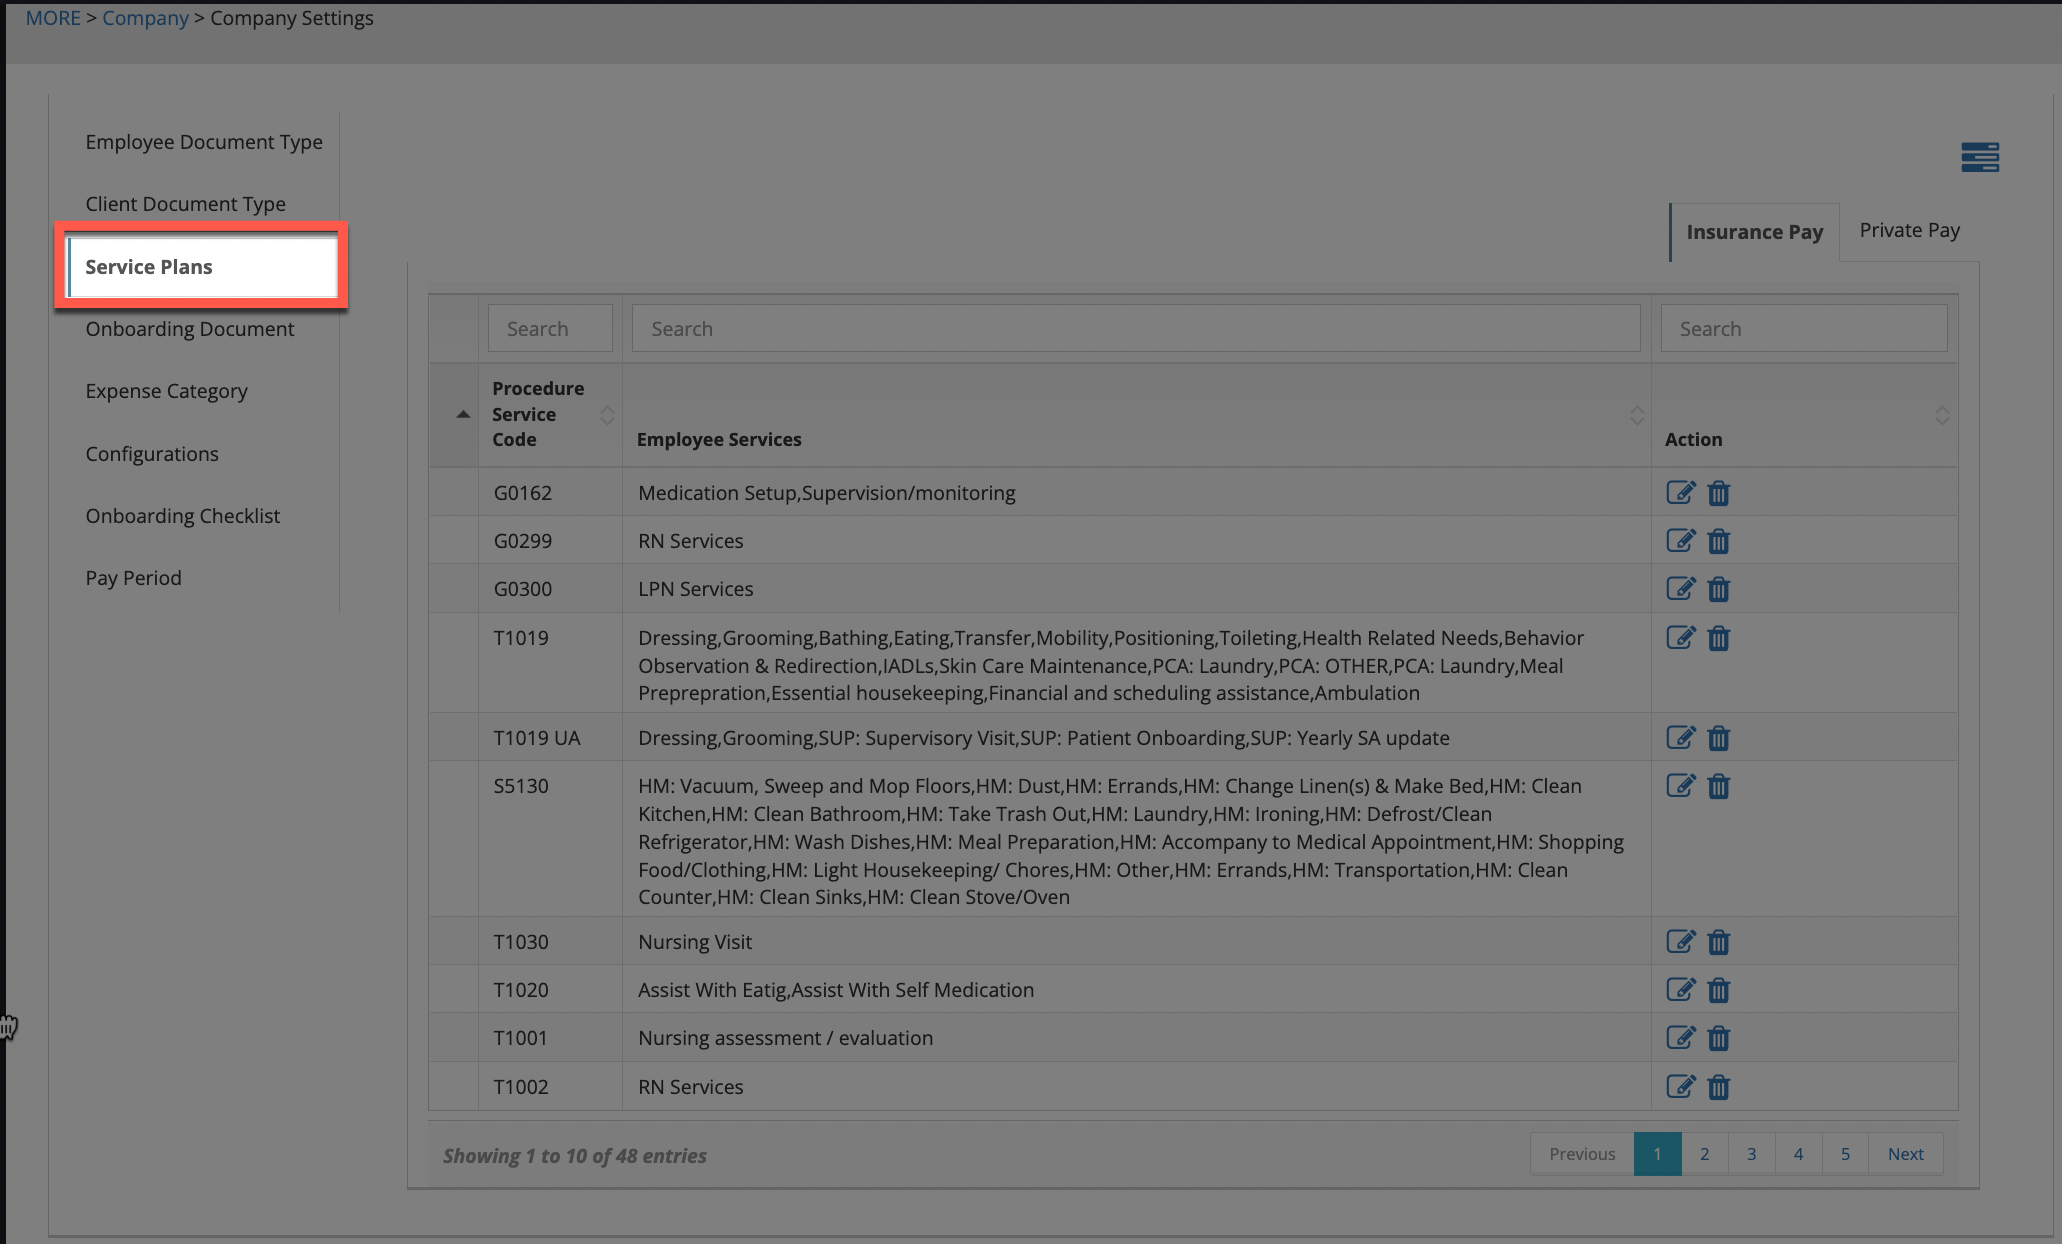
To add a procedure code or service type and select its services, click on the blue lines in the top right corner above the table.

On the pop-up that appears, the following fields will appear to fill out:
- Insurance or Private Pay
- Procedure code — If we selected "Private Pay" in the first field, this field will show as "Service Type" instead.
- Modifier (if applicable) — If "Private Pay" is selected in the first field, this field will not appear.
- Service(s) — The services that will be selected from when creating a care plan for this procedure code (+modifier, if applicable) or service type.
After filling out the fields, click on the Save button.
There will be two tabs that appear on the screen towards the tope right, Insurance Pay and Private Pay.

In the Insurance Pay tab, we'll be able to review the services for procedure codes that have been entered. In the Private Pay tab, we'll be able to review the services for service types that have been entered.
Edit any of the procedure code or service type services by clicking on the blue pencil icon that appears under the Action column heading for the line.

To delete a procedure code or service type, click on the trash can icon under the Action column heading for the line.

The Onboarding Document Tab
After a potential employee fills out the Registration URL, they will be taken to the documents selected in the Onboarding Document tab on the left side of the screen.
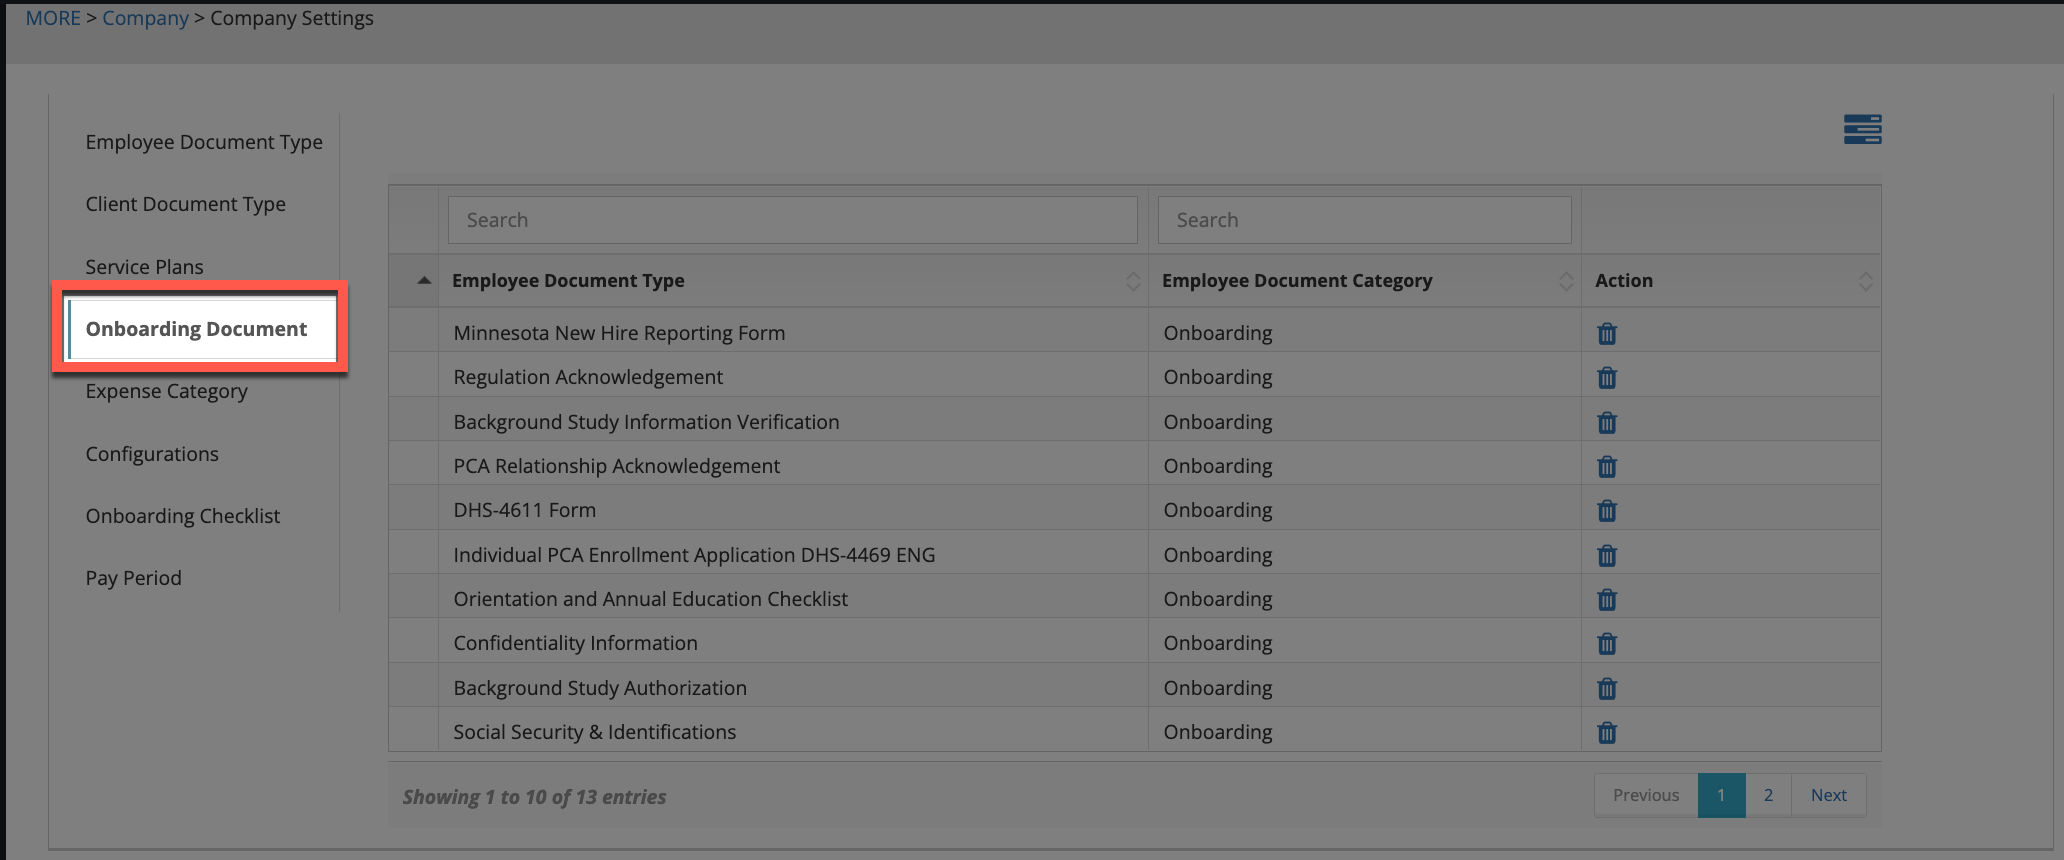
Any employee documents that have been digitalized for an agency can be attached to the Registration URL. To include a document, click on the 3 lines in the top right corner above the table.

On the pop-up that appears, select the document name in the Employee Document Type field and "Onboarding" in the Employee Document Category field. Then, click on the Save button.
To remove a document from being included in the employee onboarding documents, click on the trash can icon under the Action column.

The Expense Category Tab
Within the company settings page, click on the Expense Category tab on the left side of the screen to add in information about expense reimbursement.

Click on the + sign to add an expense category.

On the pop-up that appears, a drop-down will appear to select a category.
For the category of "Miles" two additional fields will appear to fill out:
- Amount (Multiplier): What's charged to the client.
- Reimburse: What's given to the employee.
Click on the Save button to add the expense category.
To edit an expense category after it has been added, click on the pencil icon that appears under the Action column for the expense line.

If any changes are made, click on the Save button.
To remove an expense category, click on the trash can icon that appears under the Action column for the expense line.

The Configurations Tab
Within the company settings page, click on the "Configurations" tab on the left side of the screen to view and edit basic settings.
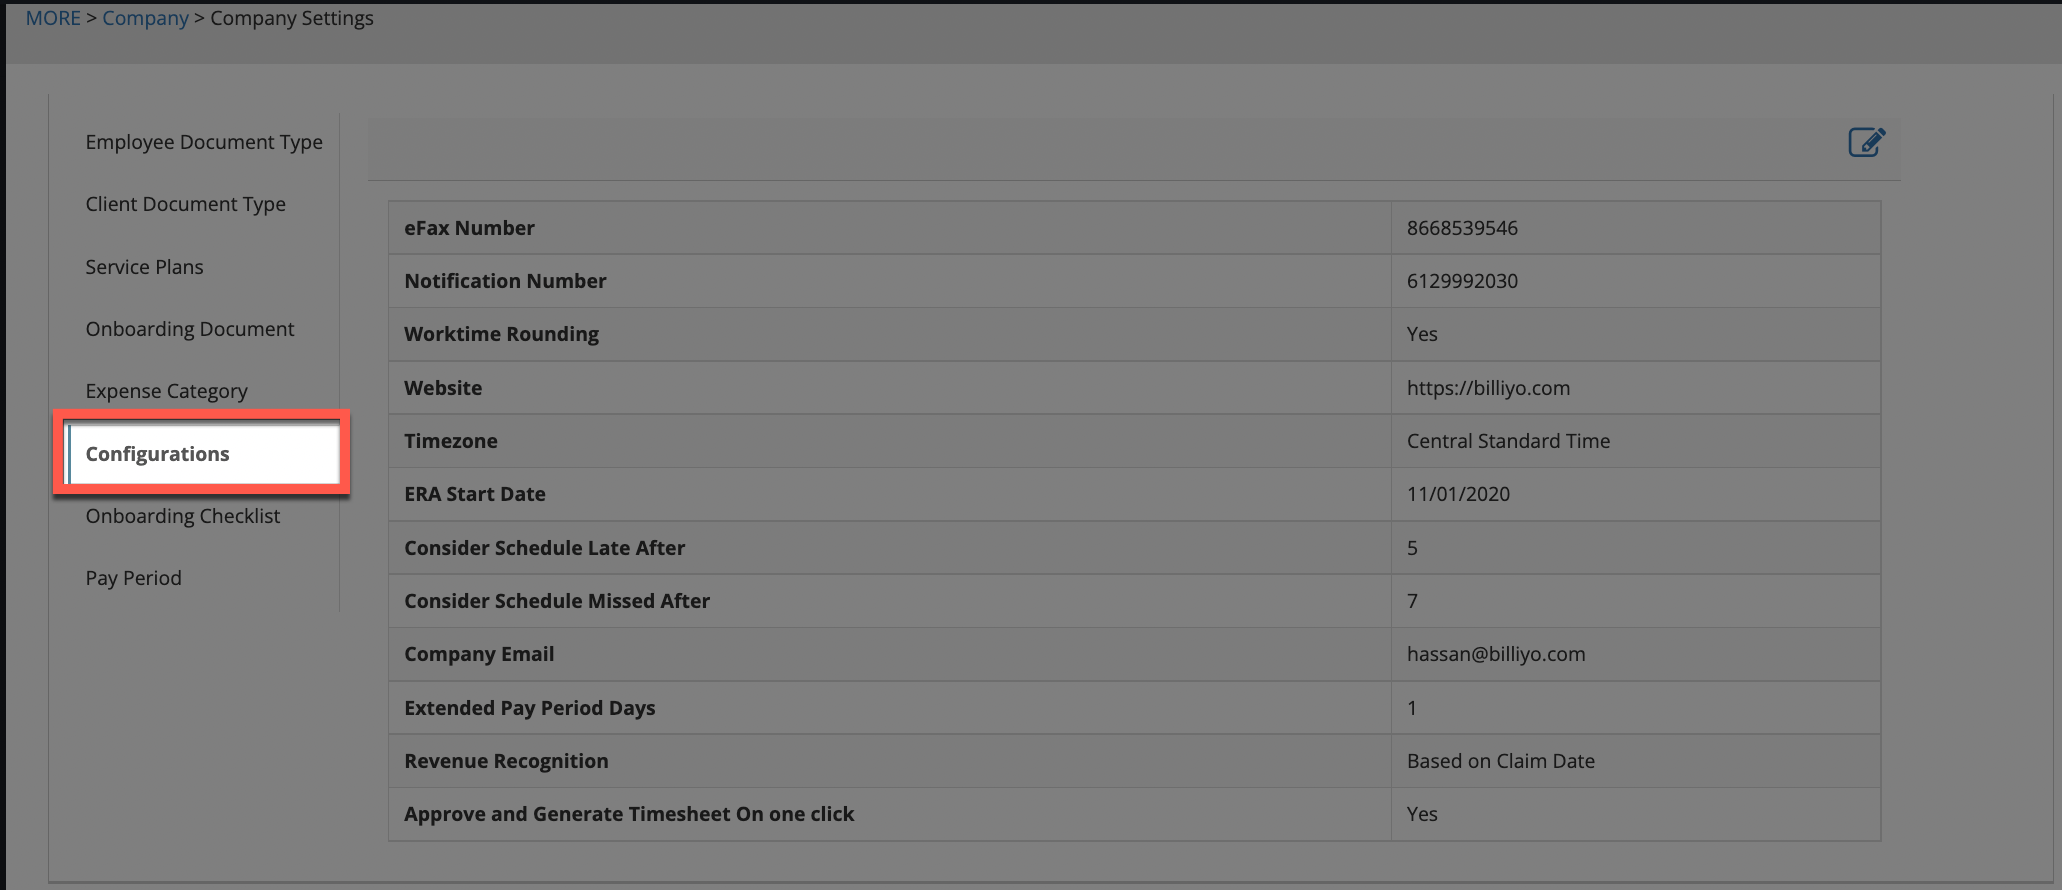
To edit any information on this screen, click on the pencil icon that appears above the table on the top right.
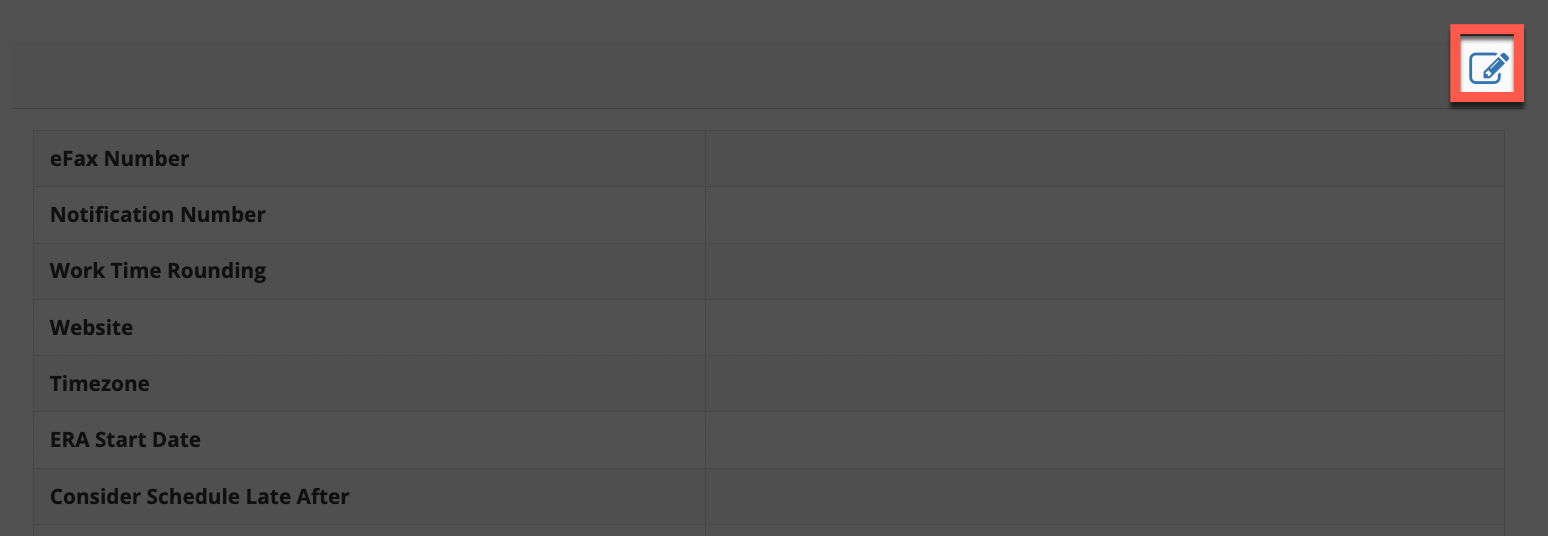
On the pop-up that appears, we can adjust your company settings. To see the individual settings in this page, please refer to this article.
If any changes are made, click the Update button.

The Onboarding Checklist Tab
Use the Onboarding Checklist tab on the left side of the screen to add items to the checklist that appears at the top of a client and employee's profile. There will be separate tabs for Client Checklist and Employee Checklist on this screen.
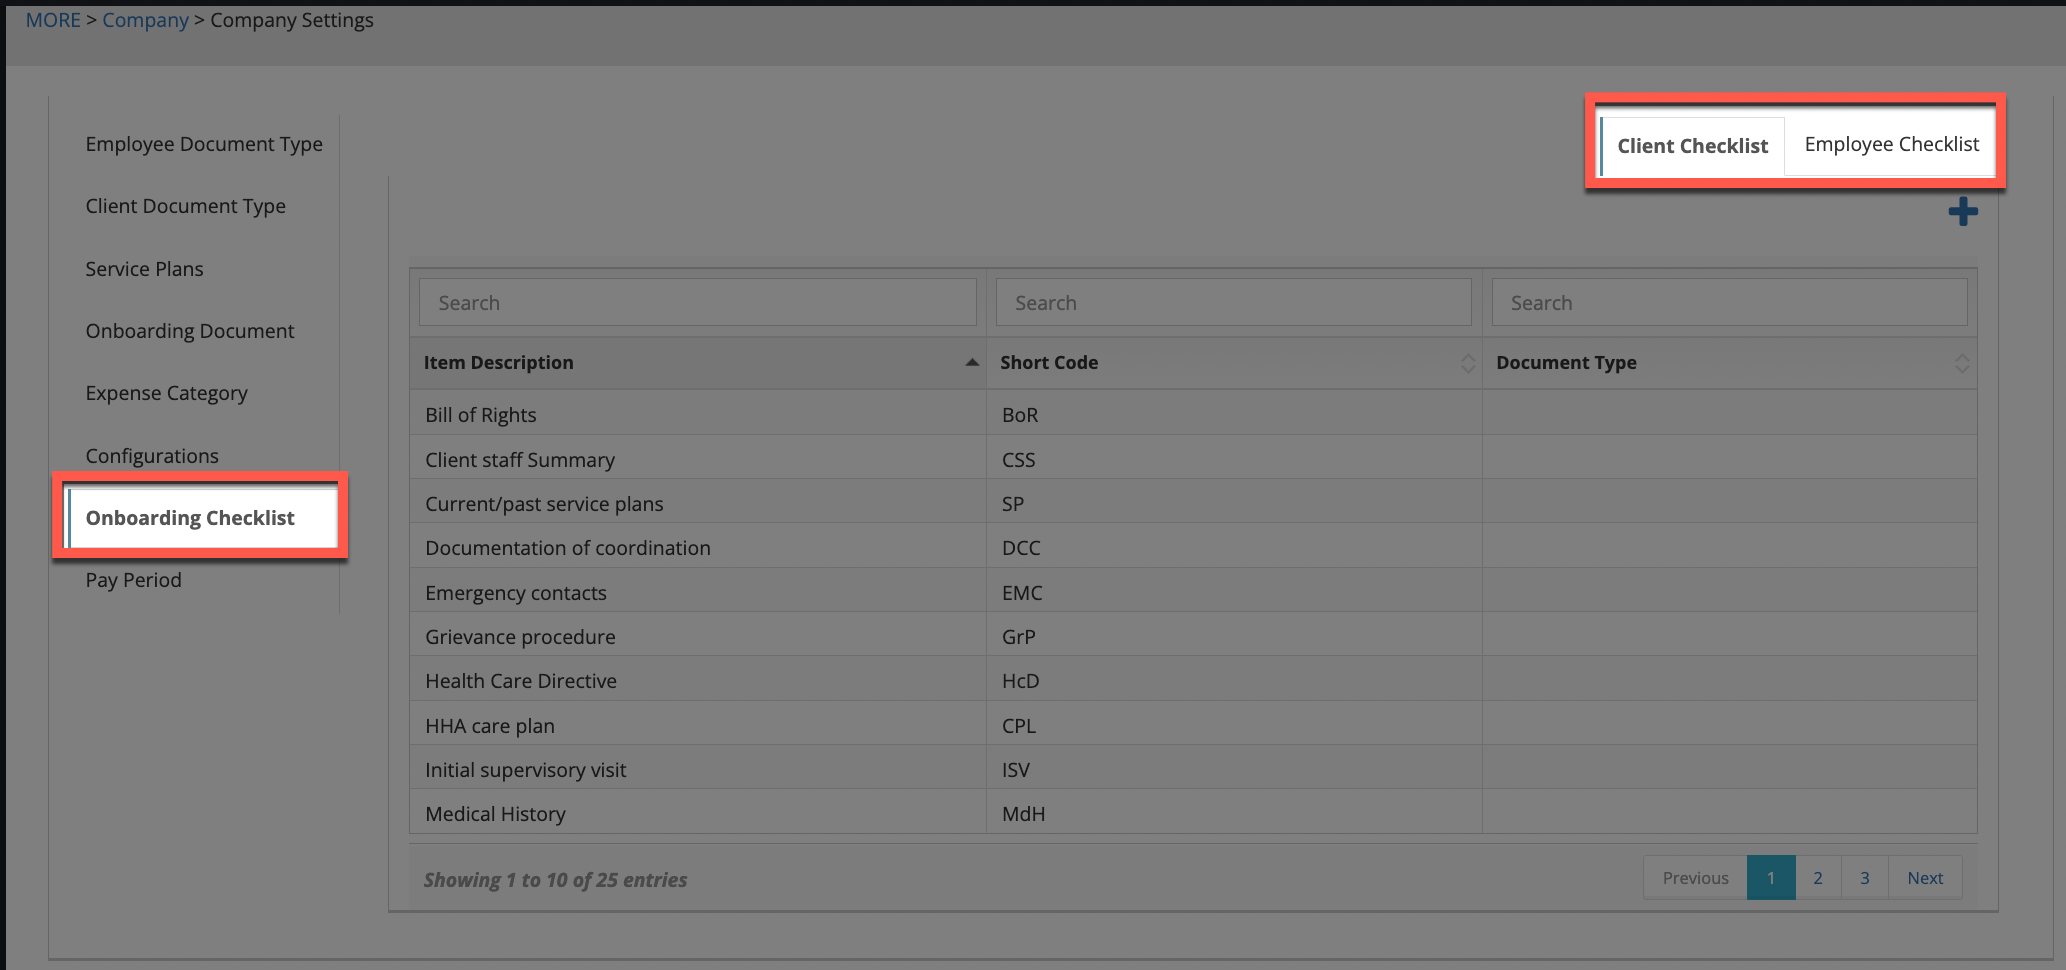
To add an item, click on the + sign that appears above the table on the top right.

Then, fill out the fields on the pop-up. After, click on the Save button.
If the document being searched for does not appear in the list, add the document type by following the instructions here for employee documents and here for client documents.
The Pay Period Tab
Within the company settings page, click on the Pay Period tab on the left side of the screen to input pay period information.
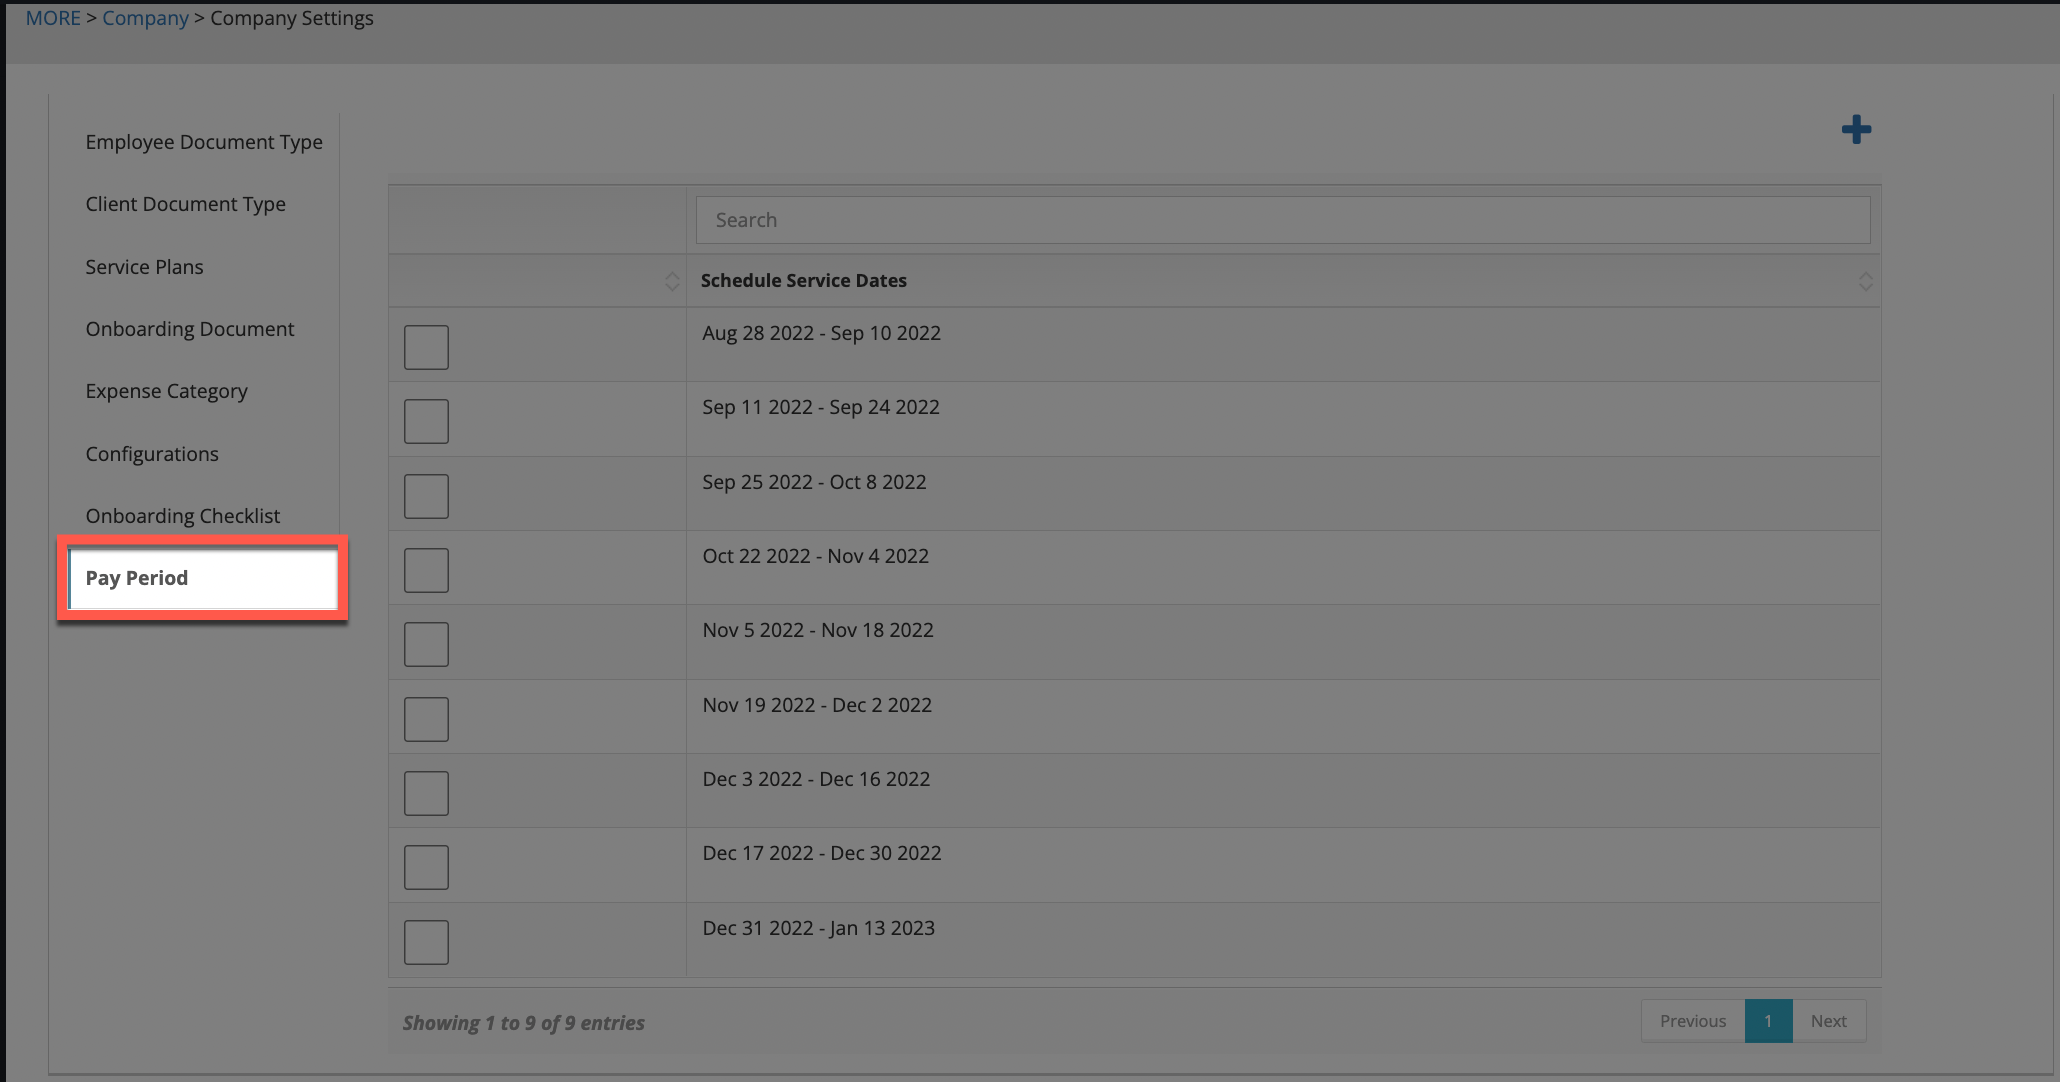
To add in pay periods, click on the + sign above the table on the top right.

On the pop-up that appears, there will be a field to select a date range in. While we can enter each pay period one-by-one, selecting the first date and last date of the pay period in the date range field, the system will automatically split up the pay periods in two week chunks for us if we select a longer date range.
If we know the date of our first pay period of the year and the date of our last pay period of the year, select those dates in the date range field to add in all of the pay periods for the entire year!
After choosing a date range, click on the Apply and Save buttons to add the pay periods into the system.
Any current or future pay periods that have been entered will appear on the table.
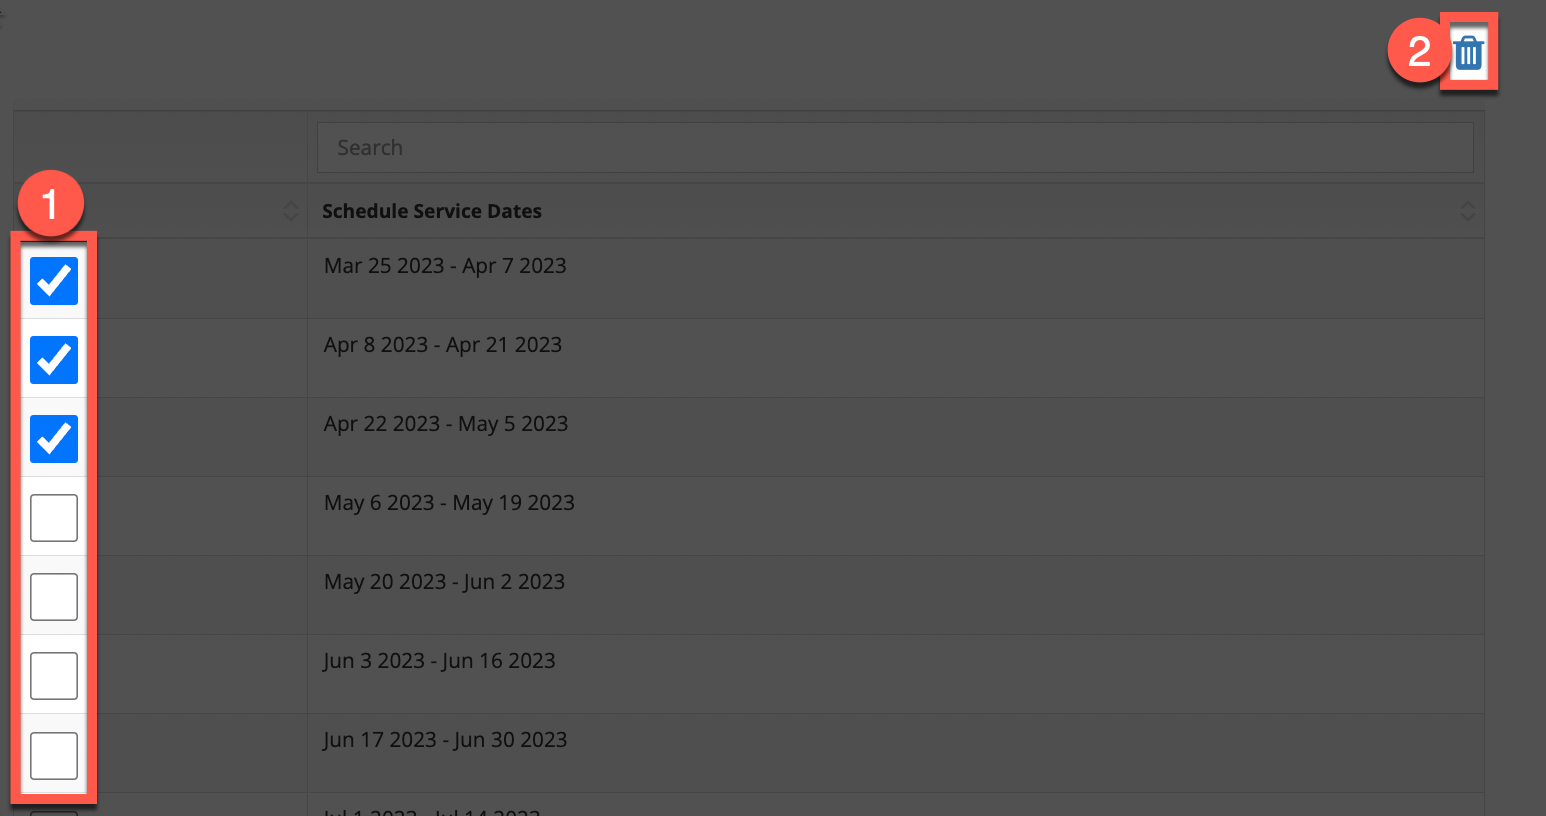
To delete a pay period, click on the checkbox next to the pay period line. Upon doing so, a blue trash can icon will appear above the table on the top right. Click on the blue trash can icon and on the pop-up that appears the orange "Okay" button to remove the pay period line.
