After sending off a claim in Billiyo we can review its status and check if the claim was paid or denied. We can then revise denied claims and rebill them to your payer
Jump To:
- Which Claims Were Denied
- Why Was A Claim Denied
- Fixing a Denied Claim
- Denial Resolution Tools
- Resolving Voided Claims
Which Claims Were Denied
In the claim detail report (Billing > Claim Detail Report)you can see which claims were accepted or rejected. If a claim is marked with the "Paying" or "Paid" status then you will be compensated for your work and everything is good to go. However, if your claim is "Denied," or has been showing "Sent Claim Status Request to Payor" for more than a week, then your claim was denied.
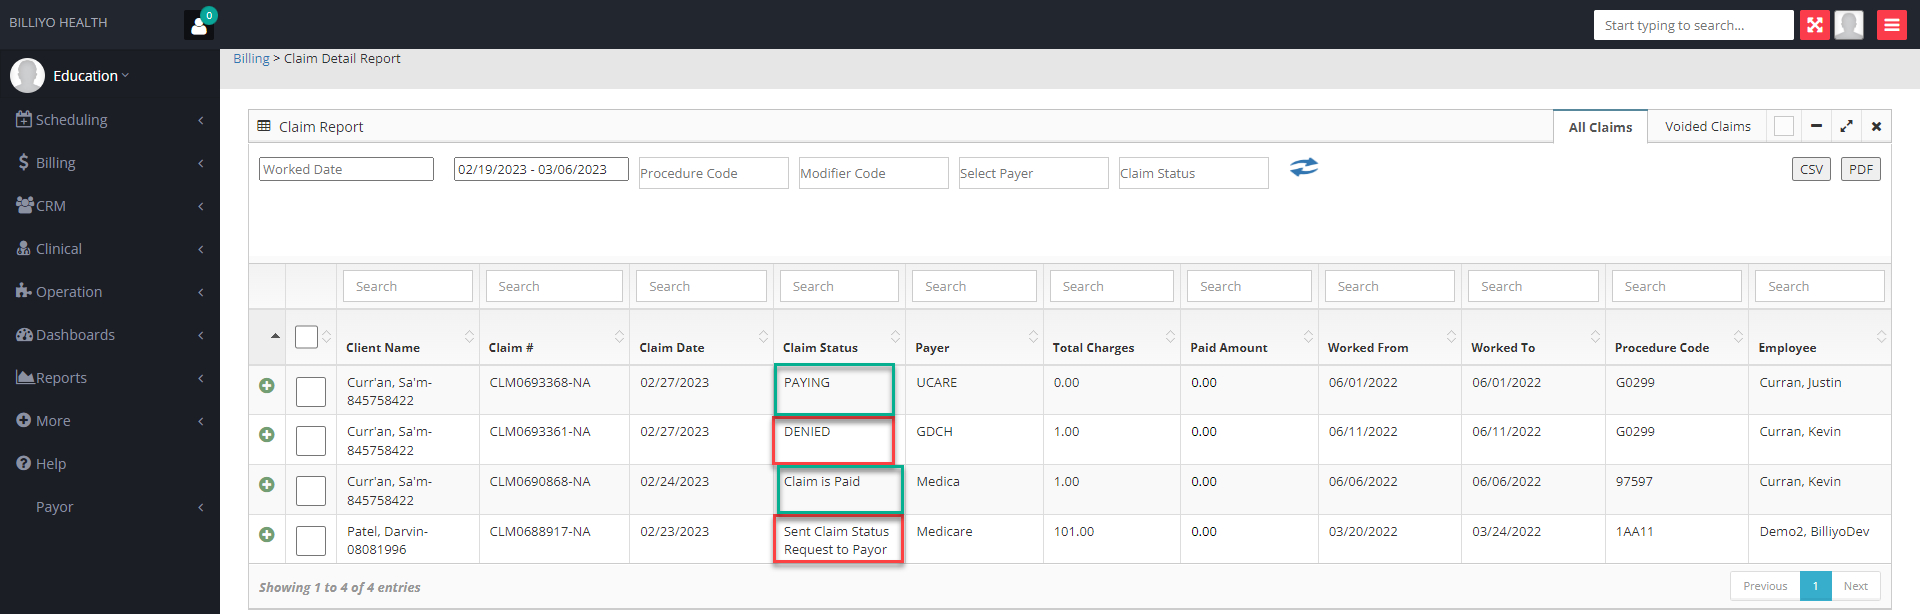
If a claim receive the "Sent Claim Status Request to Payor" or "Accepted by Intermediatory" status, then Billiyo has not yet received your claim's status from the payer. If your seeing this status for more then seven days after the claim was first sent please file a Claim Status Request.
Why Was A Claim Denied
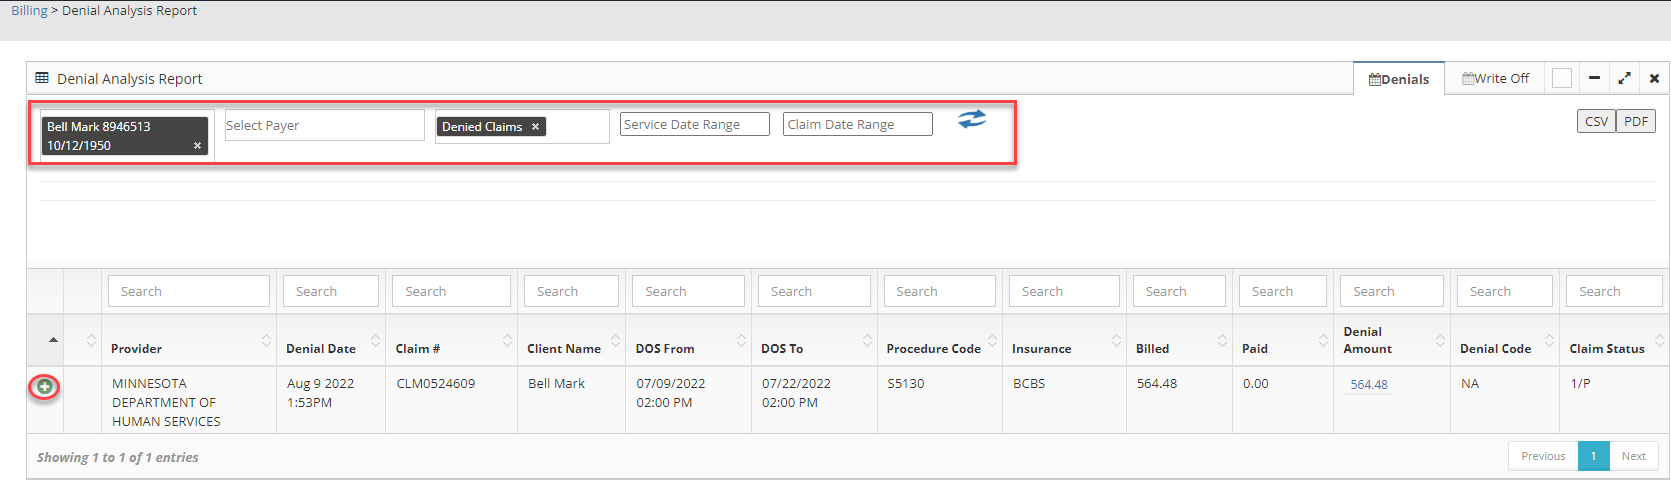
You can learn why a claim was denied by navigating to the Denial Analysis Report page (Billing > Denial Analysis Report).
Information only populates the Denial Analysis Report if your ERA request is approved (takes about 30 days from when you sent the initial ERA FAX). To get an ERA request, please email your customer success manager..
You can locate rejected claims with the filters near the top of the screen and to examine a claim in more detail we can click on the "Green Plus Sign" to the left of the Provider's name.
After expanding your claim you can see why it was denied by the by reading the Denial Description.
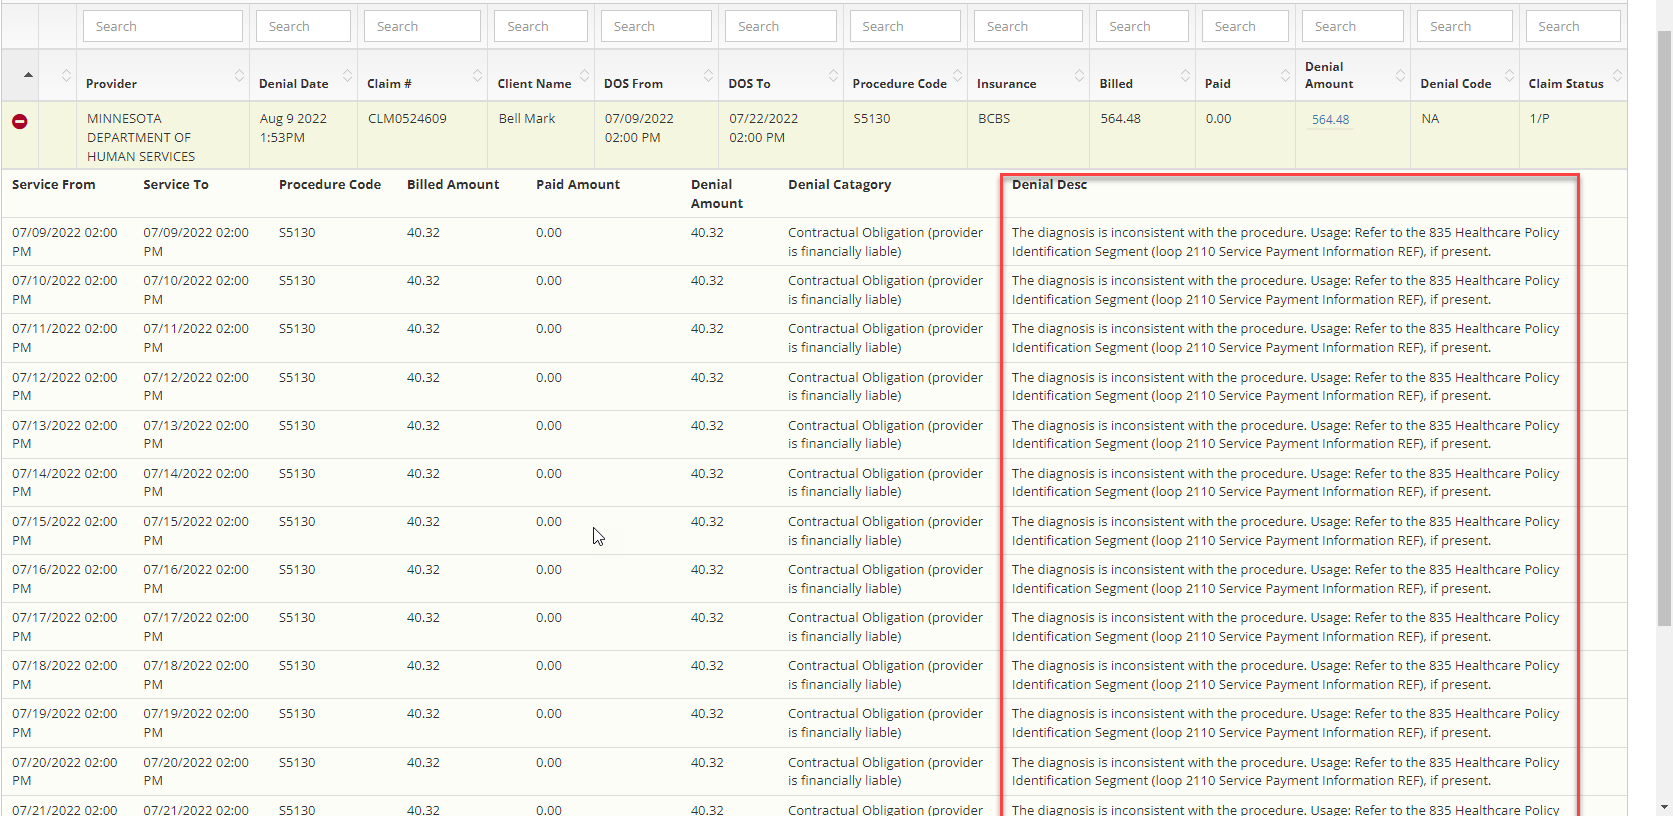
If you do not understand the denial description, please reach out to your Payer. Your Customer Success Manager at Billiyo will NOT be able to tell you why a claim was denied.
Fixing A Denied Claim
After learning why a claim was denied, we can fix and resend it from the claim detail report. To do this, first locate your claim and then click on the green plus sign next to it.

Then in the expanded menu hit Replace
This will pop up an Edit Claim Window.

From here you can change the information that was sent with your claim. For instance, if the caregiver's start time is incorrect, we can fix it by editing the DOS From field. Alternately, if a claim was sent with the wrong rate, we can fix it here. After updating a claim its time to resend if. If original the claim was denied we will hit rebill, but if the claim was paid or partially paid we would select replace.
Voiding Claims and the Denial Resolution Tools
If you need to take back a claim, perhaps its a duplicate or you billed for days that weren't worked, we will need to Void the claim. To do this we will need to open up the "Denial Resolution Tools." First we should locate our denied claims and then check box next to the provider's name. This will open up our Denial Resolution Tools.
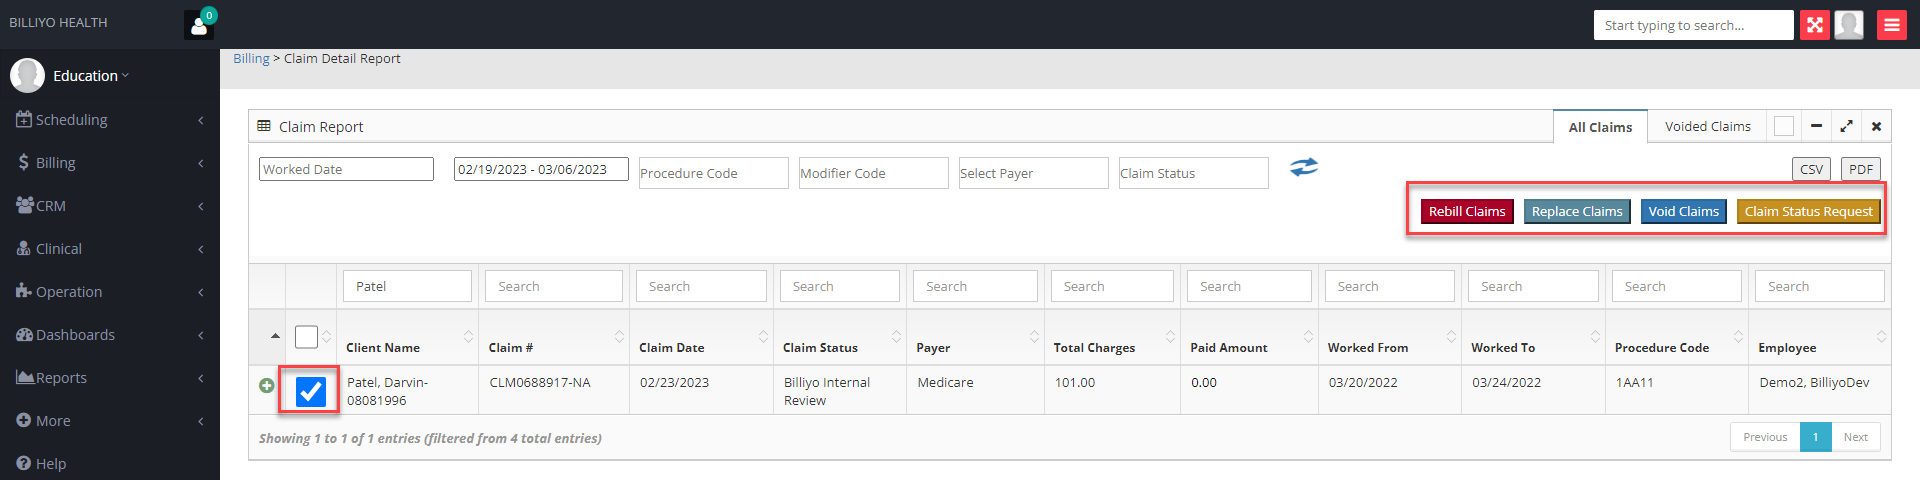
To void a claim we can simply select "Void Claims"

Resolving Voided Claims
To rework a voided claim you will first need to delete the timesheet that was used to generate the claim. You can then access and edit your individual visits from the Schedule Approval page. After correcting your schedule its time to regenerate the timesheet and send it off claim.
Even if only one appointment was incorrect, you will need to delete the entire timesheet before you can revise any visits.
To delete a timesheet, navigate to Scheduling > Timesheet and locate your desired timesheet. Then click on the green plus sign by your client's name and, in your expanded view, scroll down and click on the "Delete Timesheet" button.
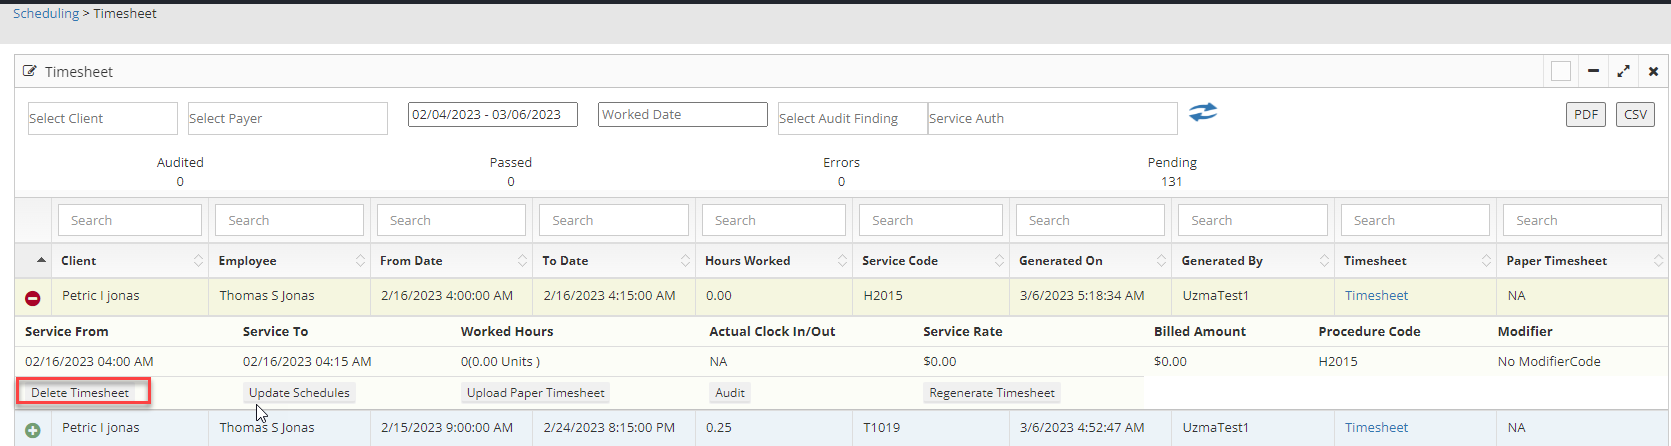
If you don't see the delete timesheet button is still an un-voided claim attached to the timesheet.
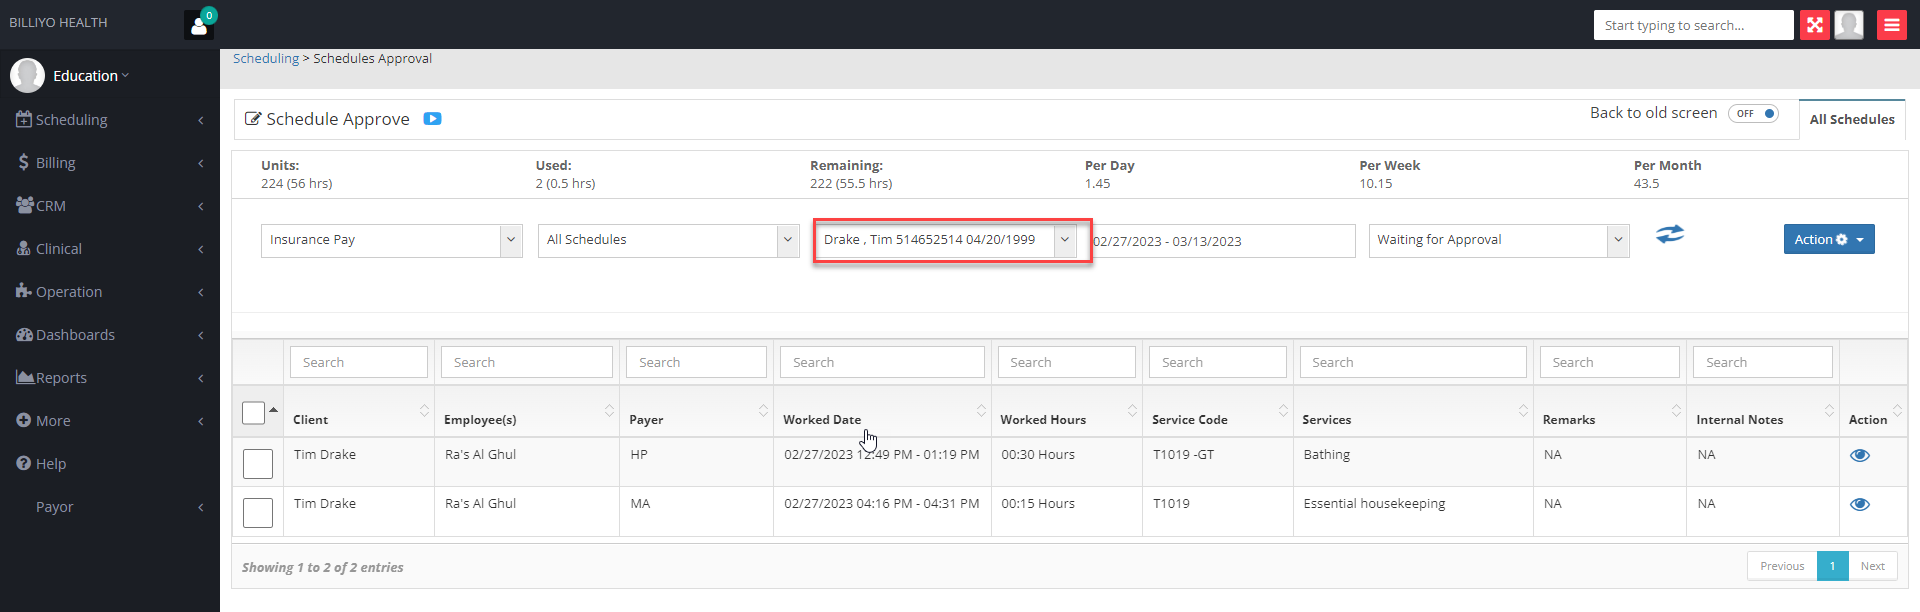
After deleting a timesheet, its composing visits will be sent to the "Schedule Approval" page. To find these visits navigate to "Scheduling > Schedule Approval" and then use the search bar near the top of the screen to find your patient's name.
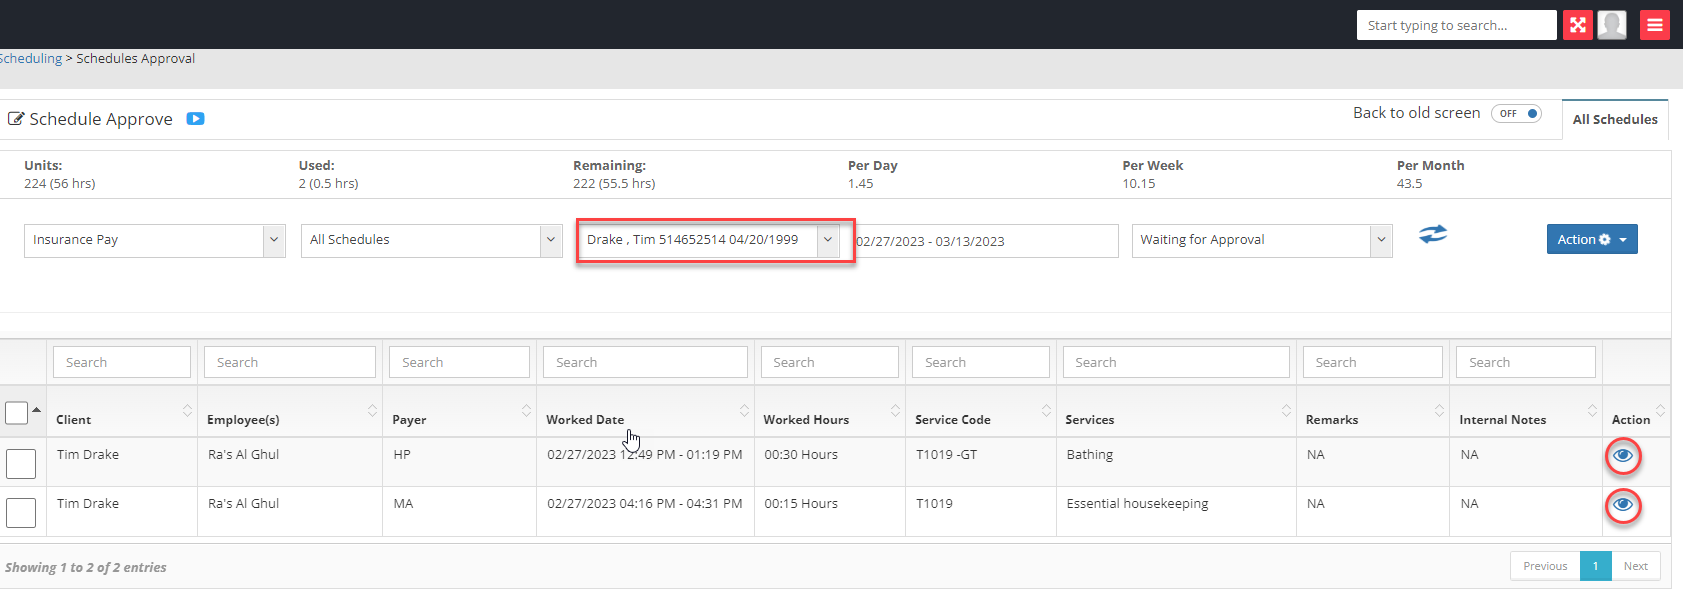
To correct the mistake that caused your claim to be denied click in the blue "Action" eyeball to the far right of the page and then click on the "Edit" button near top of the pop up.
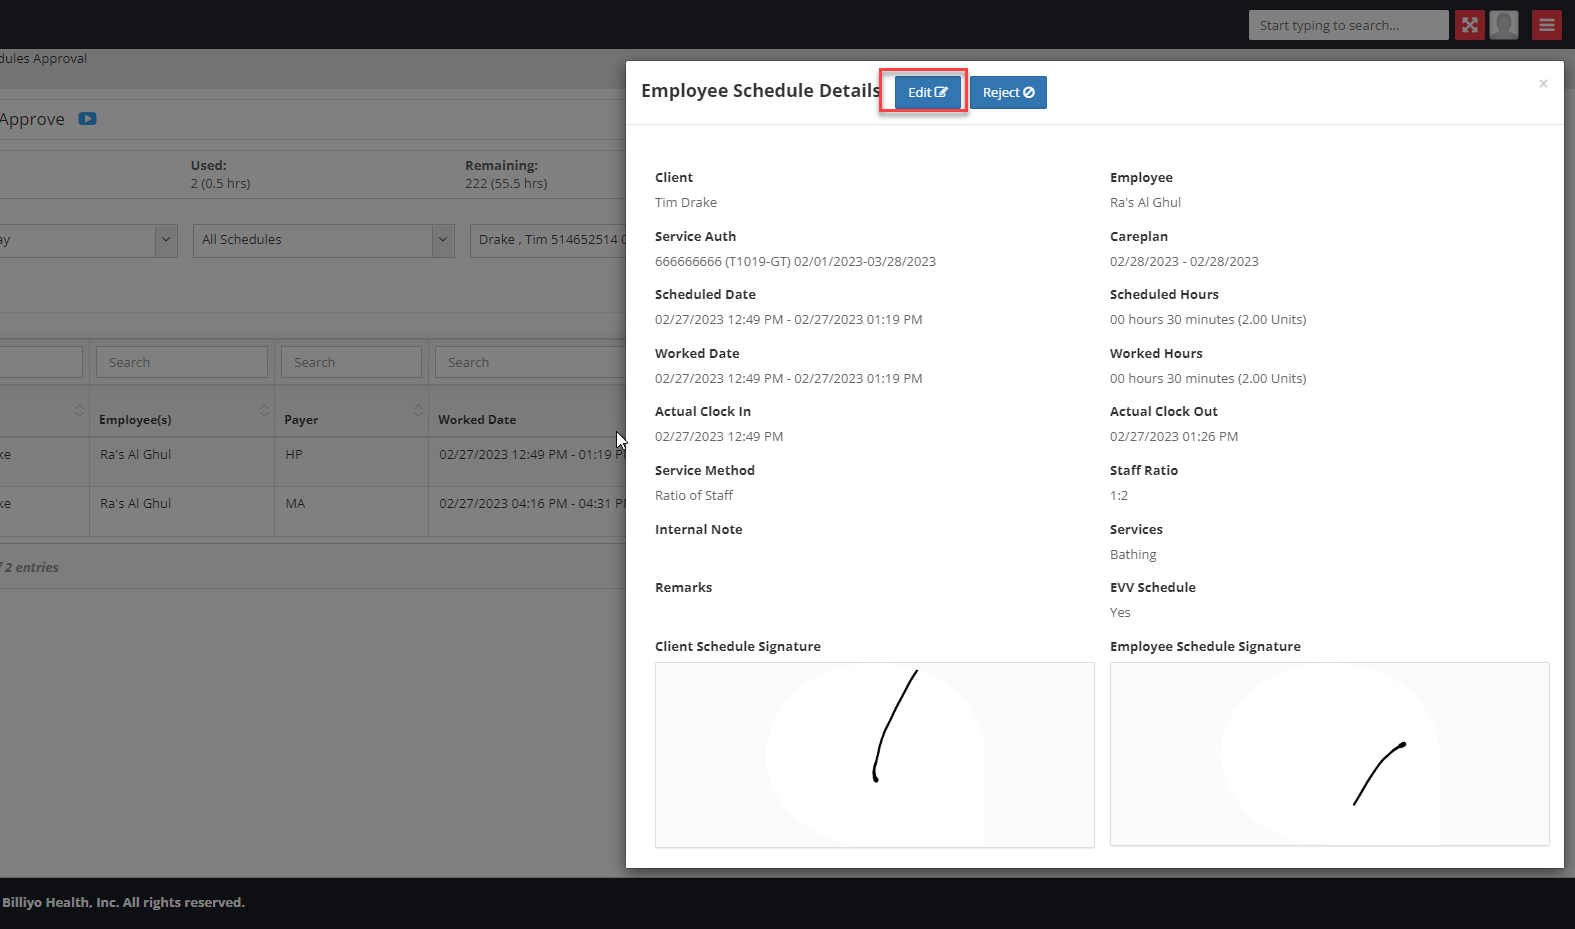
You can now change the Service Auth, schedule date/time, worked date/time and staff ratio. After correcting your visit click on the blue save button near the top of the pop up.
If you need to send a visit back your caregiver, perhaps the client needs to enter another signature instead of clicking "Edit" in the Employee Schedule Detail pop up, click "Reject"
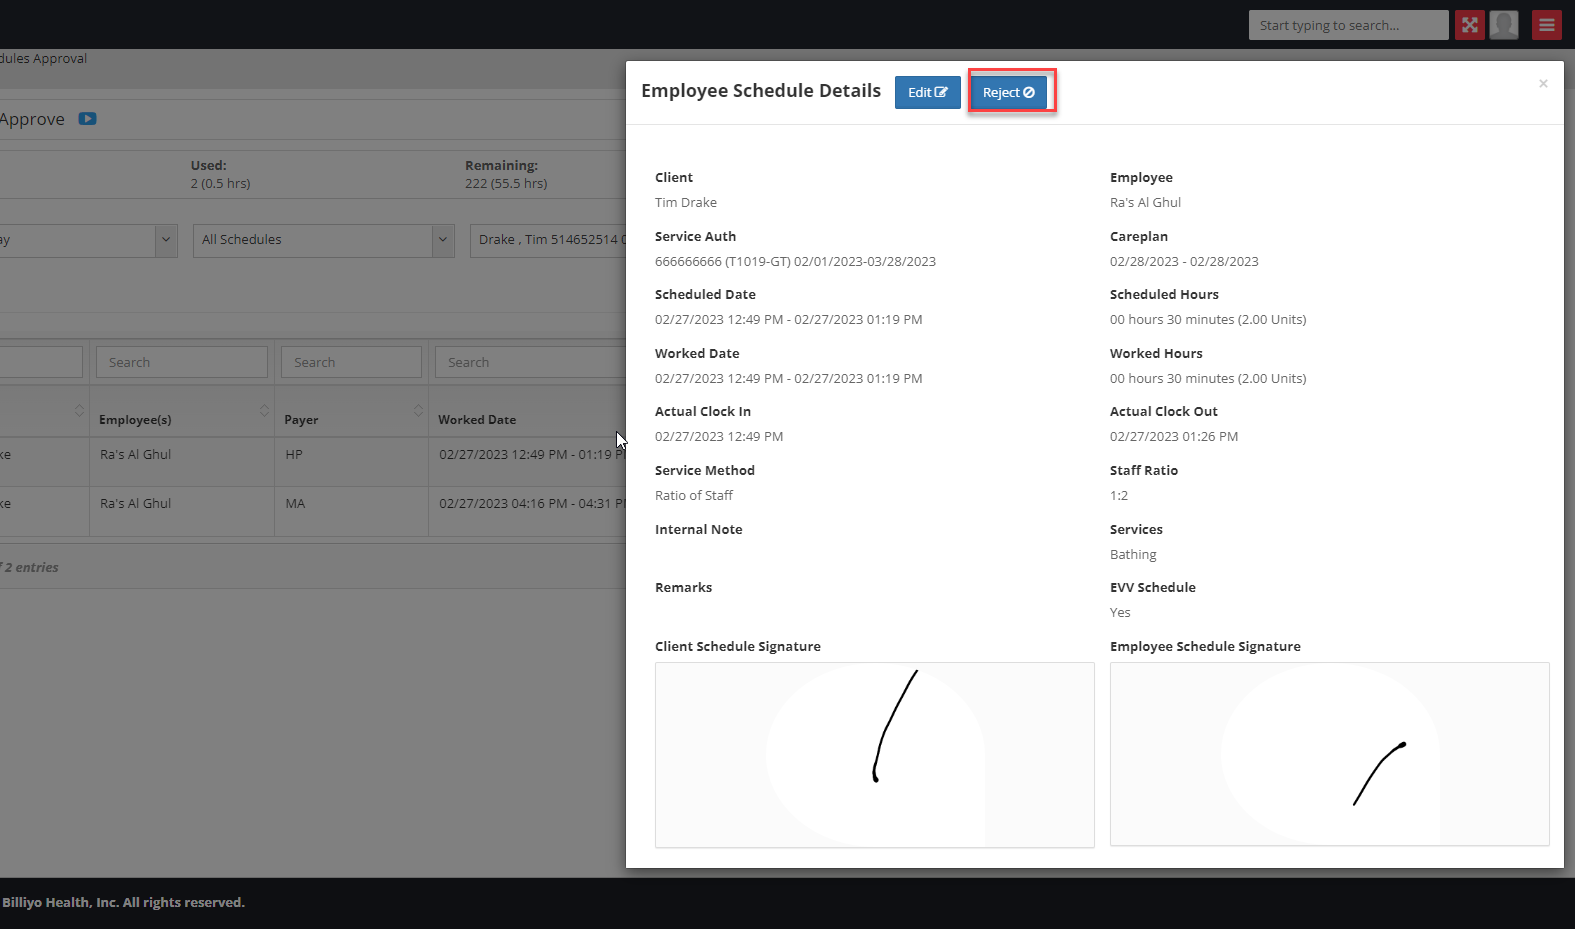
This will send the visit back to your caregiver's app so, the next time the employee is with their patient, they can relock the visit.
If your caregiver cannot see the visit yours sent back to them, remind them to tap on the filter ![]() icon to the top right of the app's home screen to adjust the client and date range they are seeing visits for.
icon to the top right of the app's home screen to adjust the client and date range they are seeing visits for.
Once your visits are correct, its time to turn them back into a timesheet and resend them as claims. To do this, follow the same "Billing" steps that you used to bill your claim in the first place.