Quick Links:
Add an Employee
Create a User Account
Add a Client
Client Caregiver Connection
Adding a Service Authorization
Add an Employee
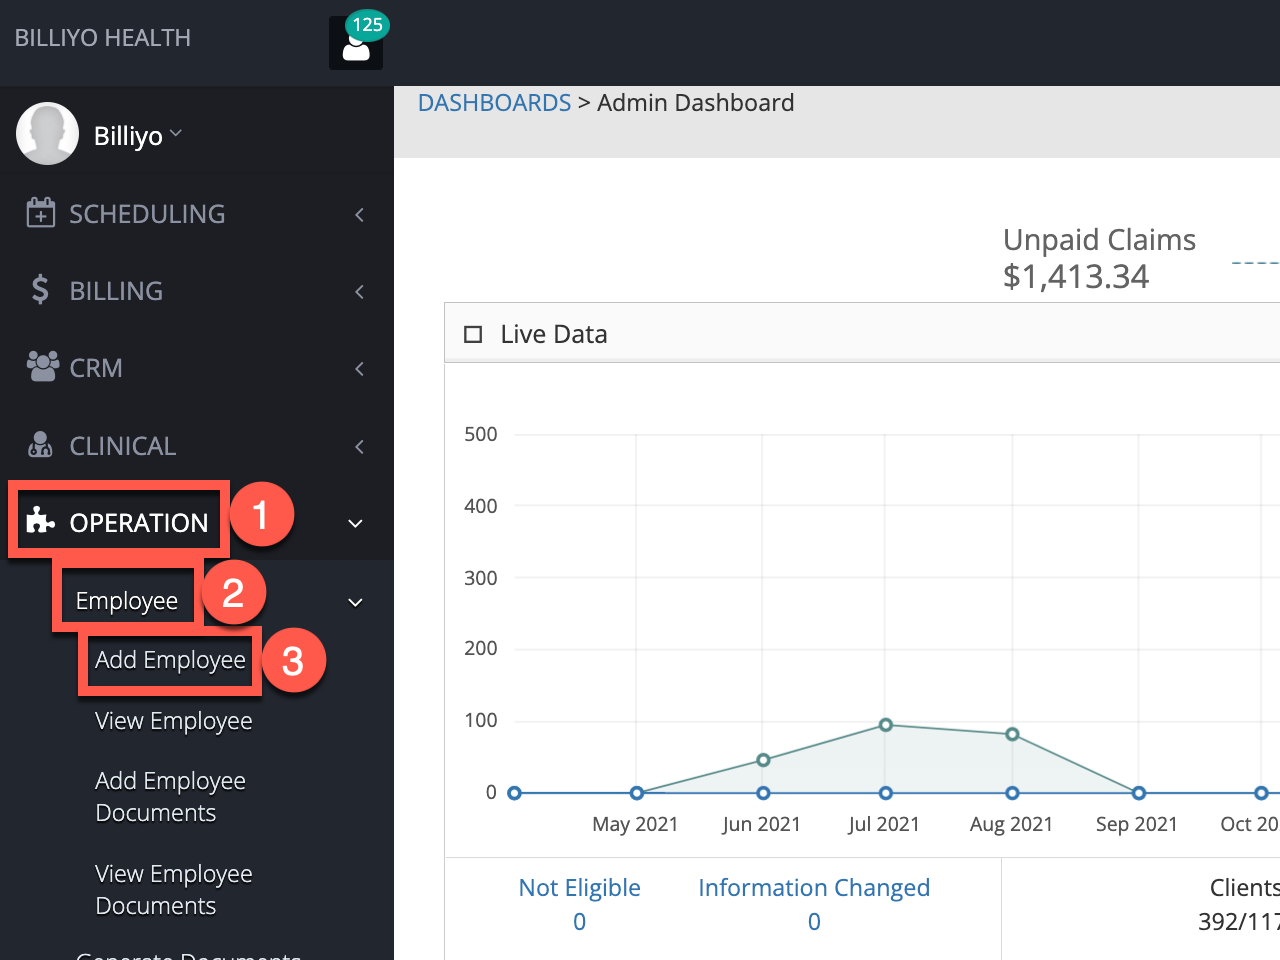
To add an employee, head to Operation > Employee > Add Employee.
While we do recommend filling out all fields that appear, only the following are required:
- Employee Type
- Job Title
- First Name
- Last Name
- Zip Code
- City
- State or Province
- Address
- Telephone Number (no dashes)
- Gender
- Date of Birth
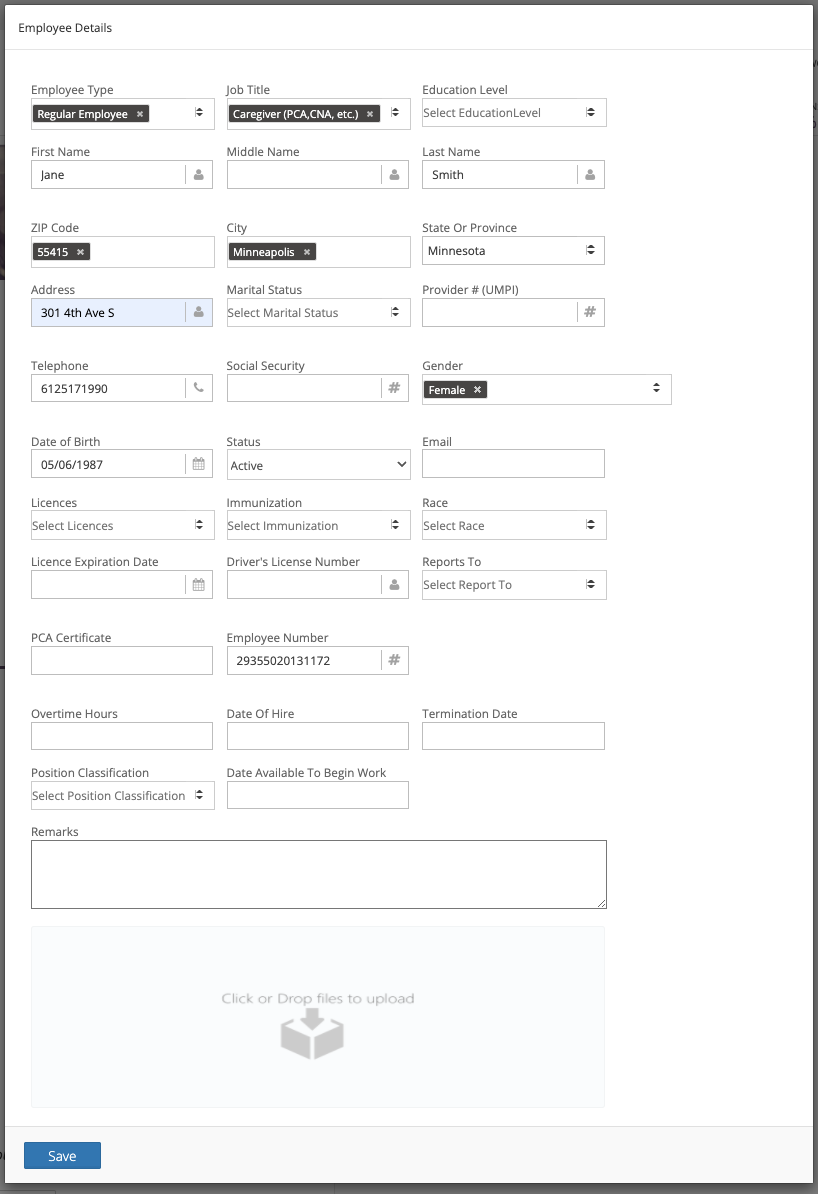
After filling out the employee's information, click on the Save button to add the employee.
For more on adding an employee, along with information on viewing and editing employees, visit our article here.
Create a User Account
Once an employee has been added, a user account can be created for them. To create a user account, head to More > User Account > Add New User Account.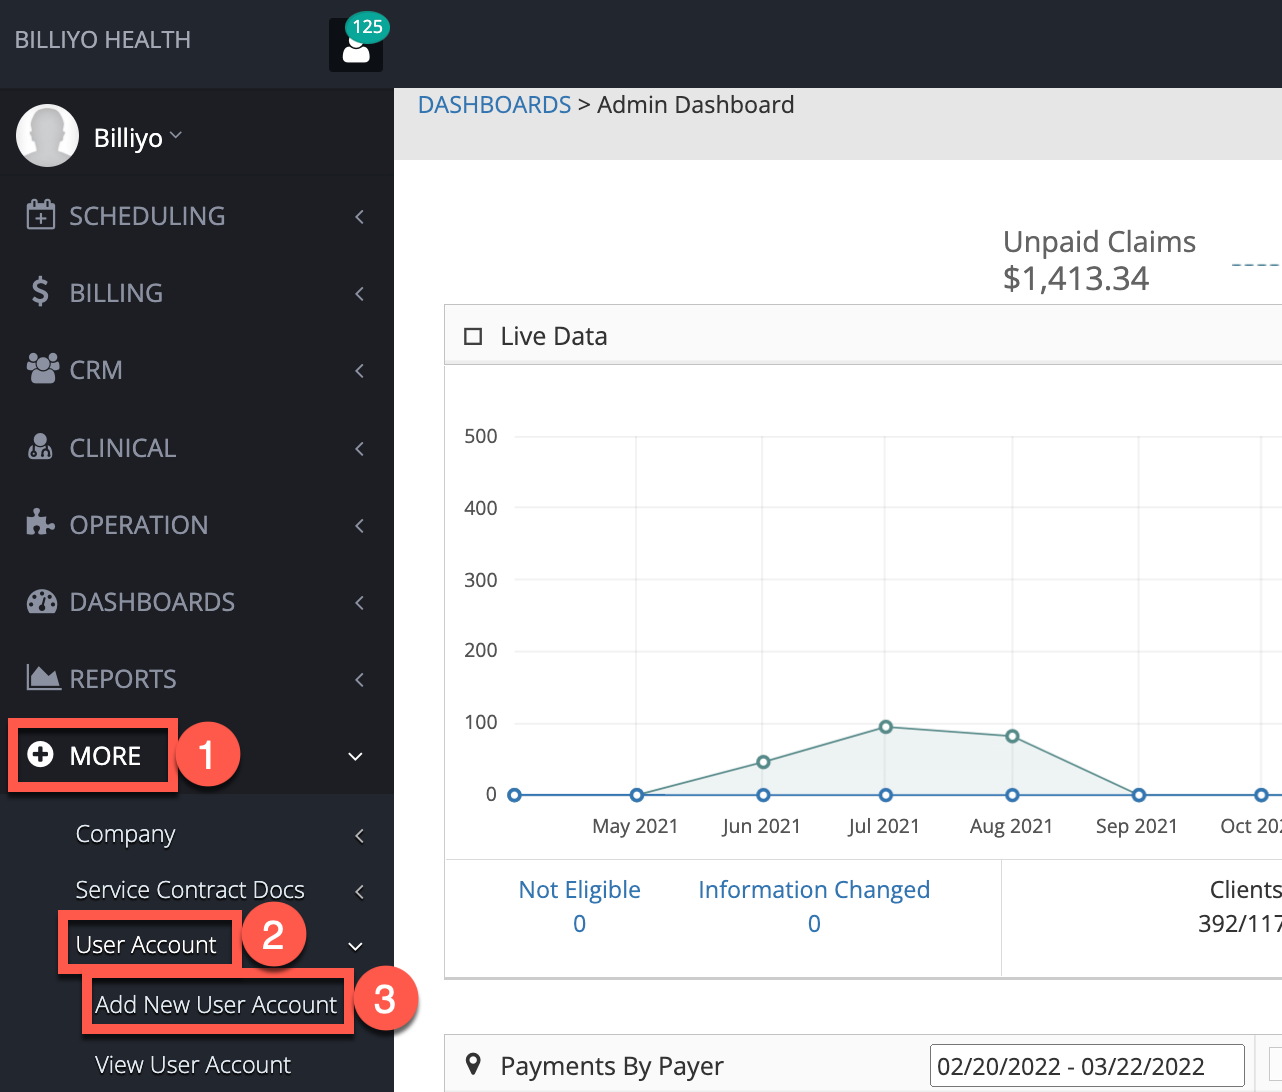
All fields that appear will be required. Make sure to click the Save button to create the user account.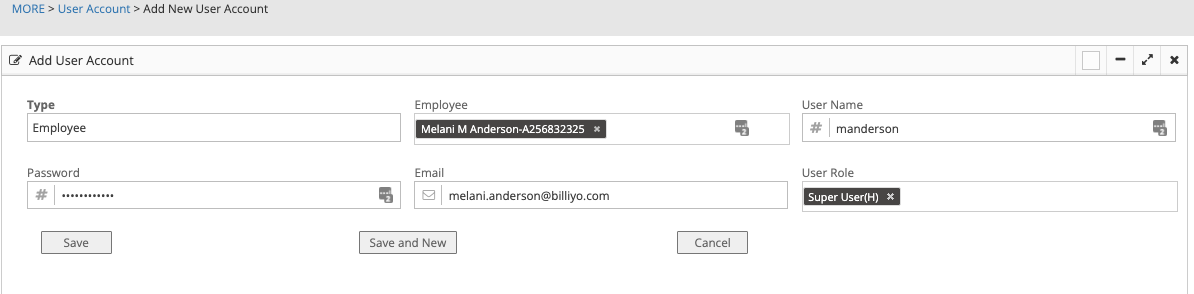
For more on creating a user account, visit our article here.
Add a Client
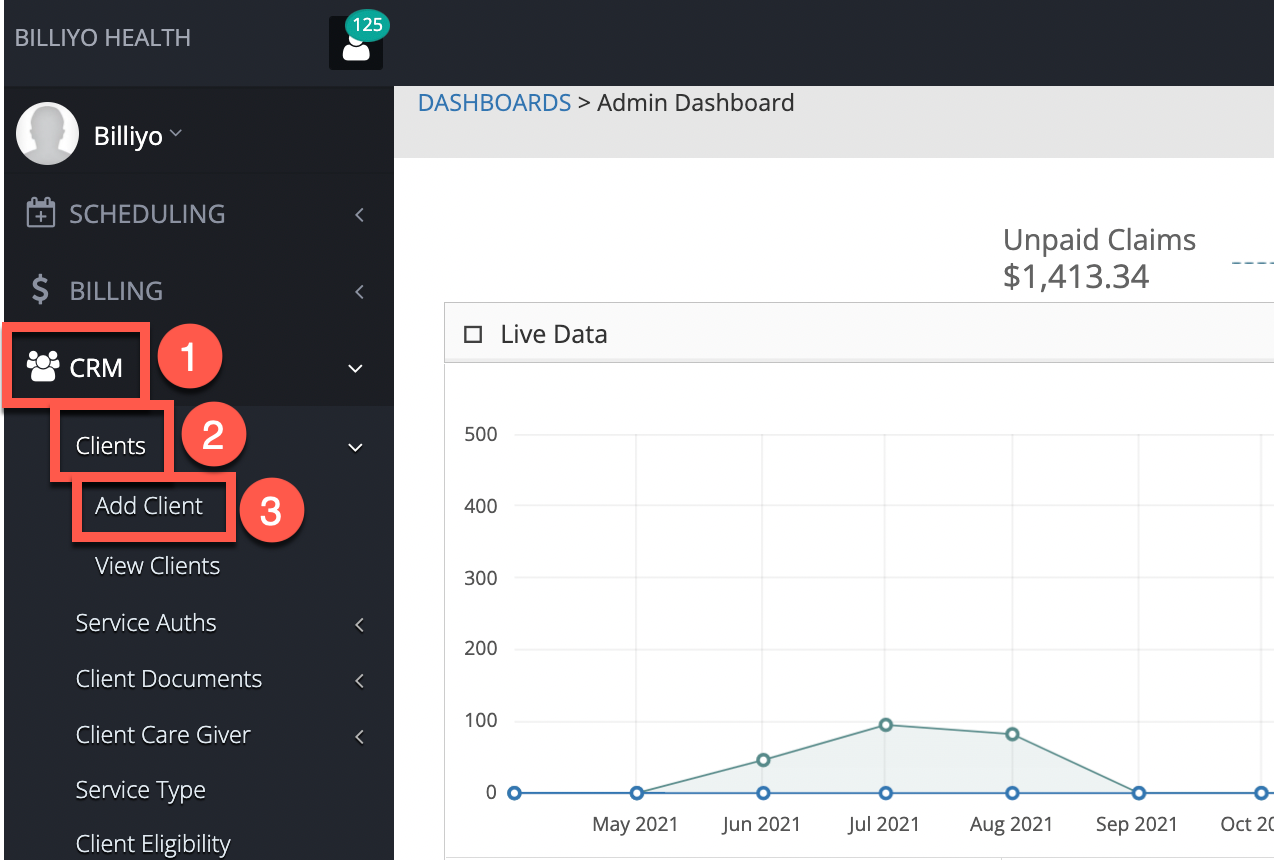
To add a client, head to CRM > Clients > Add Client.
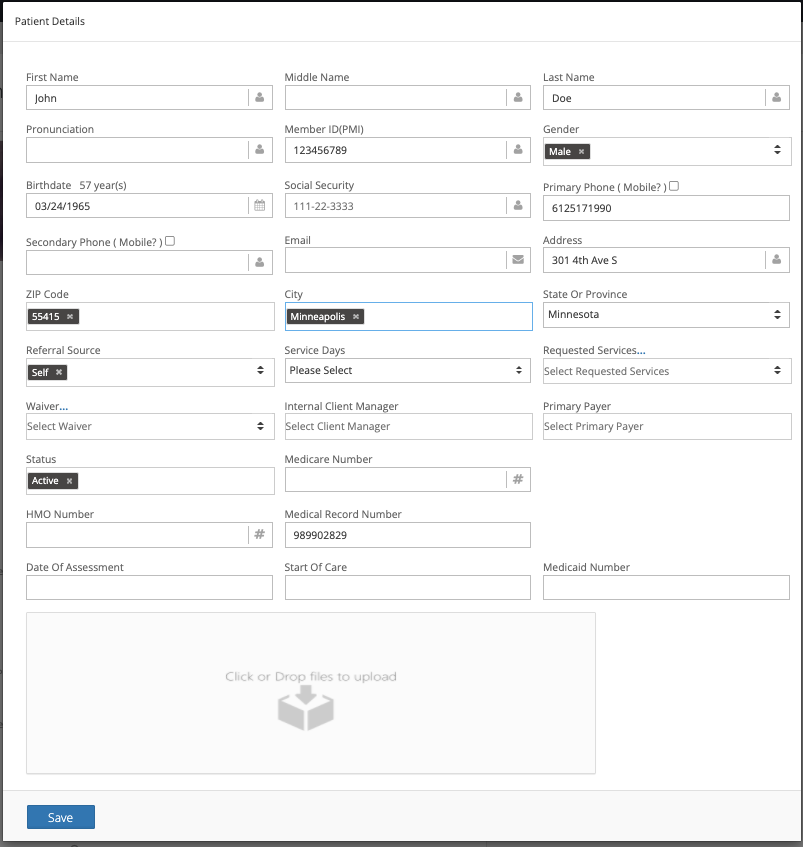
Just as with employees, we do recommend filling out all the fields that appear. That said, only the following fields are required:
- First Name
- Last Name
- Member ID (PMI)
- Gender
- Birthdate
- Primary Phone (no dashes)
- Address
- Zip Code
- City
- State or Province
- Status
For more on adding a client, along with information on viewing and editing clients, visit our article here.
Client Caregiver Connection
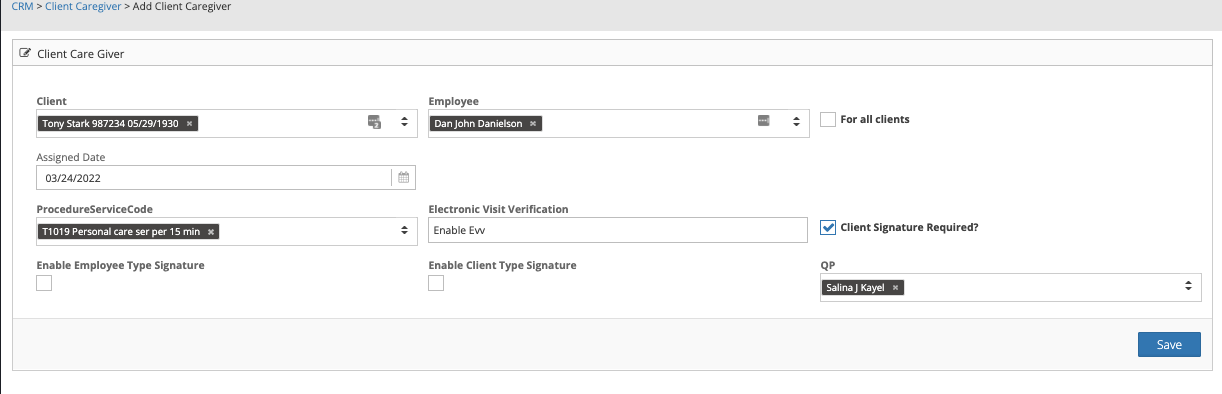
After adding employees and clients, it's time to connect who works together. To do so, head to CRM > Client Care Giver > Add Client Care Giver.
Fill out the fields that show and then click the Save button.
To connect an employee to all clients, select the "For all clients" checkbox
For more about the Client Caregiver Connection, check out our article here.
Adding a Service Authorization
Once the connection between employee and client has been made, it's time to add the Service Authorization. To do so, head to CRM > Service Auths > Add/View SA.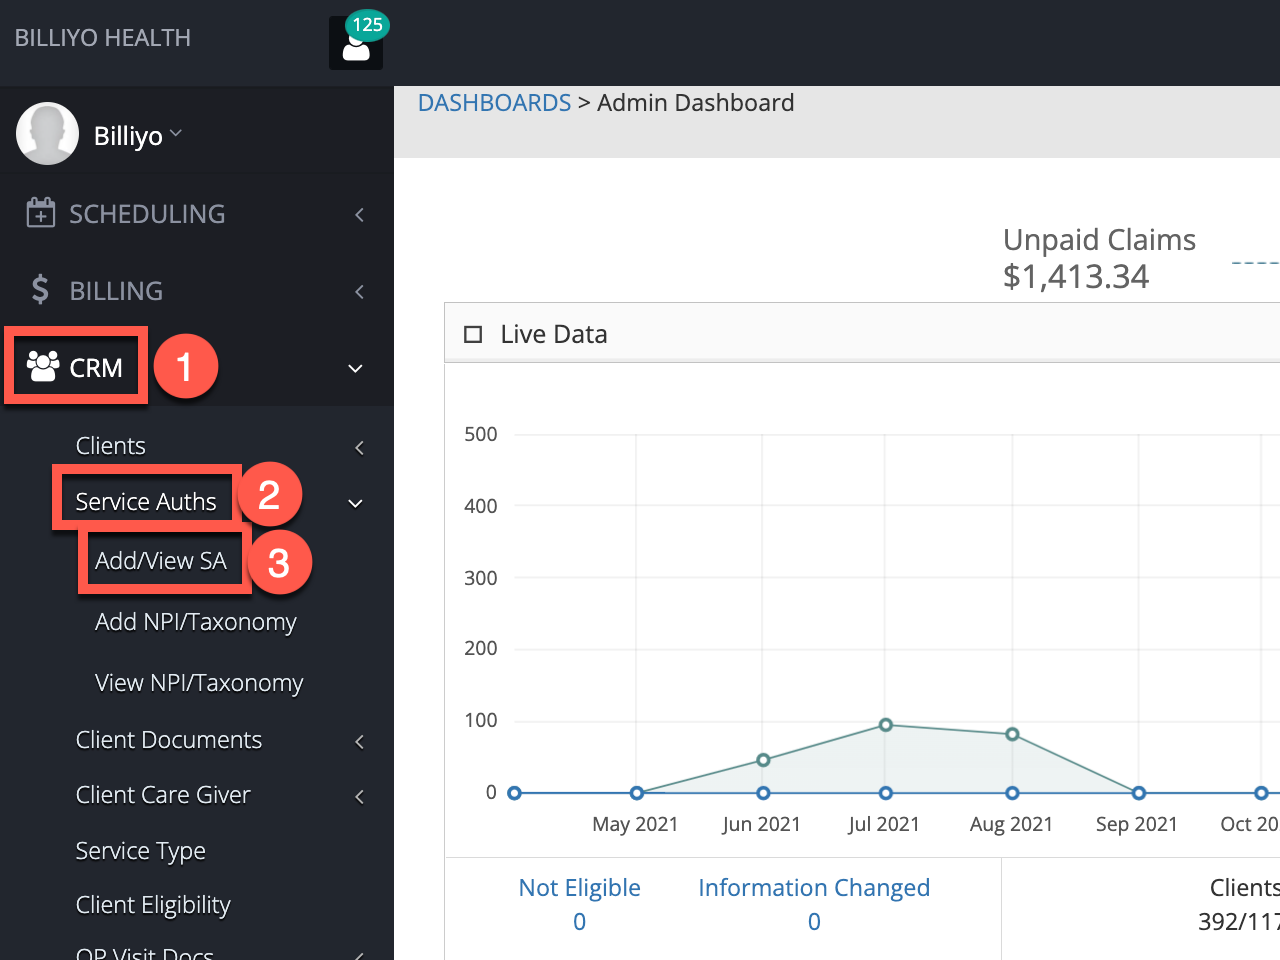
On the next screen there will be two options for adding a service authorization: SA - Manual Entry or SA - Billiyo Automation.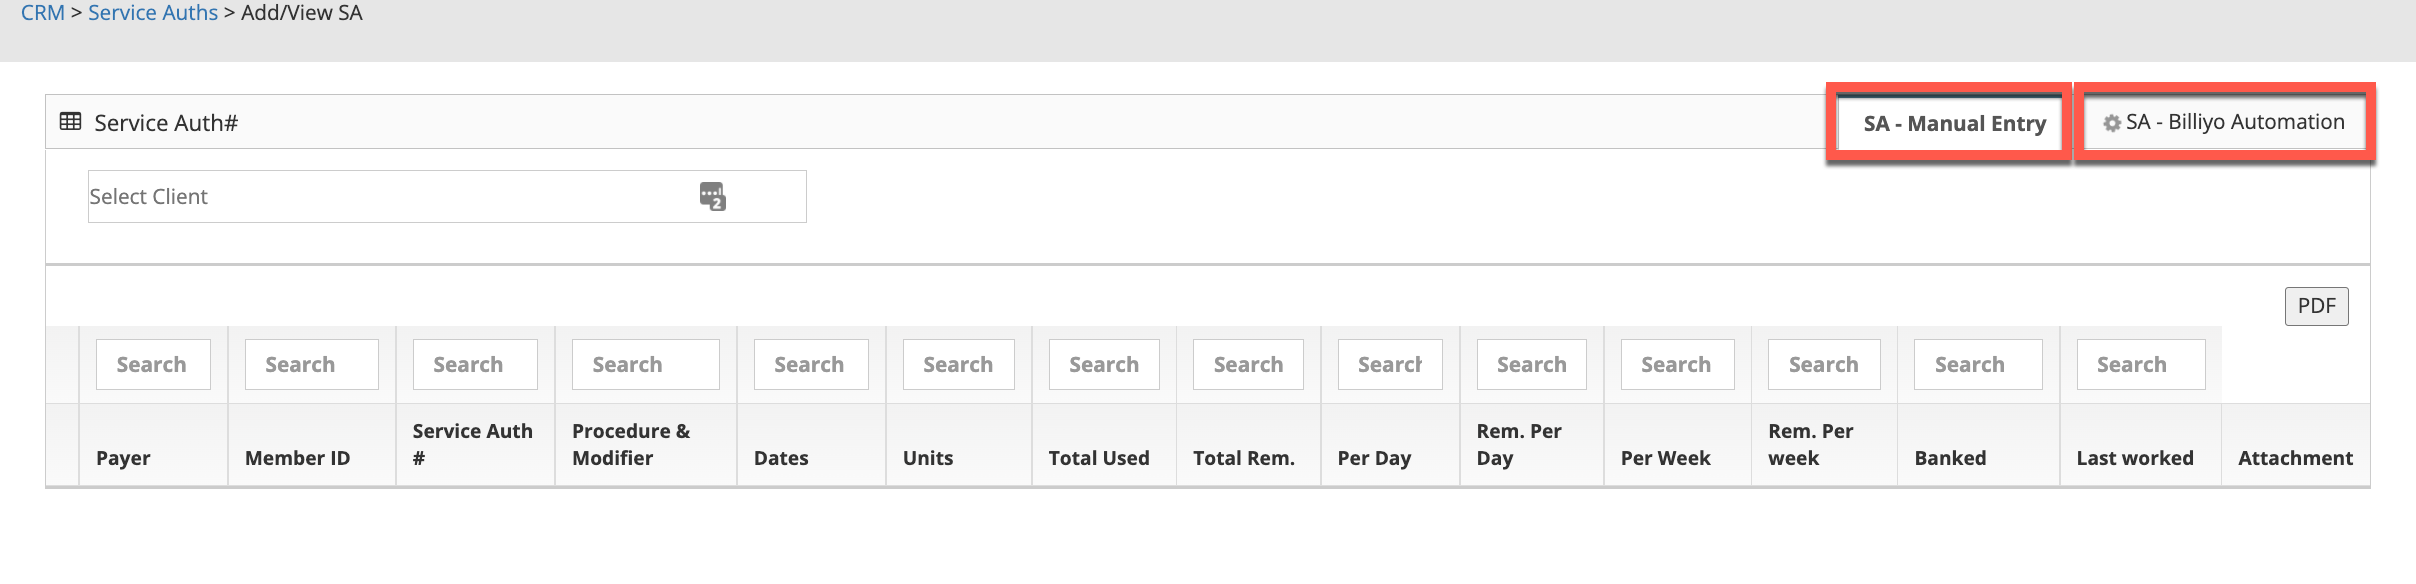 For SA - Billiyo Automation, select the client and then add the service authorization PDF from your device.
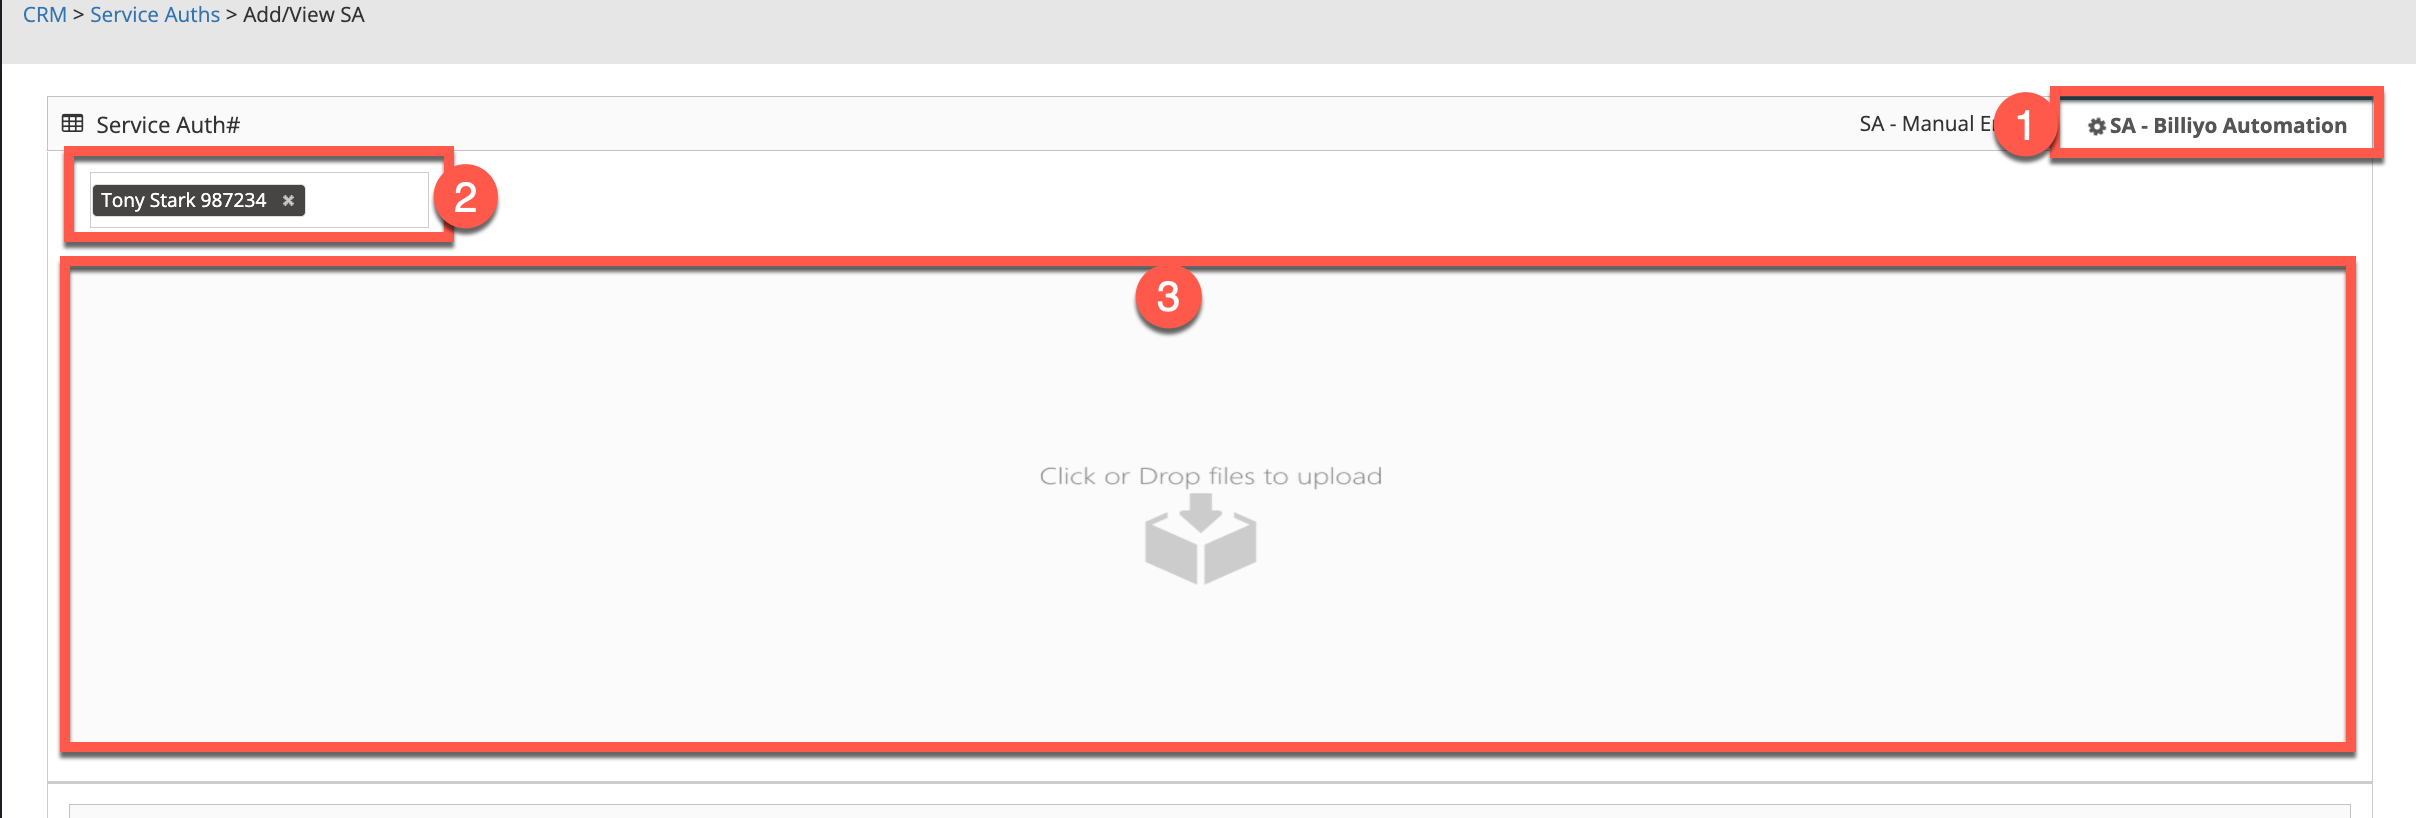
Review the information that appears below to verify that it is correct and then click on the Save Service Auth button.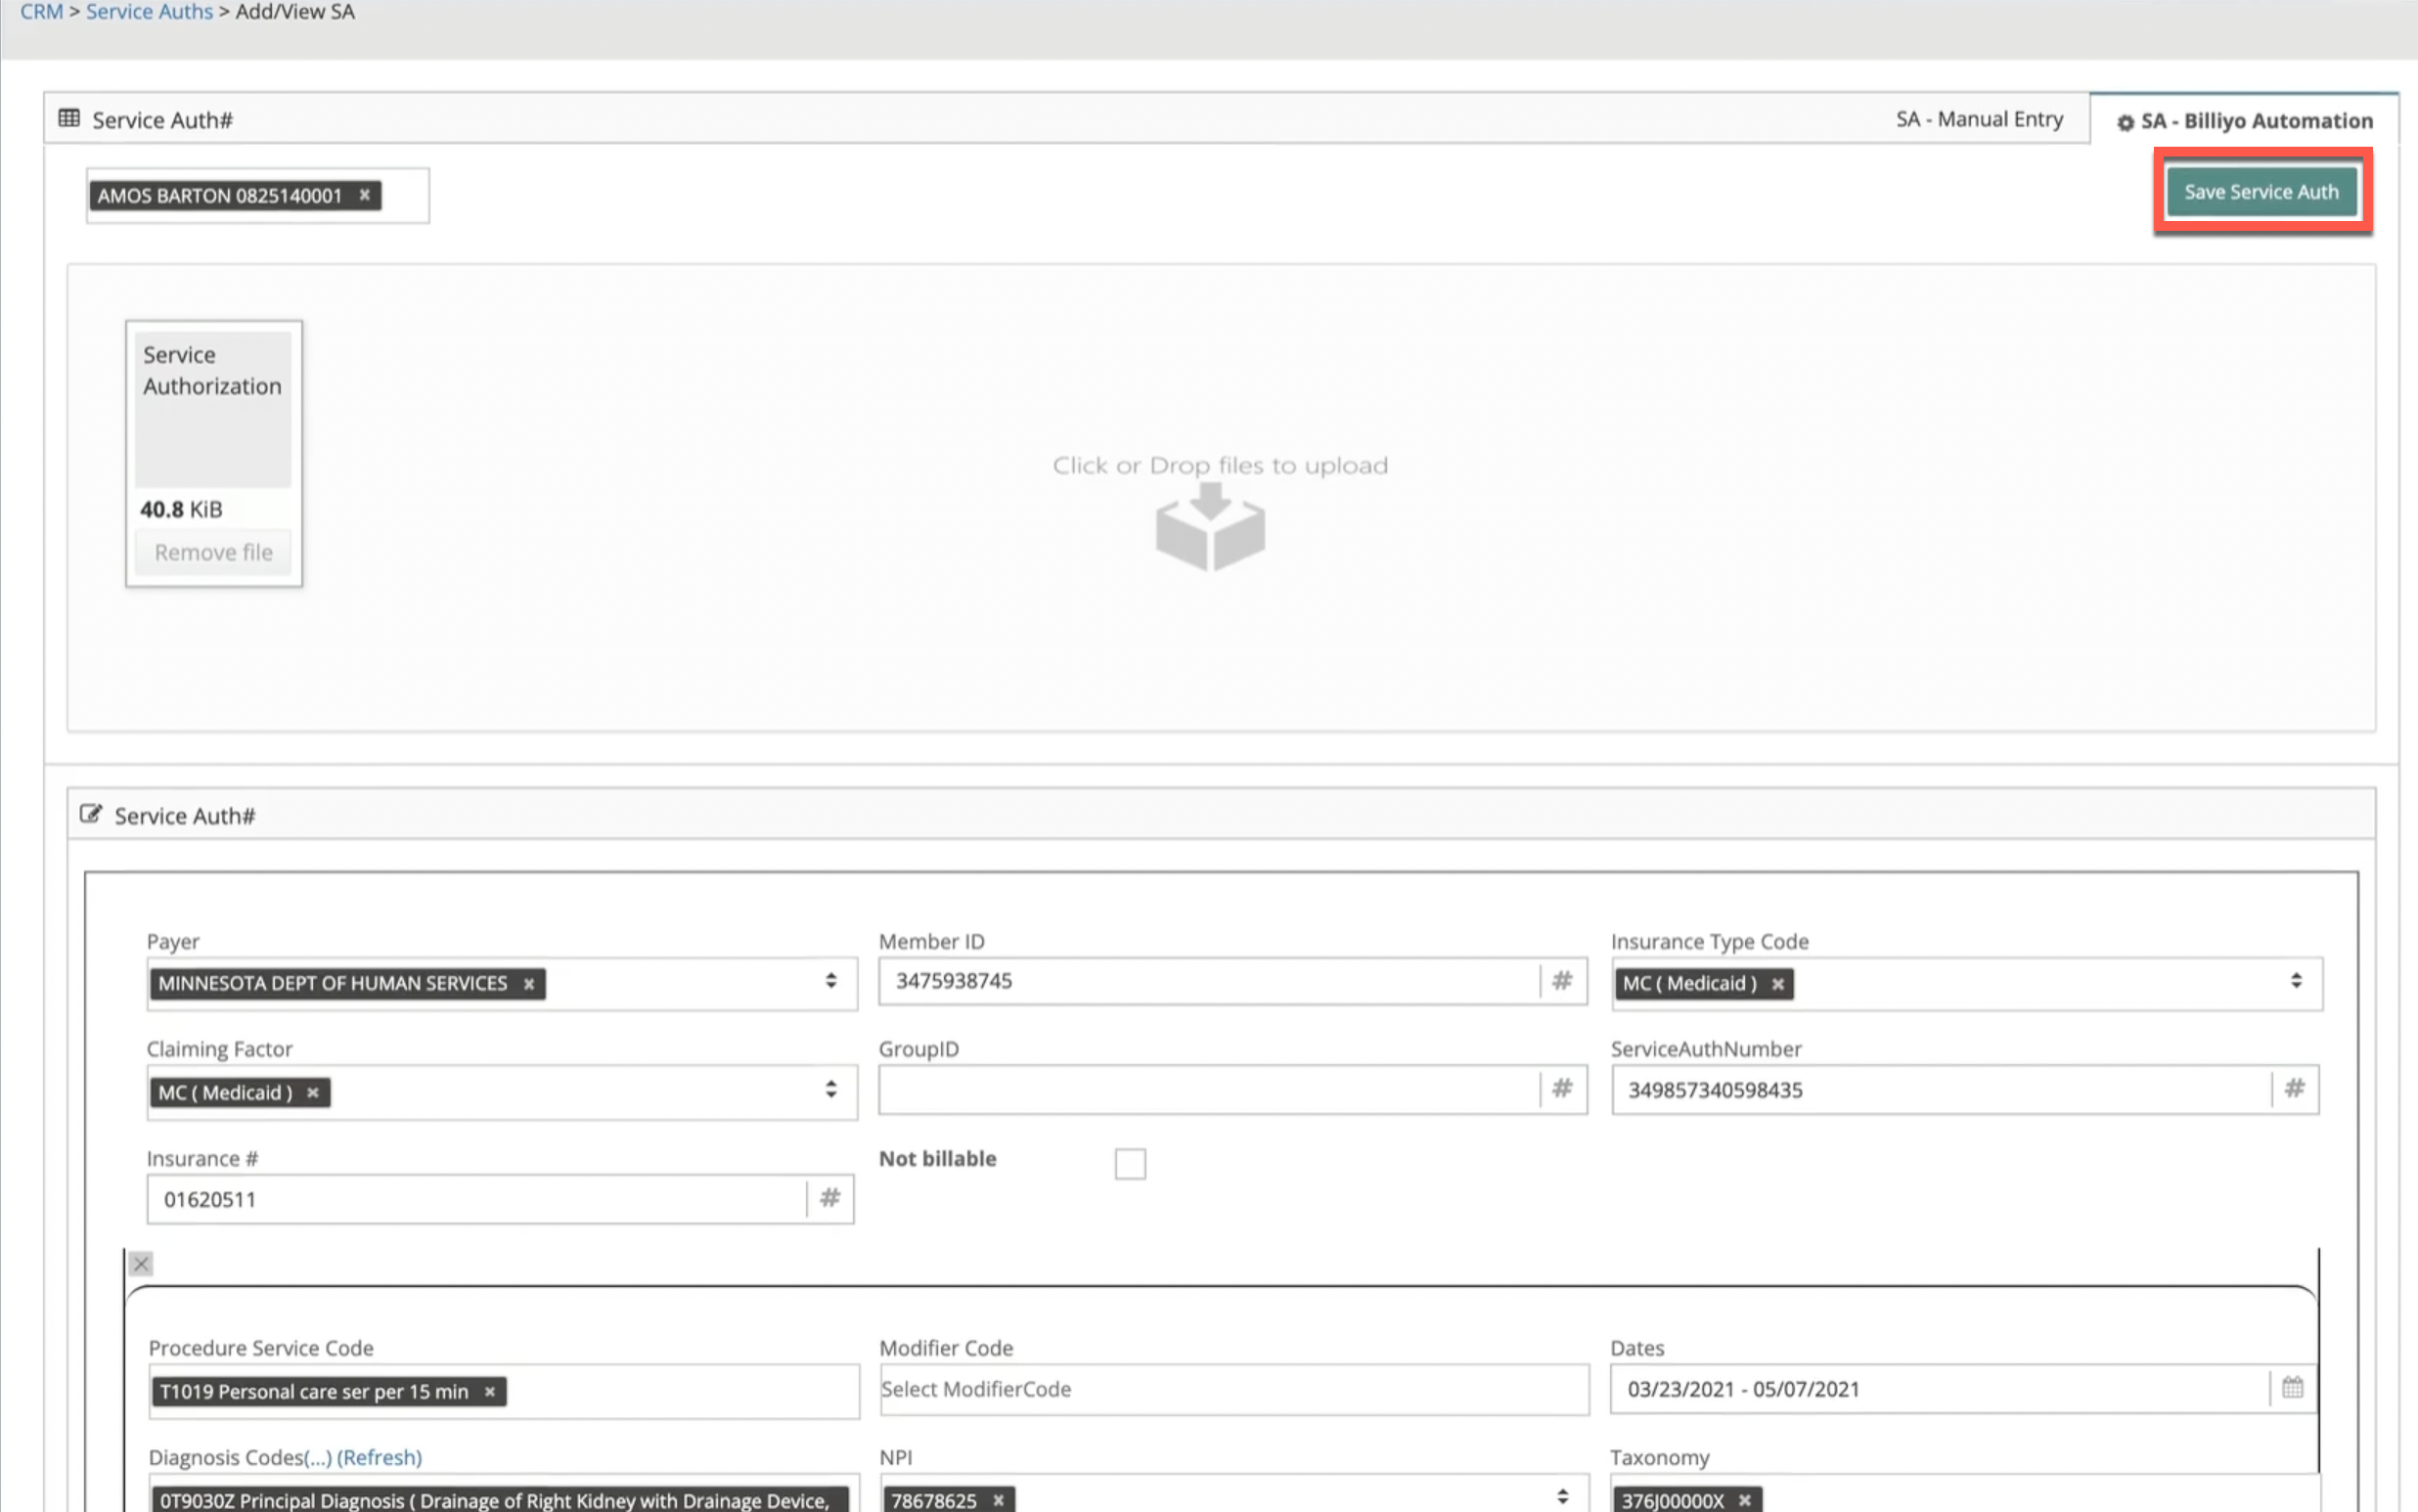
For SA - Manual Entry, select the client and click the Add Service Auth button. 
If there are multiple lines in the service authorization, use the Add New Line button at the bottom to add as many lines as needed. After inputting all information, click on the Save Service Auth button.
For more on service authorizations visit our article here.
No real employee or client information was used.