Patient Onboarding
In this article we will discuss adding your patients into Billiyo with the patient onboarding page. Using this page ensures that your patient's dashboard is complete and contains all the information your visits and audits need.
Jump To:
Navigation
Overview
Patient Profile
Contacts
Diagnosis
Payer
Documents
Navigation
Navigate to the patient onboarding page by heading to "CRM > Patient Onboarding"
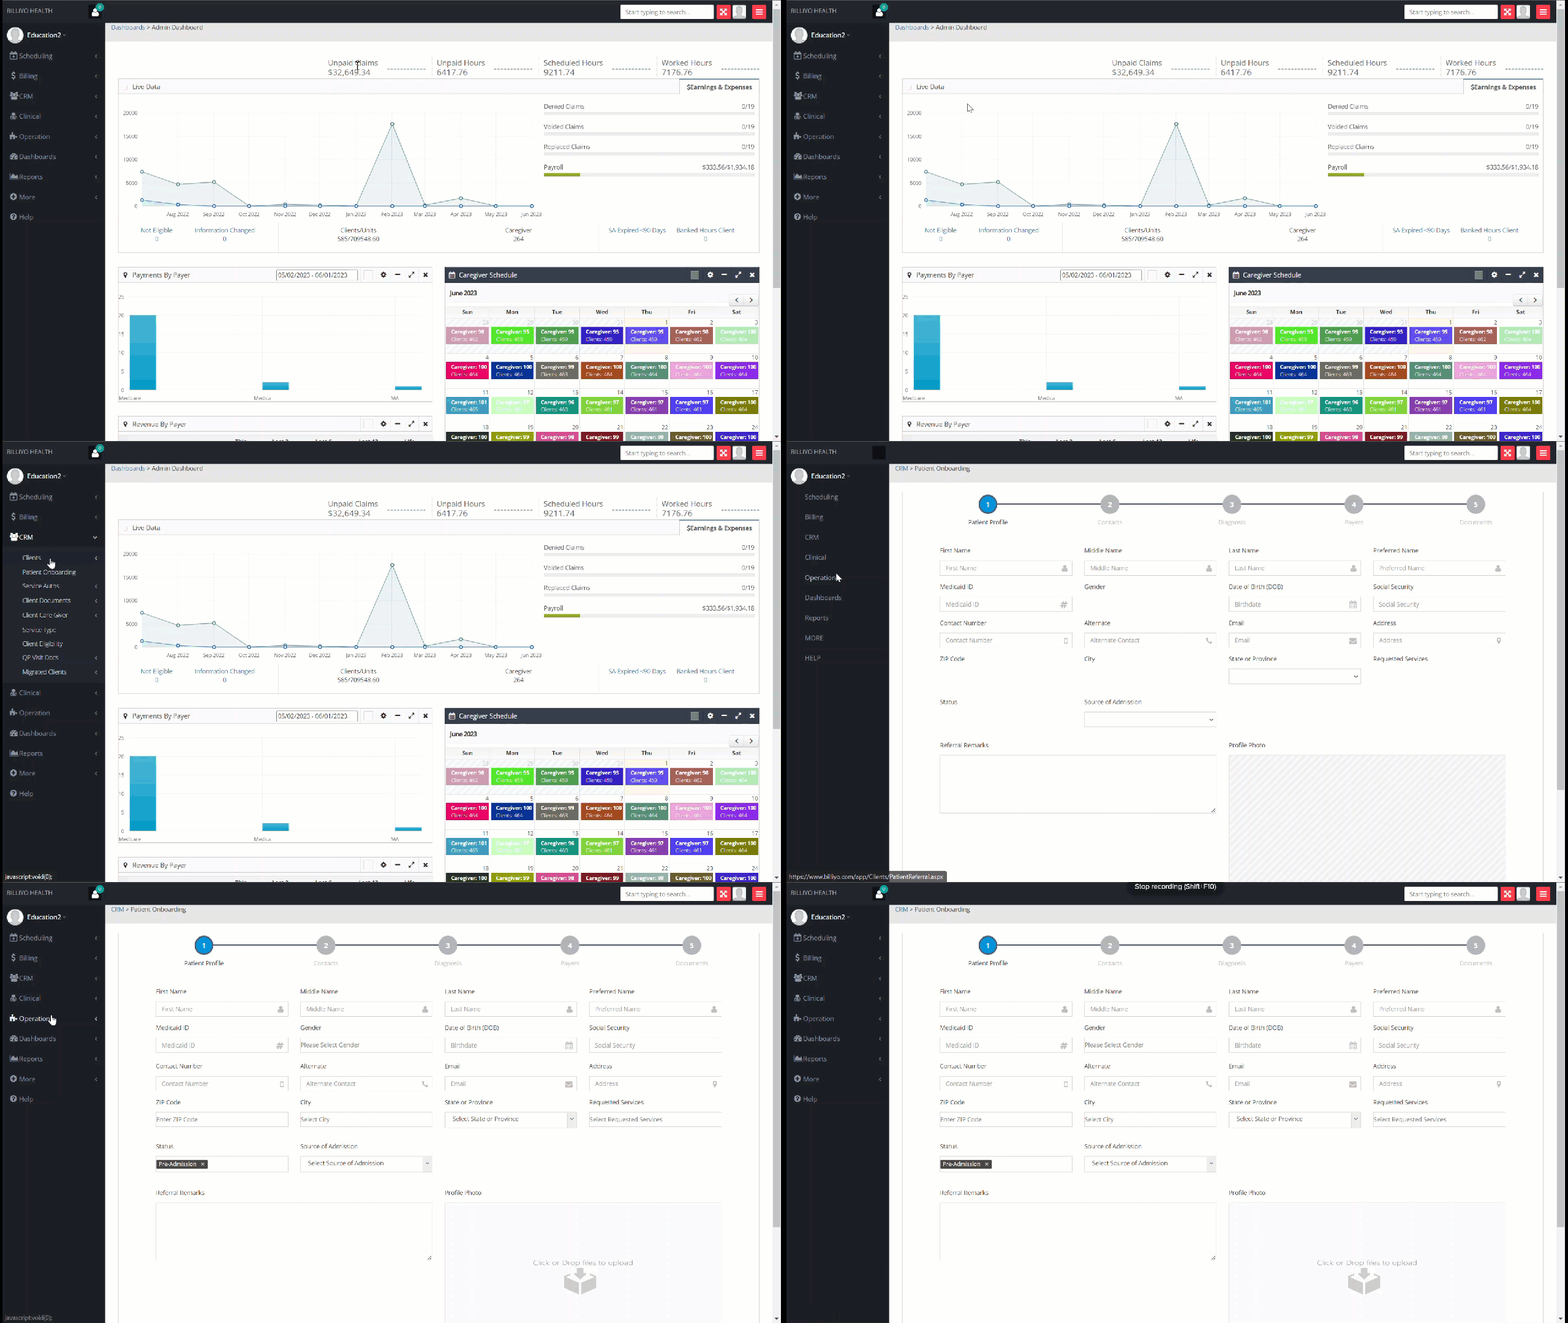
Patient Onboarding Page: Overview
The patient onboarding page is broken up into five section: Patient profile, contacts, diagnosis, payers and documents. In each section you will be given a series of prompts that need to be filled out. The information that you enter into these fields will be saved to the patient's dashboard.

Billiyo uses the information that you enter in the onboarding page to autofill other pages. For example, the documents that you enter in this process can be sent off an eFAX or email from the Patient Dashboard or Client eFAX page. Similarly, the diagnosis that your provide will drive the assessments that your clinicians will later fill out.
Because the information in the dashboard is used by other pages, Billiyo recommends completely filling out the onboarding form and leaving no page blank.
After completing a page scroll down and click on the "Save and Next" button. To return to a previous page, hit "Previous".

Patient Profile
In the first part the of the onboarding page, the patient profile tab, you will be asked to enter your client's basic information: like their name, address and demographics.
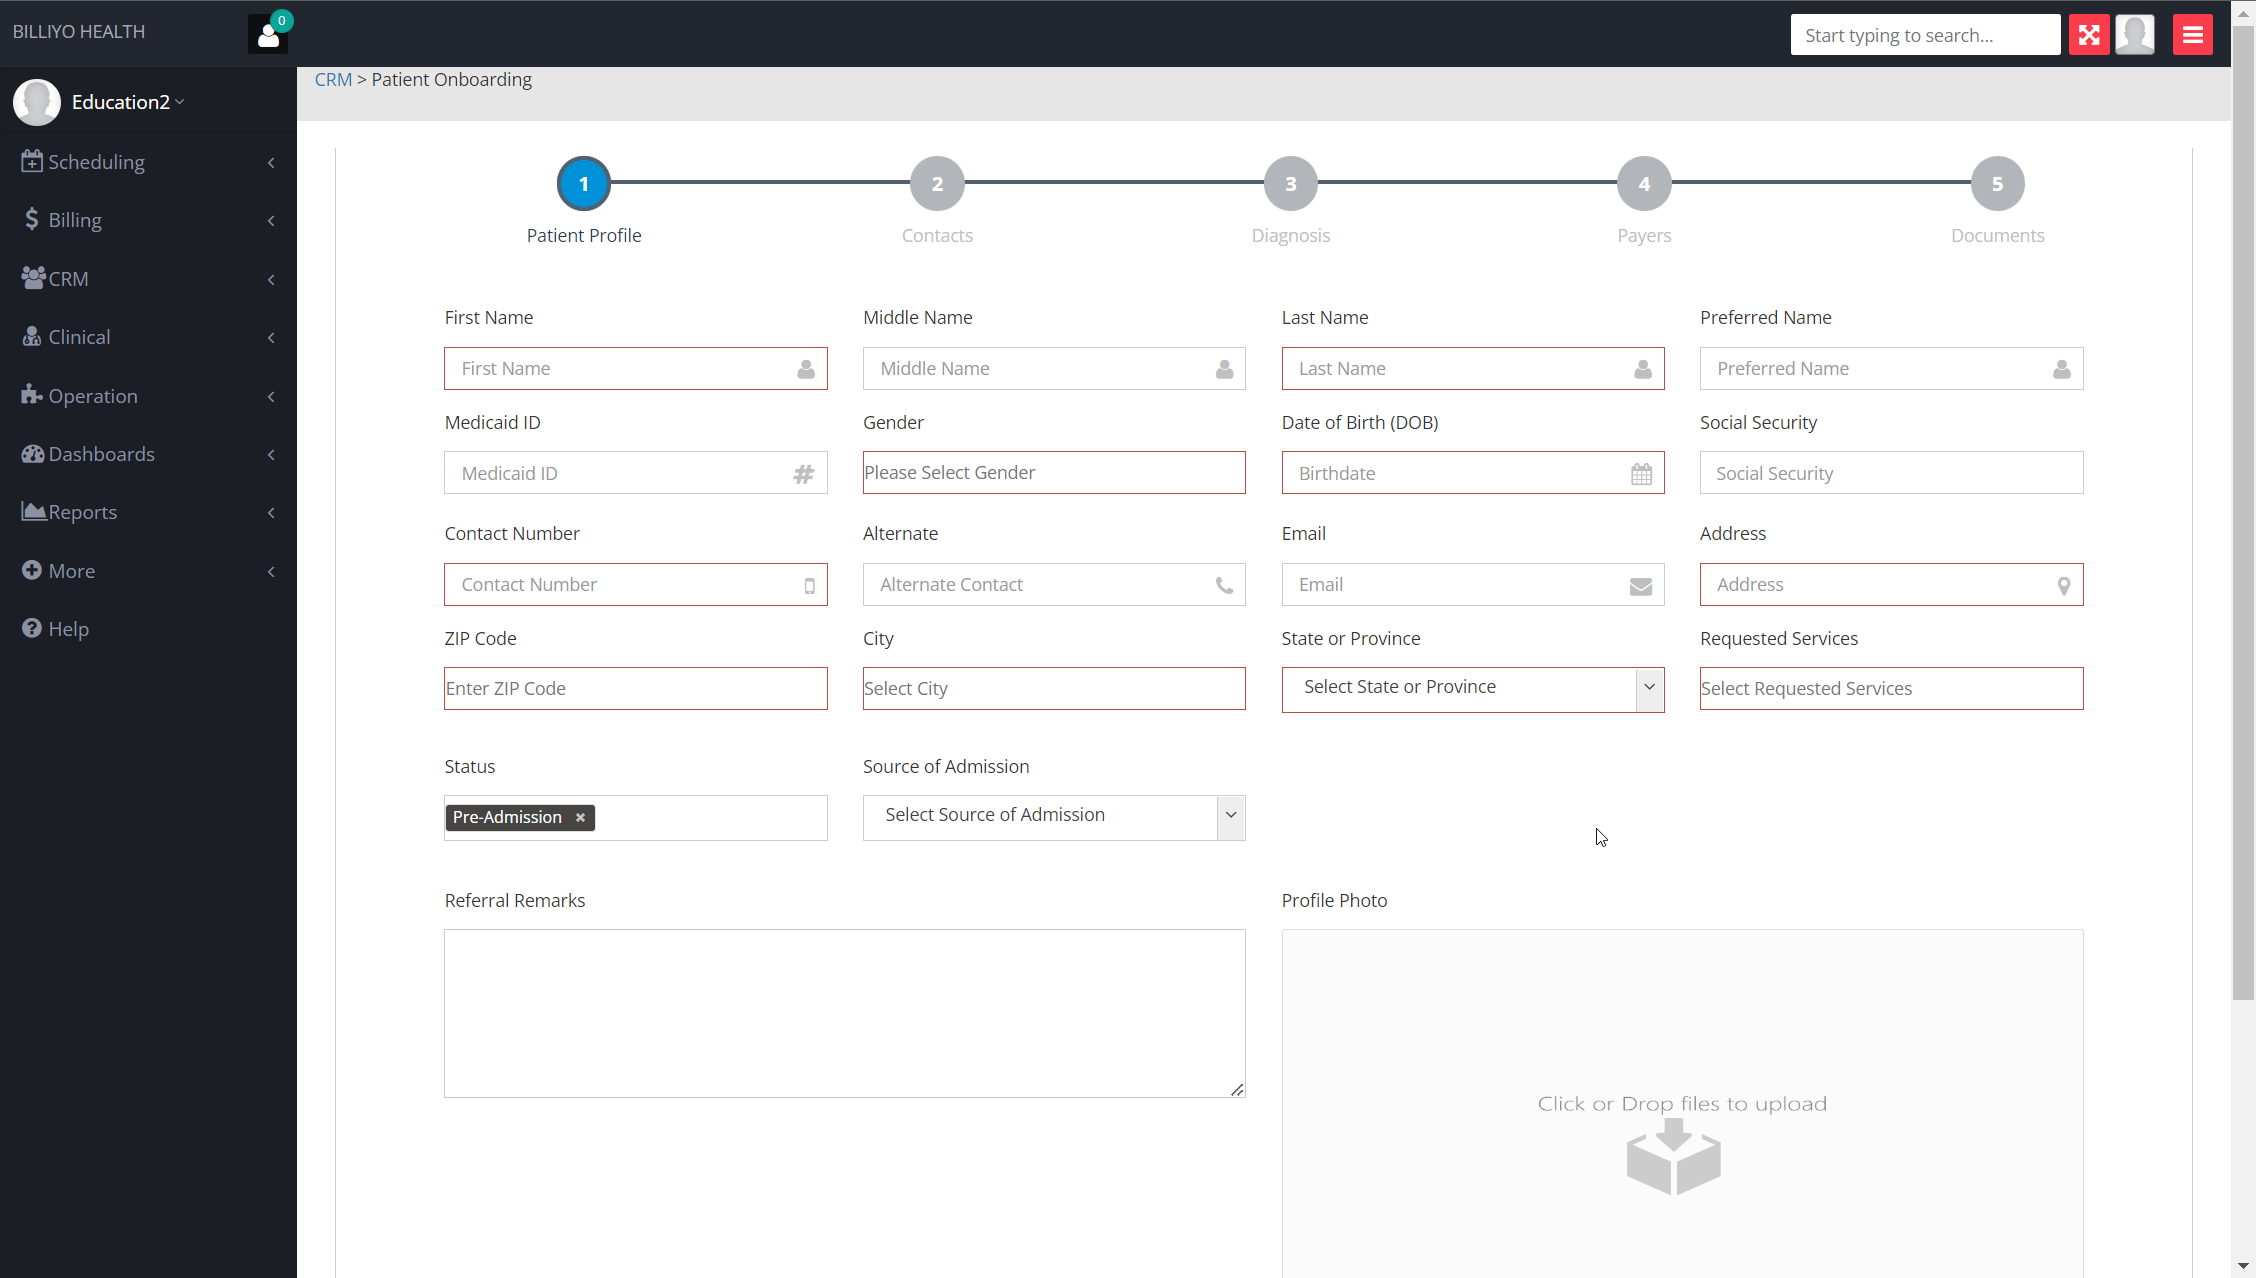
Please complete as much information as you can but the required fields are:
- First Name- as it appears
- Last Name
- Gender- as it appears
- Date of Birth
- Contact Number
- Address
- Zip Code
- City
- State or Province
- Requested Services
Note: By default, when adding a patient, the patients Status will automatically default to the Pre-Admission status. You will have to Edit the patient and mark the status "pending admission" or "active" in order to schedule the SOC assessment. Typically, the Pending admission status is used for Skilled care agency's- Pending Admission will allow SOC assessments and Evaluations to be scheduled. Active will allow all types of services to be scheduled.
Once this page is finished, you can move on to the other tabs clicking "Save & Next" at the bottom of the page.
By completing and saving information in the Patient Profile section you have entered the client into Billiyo and prepared a dashboard for them. The other pages simply add more information their dashboard.
Contacts
In this page we can add the patient's contacts. This includes both their personal contacts (like family members and emergency contacts) and the physician/pharmacists that work with them.

For a Physician Contact, you will be able to begin the search for Physicians in the NPI registry by typing in the first few letters of the Physicians last name, Billiyo will name match and autofill the physicians information for you.
To add a Face to Face Encounter document drag and drop the file into the drop box or upload the file. If no Face to Face Encounter document is dragged in or uploaded at this point, you will still be able to proceed with Patient onboarding and be able to add the Face to Face at a later time.

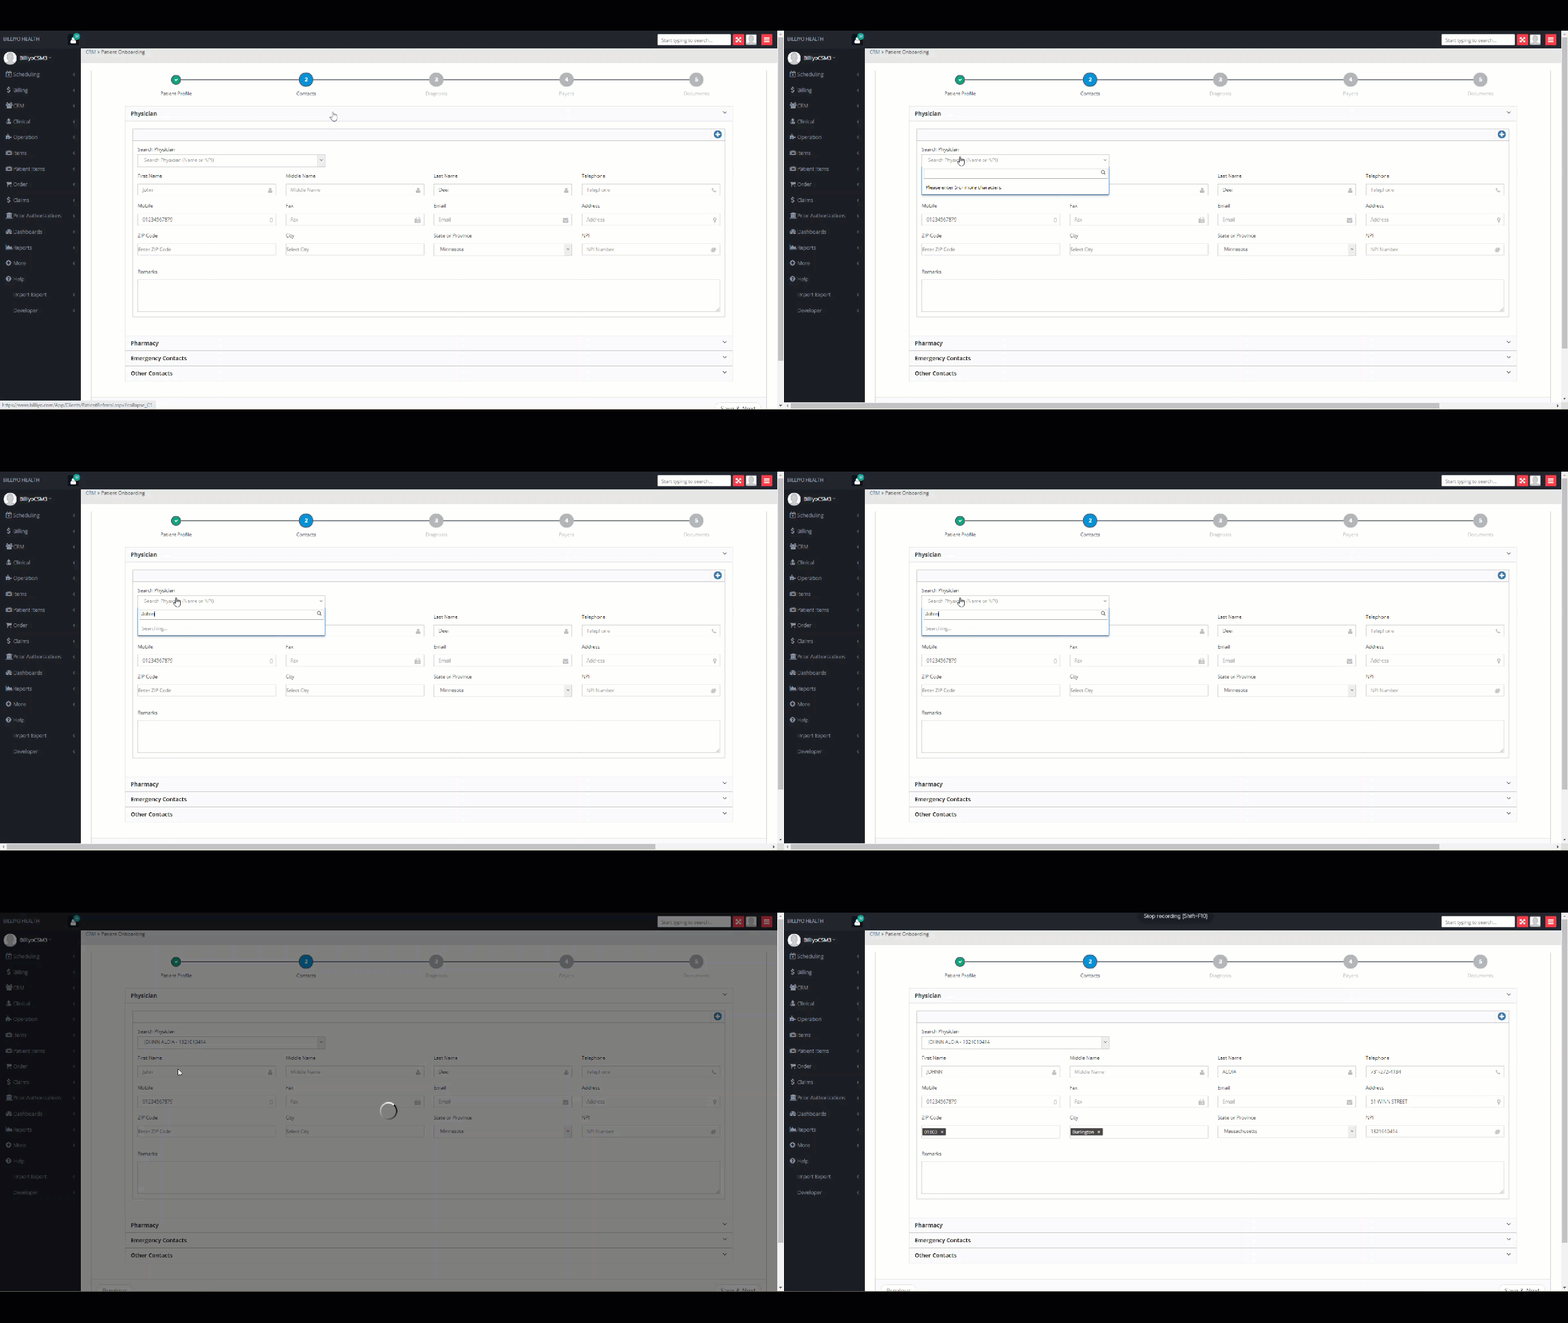
To add more contacts, like a second pharmacist or another emergency contact, use the blue plus sign.![]() .
.
Diagnosis
Next enter the patient's diagnosis. Simply start typing in their ICD-10 and select the correct diagnosis from the drop down. Then, in the new box that pops up, enter the start date. Finally click add.
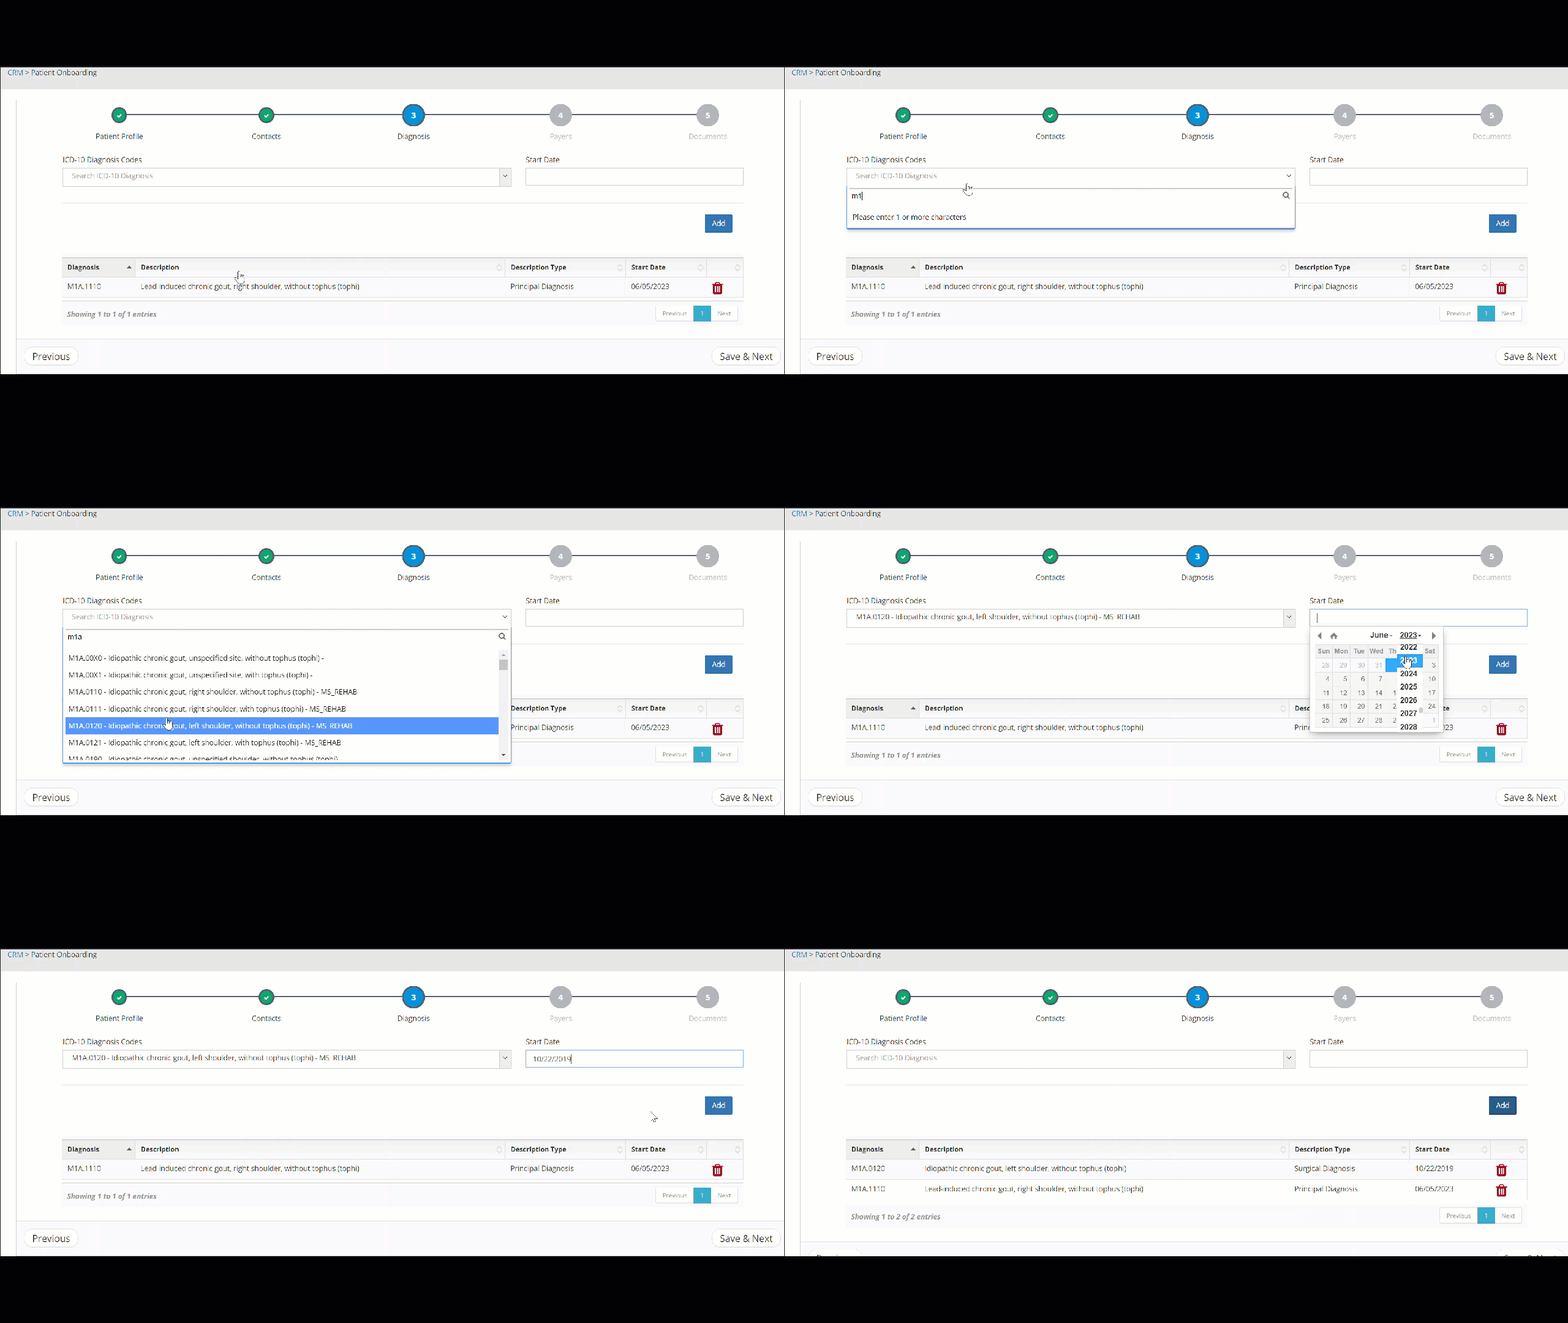
Please keep in mind that the first diagnosis you enter will be the patient's principal diagnosis and any addition diagnosis you add we entered as "Surgical" diagnosis. This information can be edited in the patient dashboard.
Payer
In the next page we can enter your patient's payers. Simply fill out the information in each field.
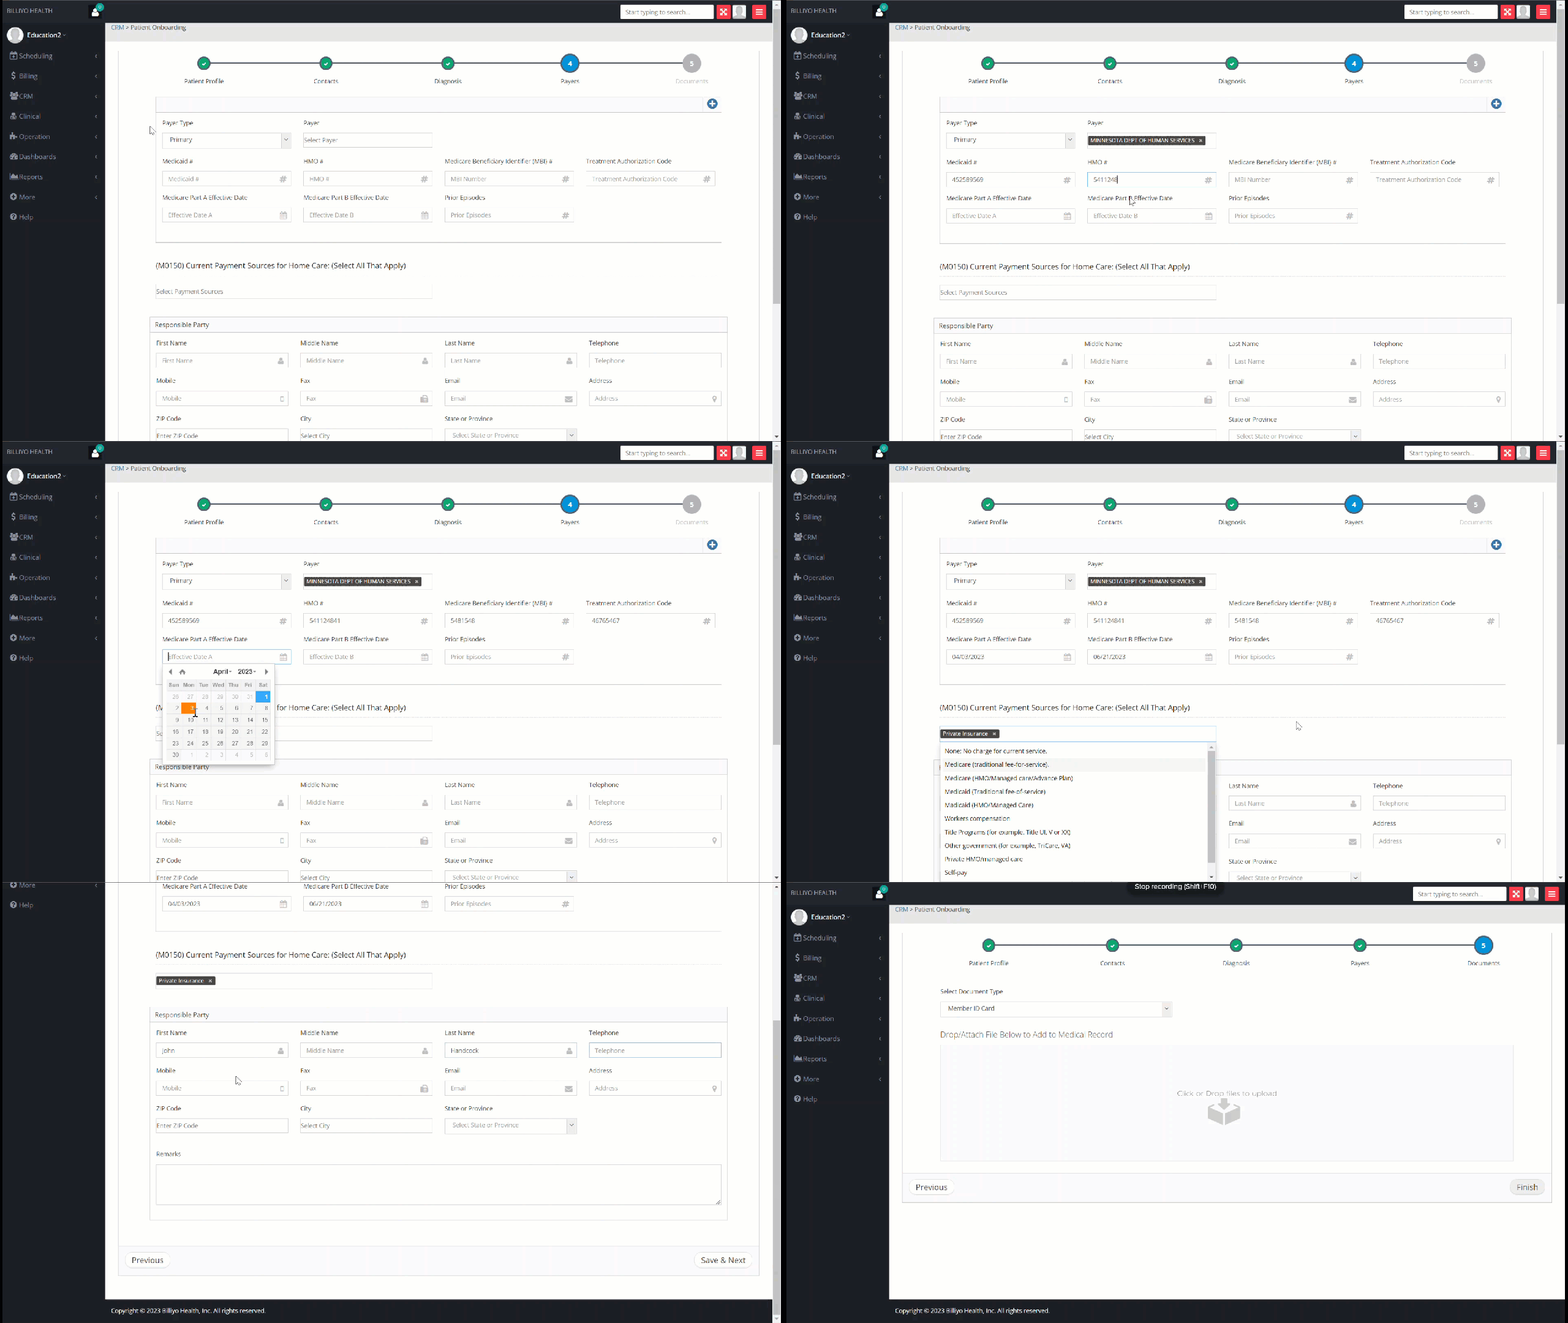
Documents
In the final page you can enter your patient's referral documenters (like their H & P exam, orders or insurance information). First make sure your have a PDF copy of the documents you would like to add. Then click into the "Select the document type" box and chose the form you want. to add.
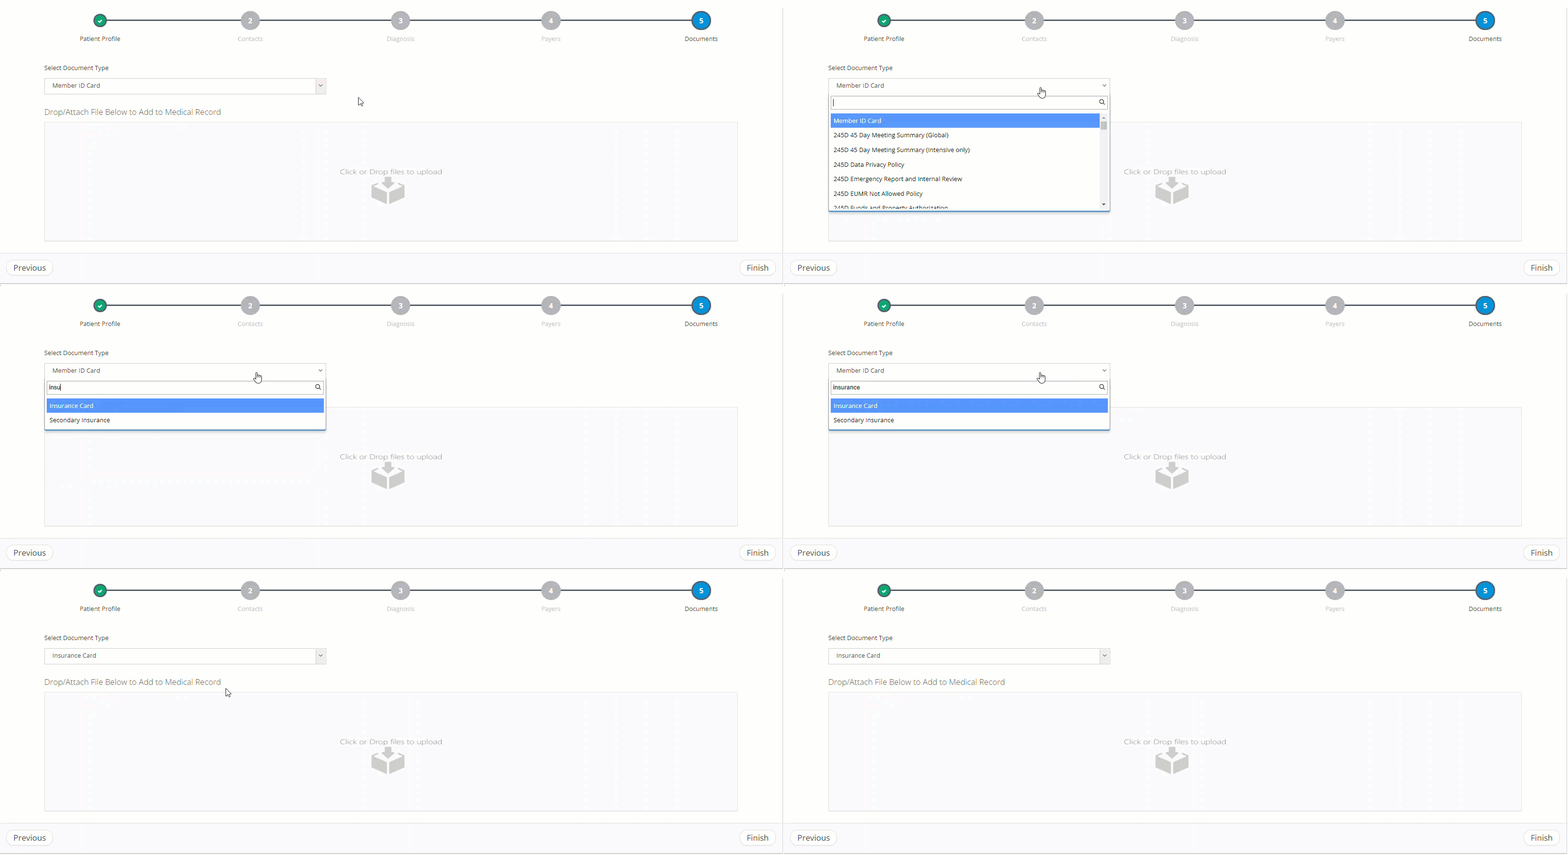
You can now drag your documents into the box below.
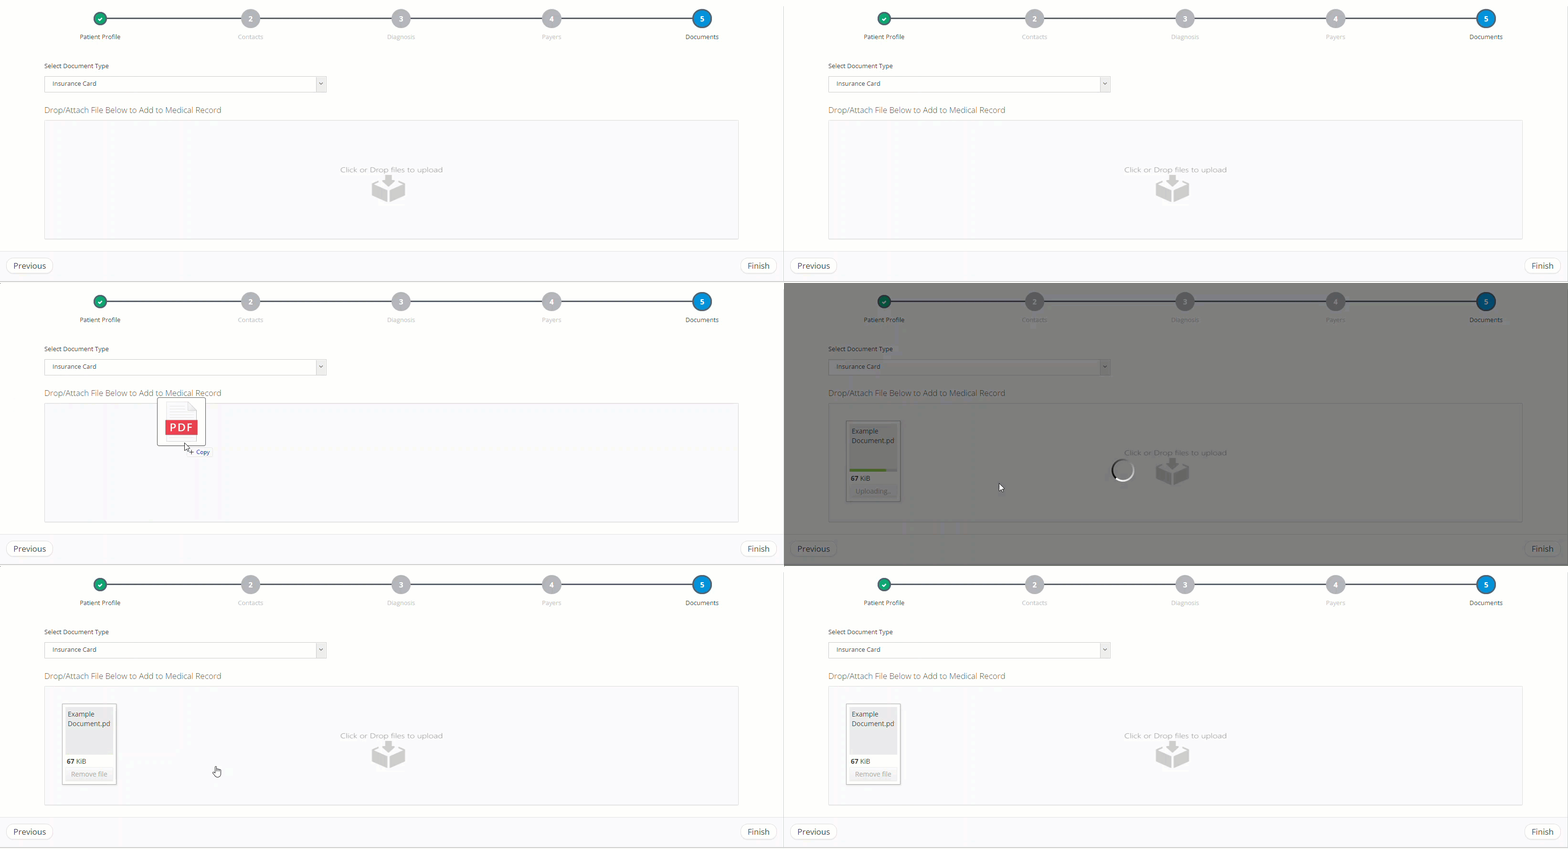
If you cannot find the document type you want, please reach out to your CSM.
You can also add these forms directly to your patient's dashboard, so if you don't have them all now, there is no need to worry.
To learn how to electronically prepare these forms, please refer to this article.
After completing every page the patient onboarding form hit Finish. This will take you to the patient dashboard, where you can review the information you added and enter more as needed.
