- Navigate to Clinical > eMAR
Note: You must first add medications for the client through Client Medications prior to scheduling.
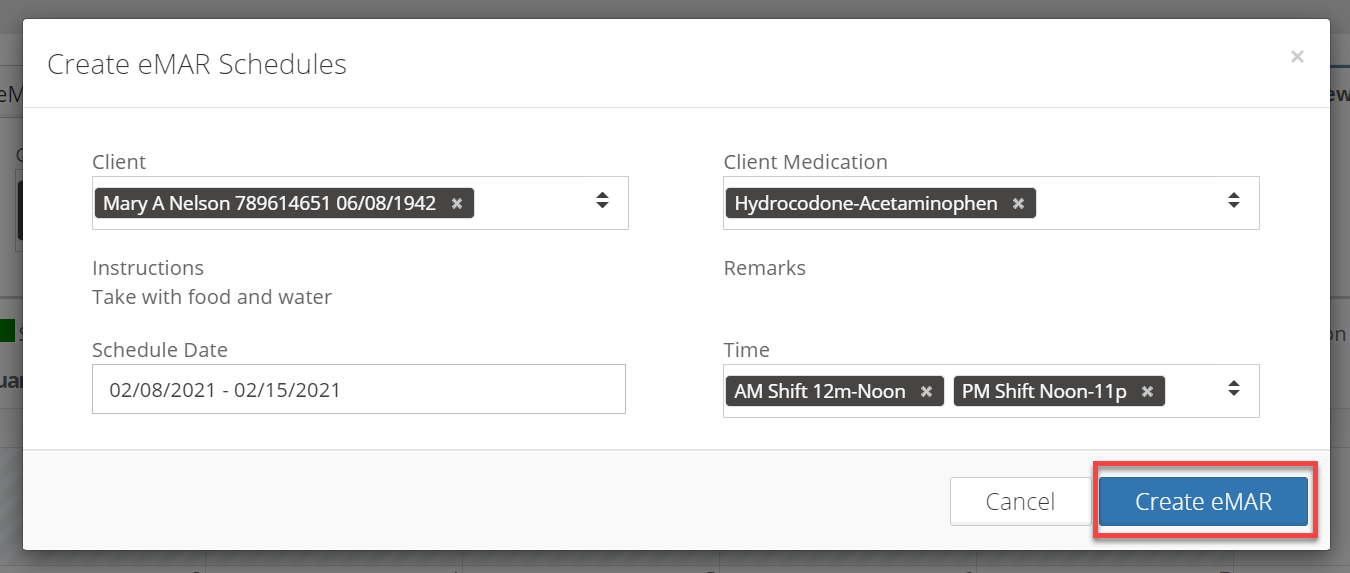
Add eMAR Schedule
- Click the + icon.

- Select the Client, Medication, Schedule Date and Time.
- Click 'Create eMAR'.
Calendar View (Default View)
- Click on the 'Calendar View' tab.

- Select Client and Date Range.
- Click the blue refresh
 icon.
icon. - All scheduled medications for that date range will show. Click on a medication schedule cell to view the following details:
- Client name and medication
- Instructions
- Remarks
- Scheduled date and time
- Status (Scheduled, Taken, Skipped, Refused, Hold Medication, Not Available)
- Attachment drop box (for medications in a status of Taken, Skipped, Refused, Hold Medication, Not Available)
- Medications are color-coded based on administration response:
- Scheduled = Green
- Taken = Olive Green
- Skipped = Orange
- Refused = Red
- Hold Medication = Yellow
- Not Available = Blue
- Administered by Another Person = Purple
Discontinued medications will disappear from the eMAR schedule.

-
-
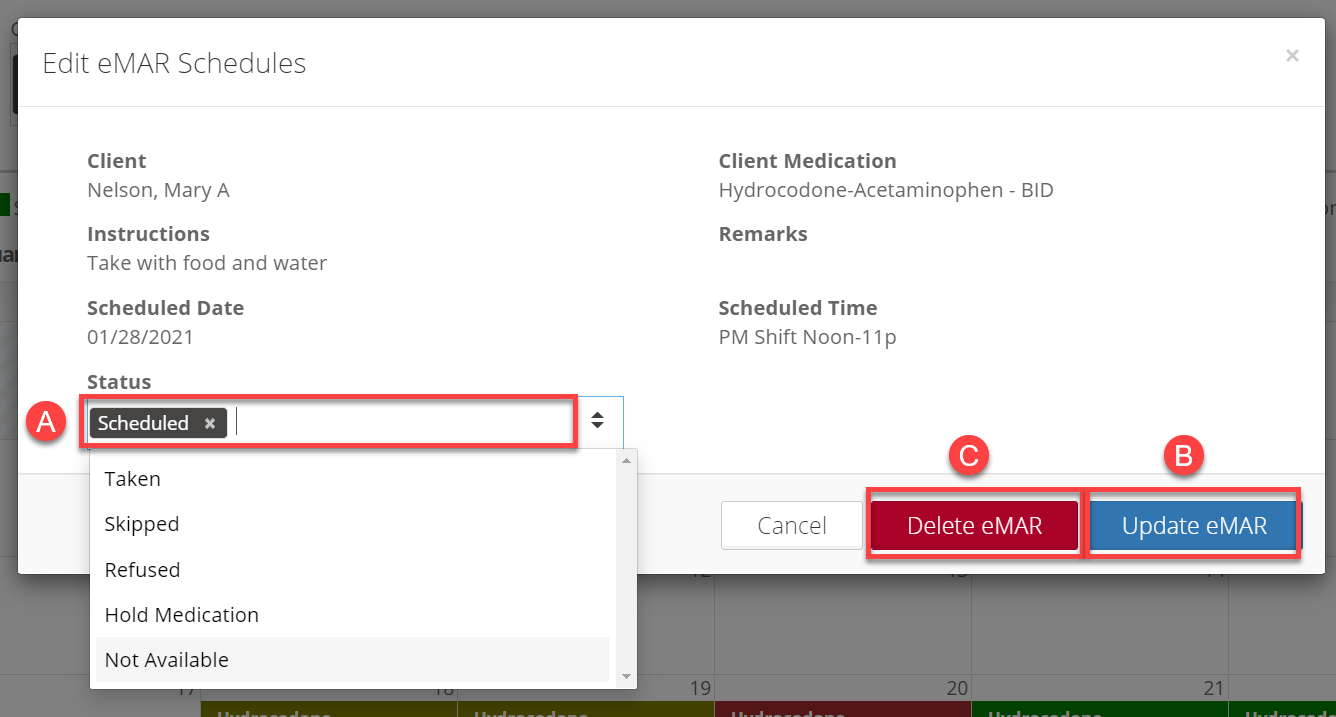
Scheduled Medication
- Click the green schedule to view details.
- Edit the administration status.

- Click 'Update eMAR' to save changes.

- Click 'Delete eMAR' to delete the scheduled administration date/time.

-
-
-
Taken Medication
-
Warning: Medication that is marked as taken can only be edited within 24 hours of the scheduled time.
-
-
- Clicking on a taken medication schedule will show details and allow you to add a 'Follow-up Response'.

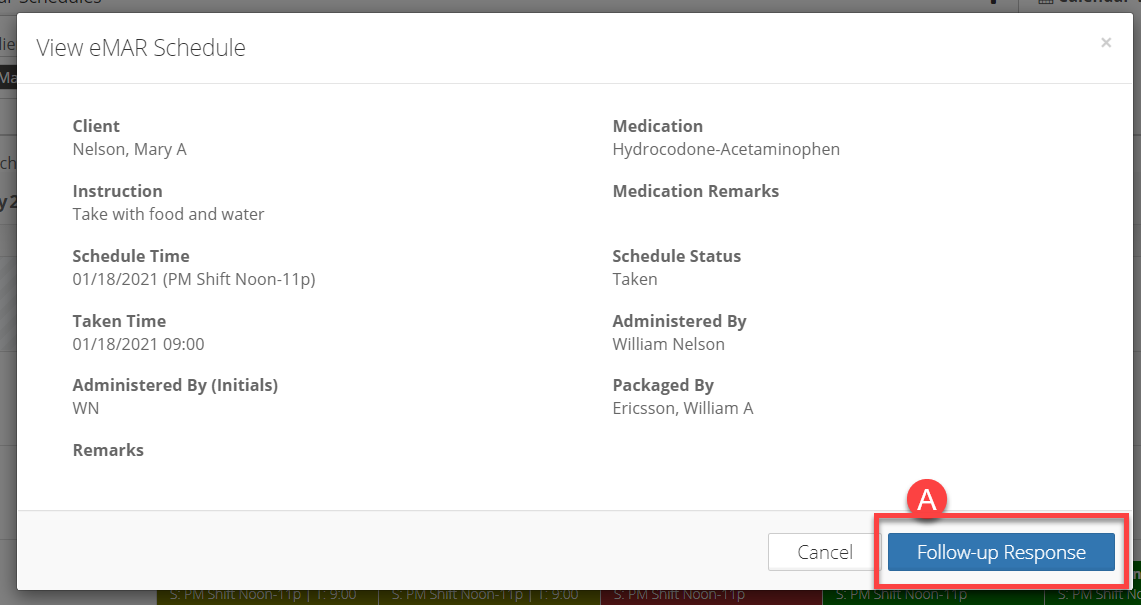
- Add a Follow-up Response.

- Click Submit to save.

- Clicking on a taken medication schedule will show details and allow you to add a 'Follow-up Response'.
-
-
-
- Edit a previous response
 by clicking the pencil
  icon OR delete the comment by clicking the trash can
  icon.
icon. 
- Edit a previous response
-

-
-
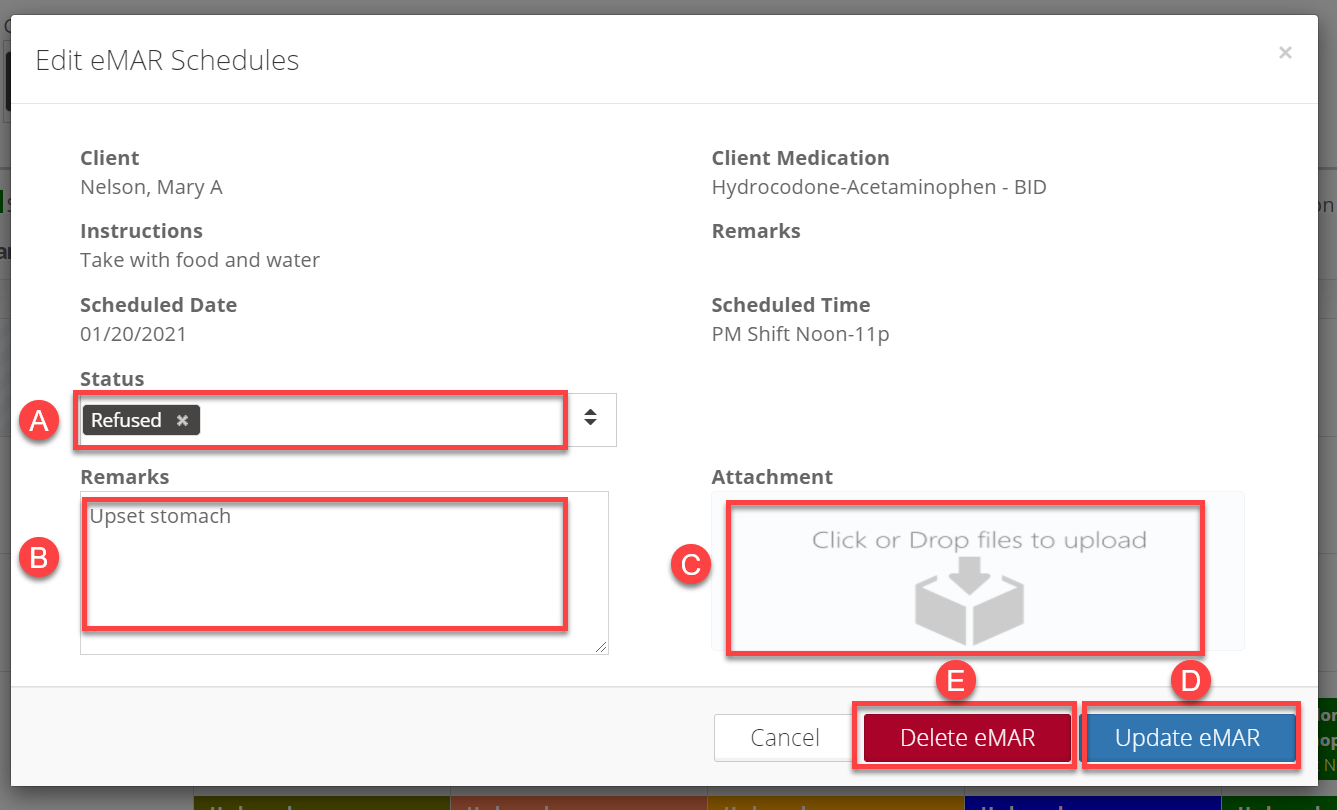
Skipped, Refused, Hold, and Not Available Medication
- Edit the administration status.

- Add/edit remarks.
- Add an attachment.
- Click 'Update eMAR to save changes.
- Click 'Delete eMAR' to delete the scheduled administration date/time.
- Edit the administration status.
-
-
Print

- Click the 'Print' button to print a physical copy of the client's eMAR.
- Click the down arrow to select printing options:
- Current Meds - Print or download the client's medications
- Print Month (All) - Select preferred date range
 and click 'Generate'
  . Open file to view medication administration schedule.
 - Filled eMAR - Select preferred date range
 and click 'Generate' . Open file to view previously administrated medication schedule and details.

Table View
- Click the 'Table View' tab.

- Select Client and Date Range.
- Click the green plus
 icon to expand for medication details.
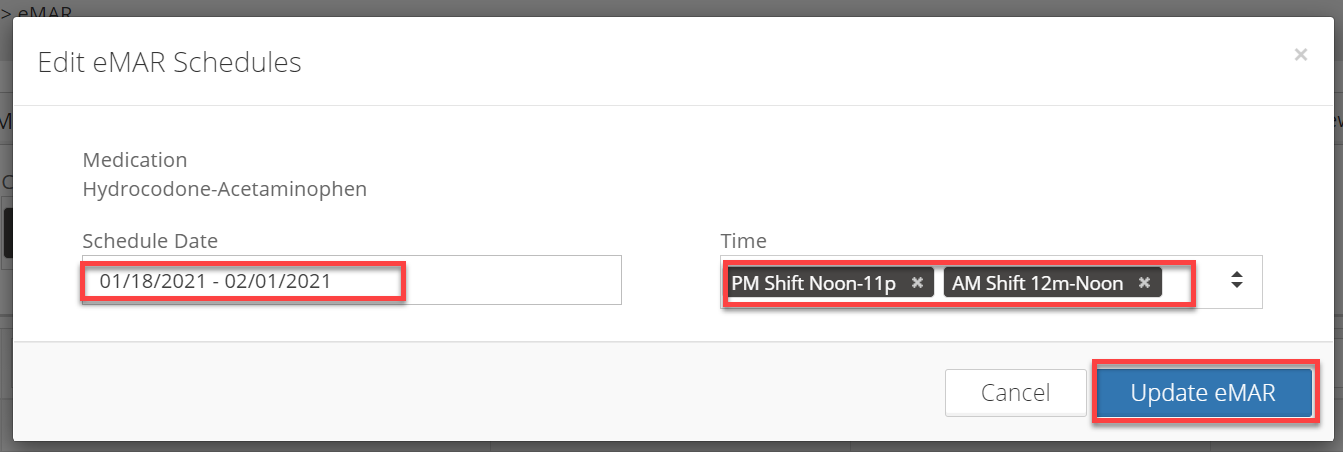
 - Click on the pencil icon to edit the schedule date and time.

- Click 'Update eMAR' to save changes.
- Click the trash can icon to delete the schedule.
