Creating an Invoice
Creating an Invoice - Denial Analysis Report
Creating an Invoice - Generate Invoice
Viewing Invoices
Downloading Invoices
Marking Invoices as Paid
Creating an Invoice
Creating an Invoice - Denial Analysis Report
After submitting your claims with Billiyo we can see which ones were denied, or only partially paid, by navigation to Billing> Denial Analysis Report. In this page we can use the filters at the top of the screen to locate the claims that we want to turn into an invoice.
To begin the process of turning a claim it into an invoice, we should start by clicking on the number in the Denied Amount column.
This will generate a pop up .

To turn a claim into an invoice, select Move to Patient Balance. Alternatively, we could chose to absorb the cost and by selecting Write off. After making your election hit the blue save button.
Partial Payments:
We can move multiple partially paid claims to the patient balance at once. To do this we first need to adjust the filter at the top of the page to partial payment.

After locating our partial payments we can check them off and then hit the Mark as Adjustment button to the top right of the page.

In the resulting pop up enter the invoice amount in the Adjustment amount less than field. Then select the Move to Patient Balance radial and hit Mark as Adjustment. Alternatively, we could chose to absorb the cost and by selecting Write off.

Creating an Invoice - Generate Invoice
After moving our claims to the patient balance we can turn them into an invoice by heading to to Billing > Patient Invoicing > Create Invoice.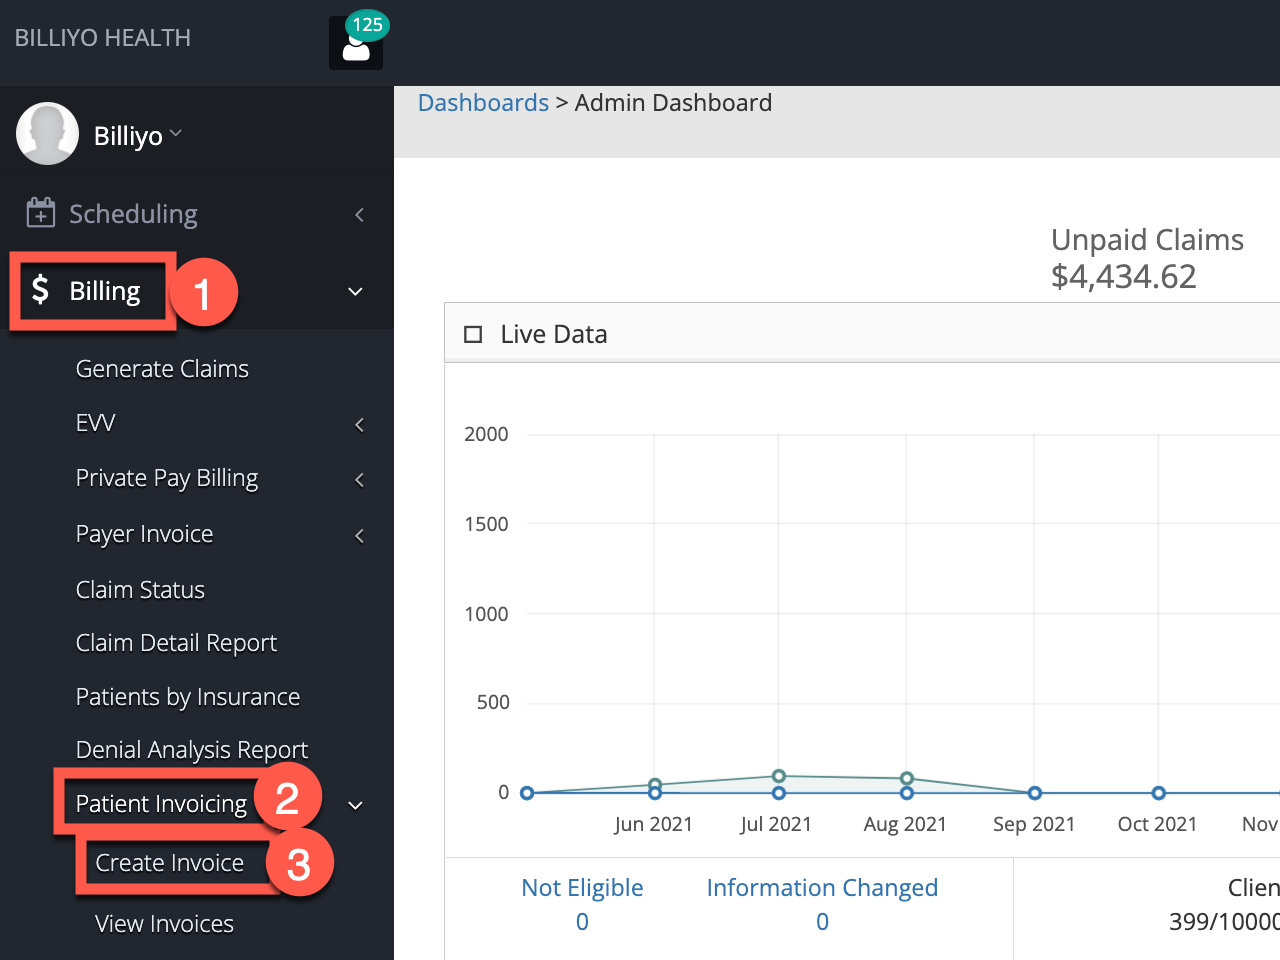
To locate a specific claim, use the filter and search fields at the top. 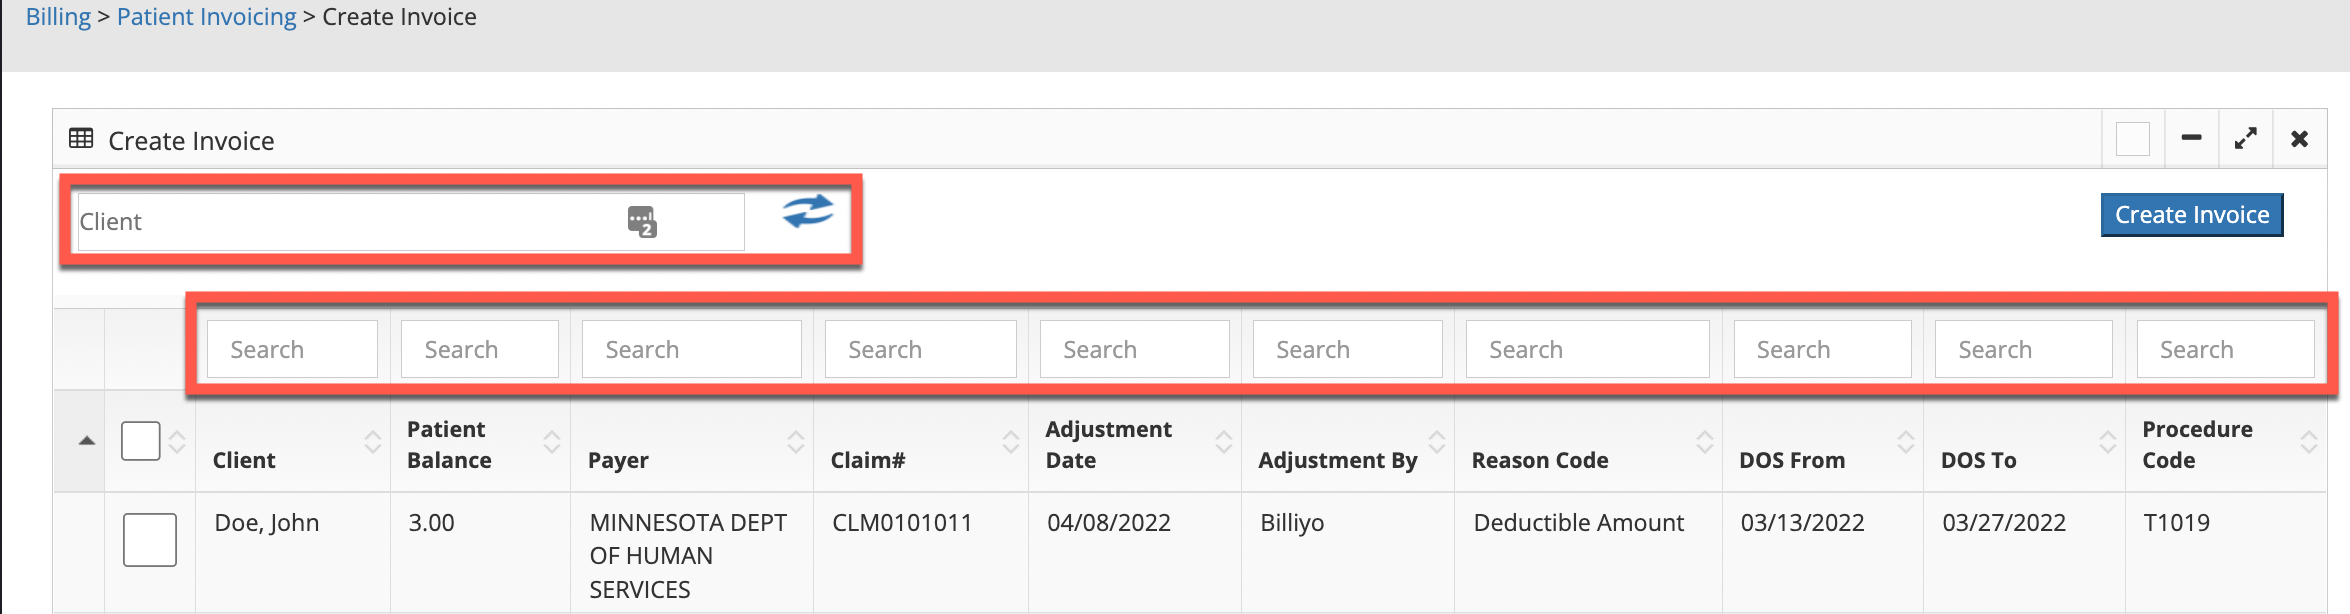
After locating the claim, check the box to the left of the client's name and then click the Create Invoice button. This will create an invoice for your client.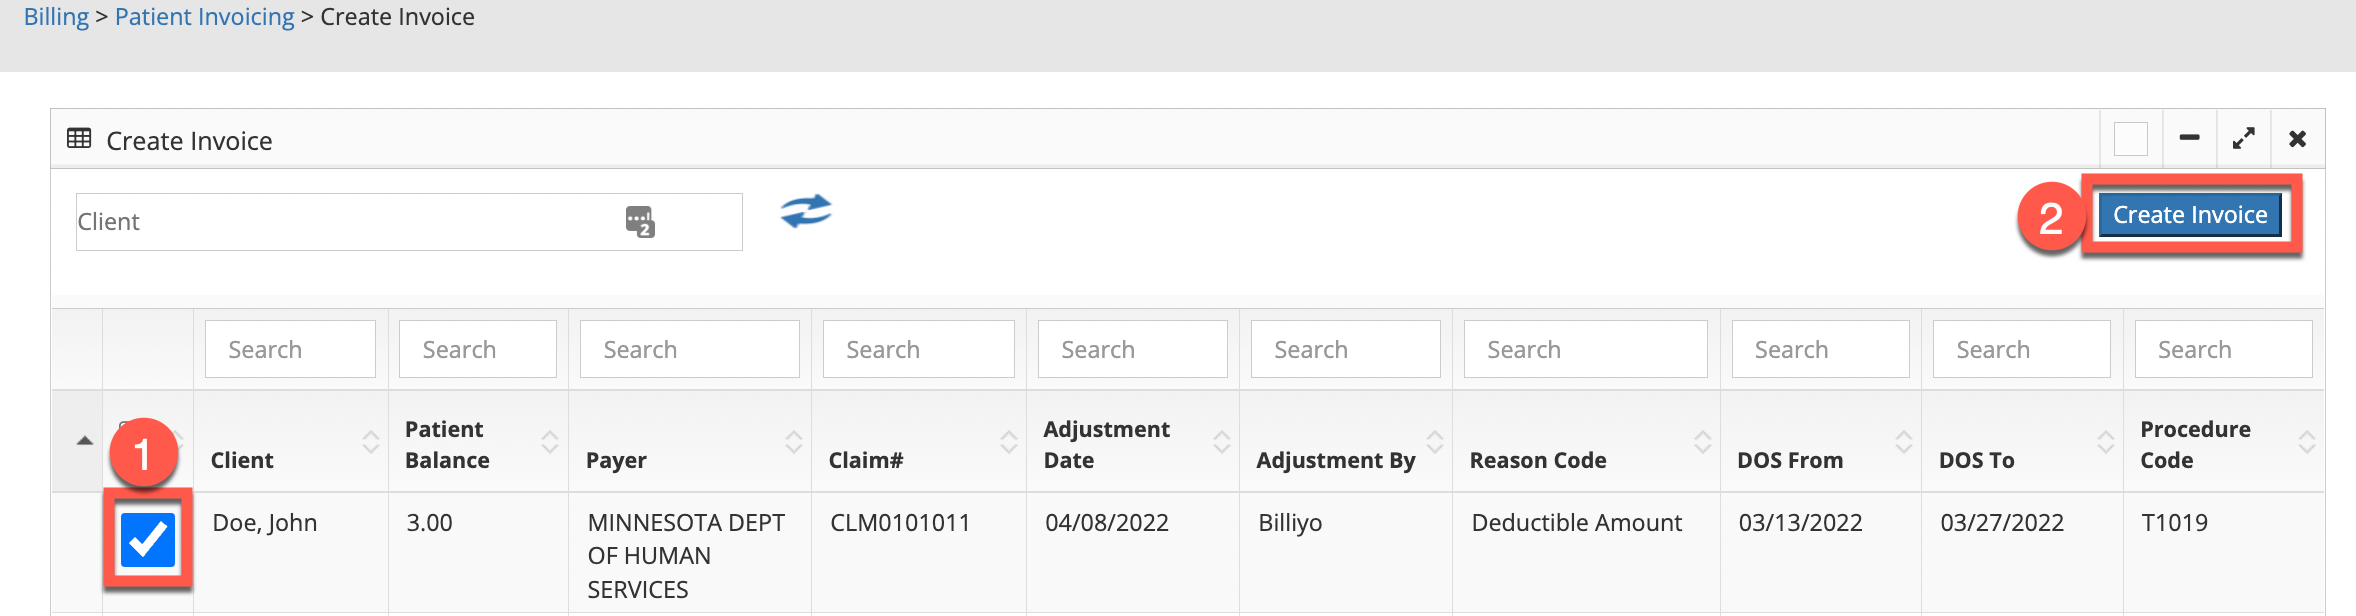
Viewing Invoices
To view and download invoices, head to Billing > Patient Invoicing > View Invoices.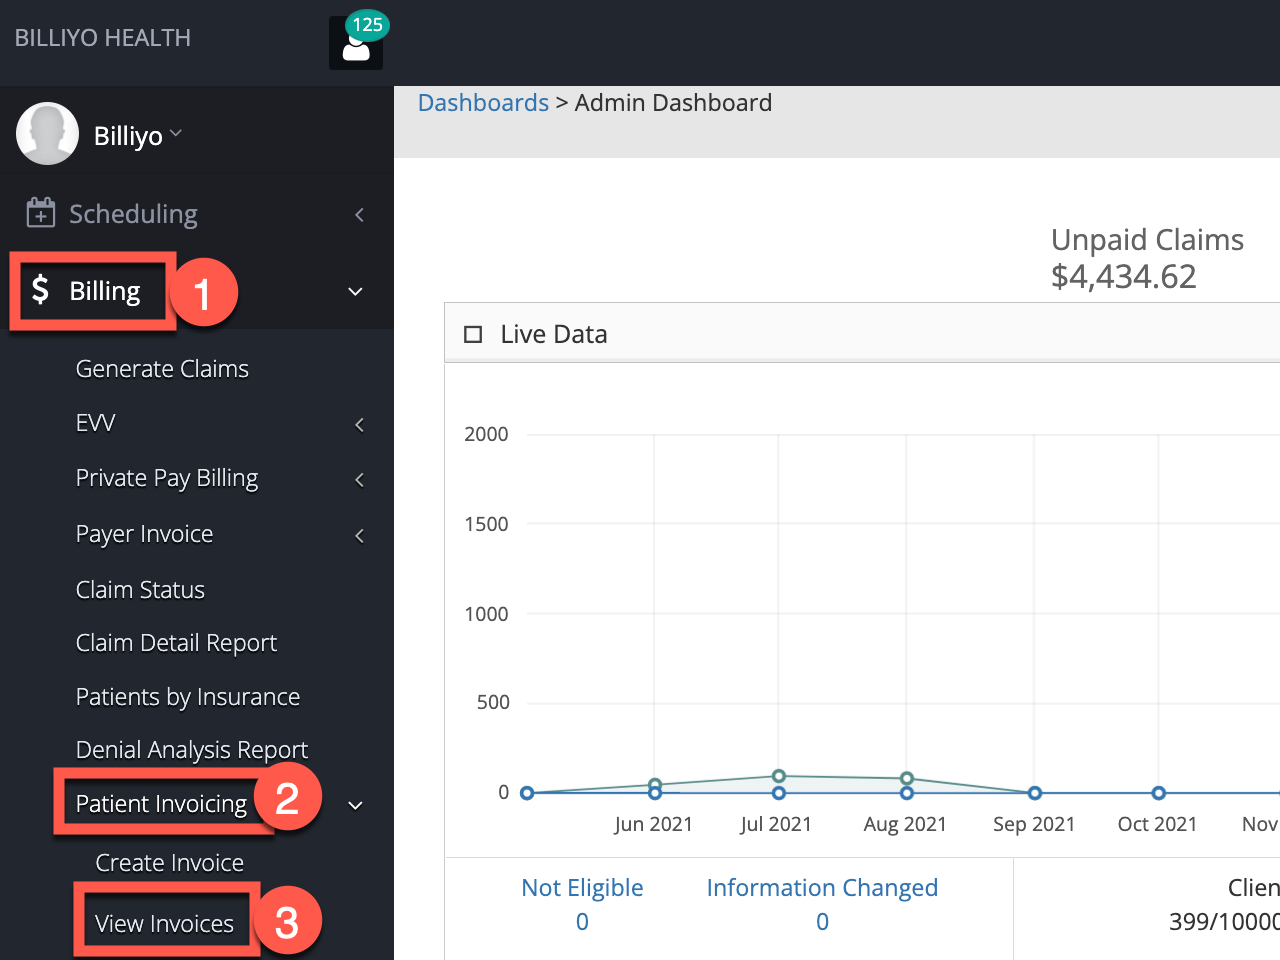
Use the filter and search fields to locate a specific invoice. 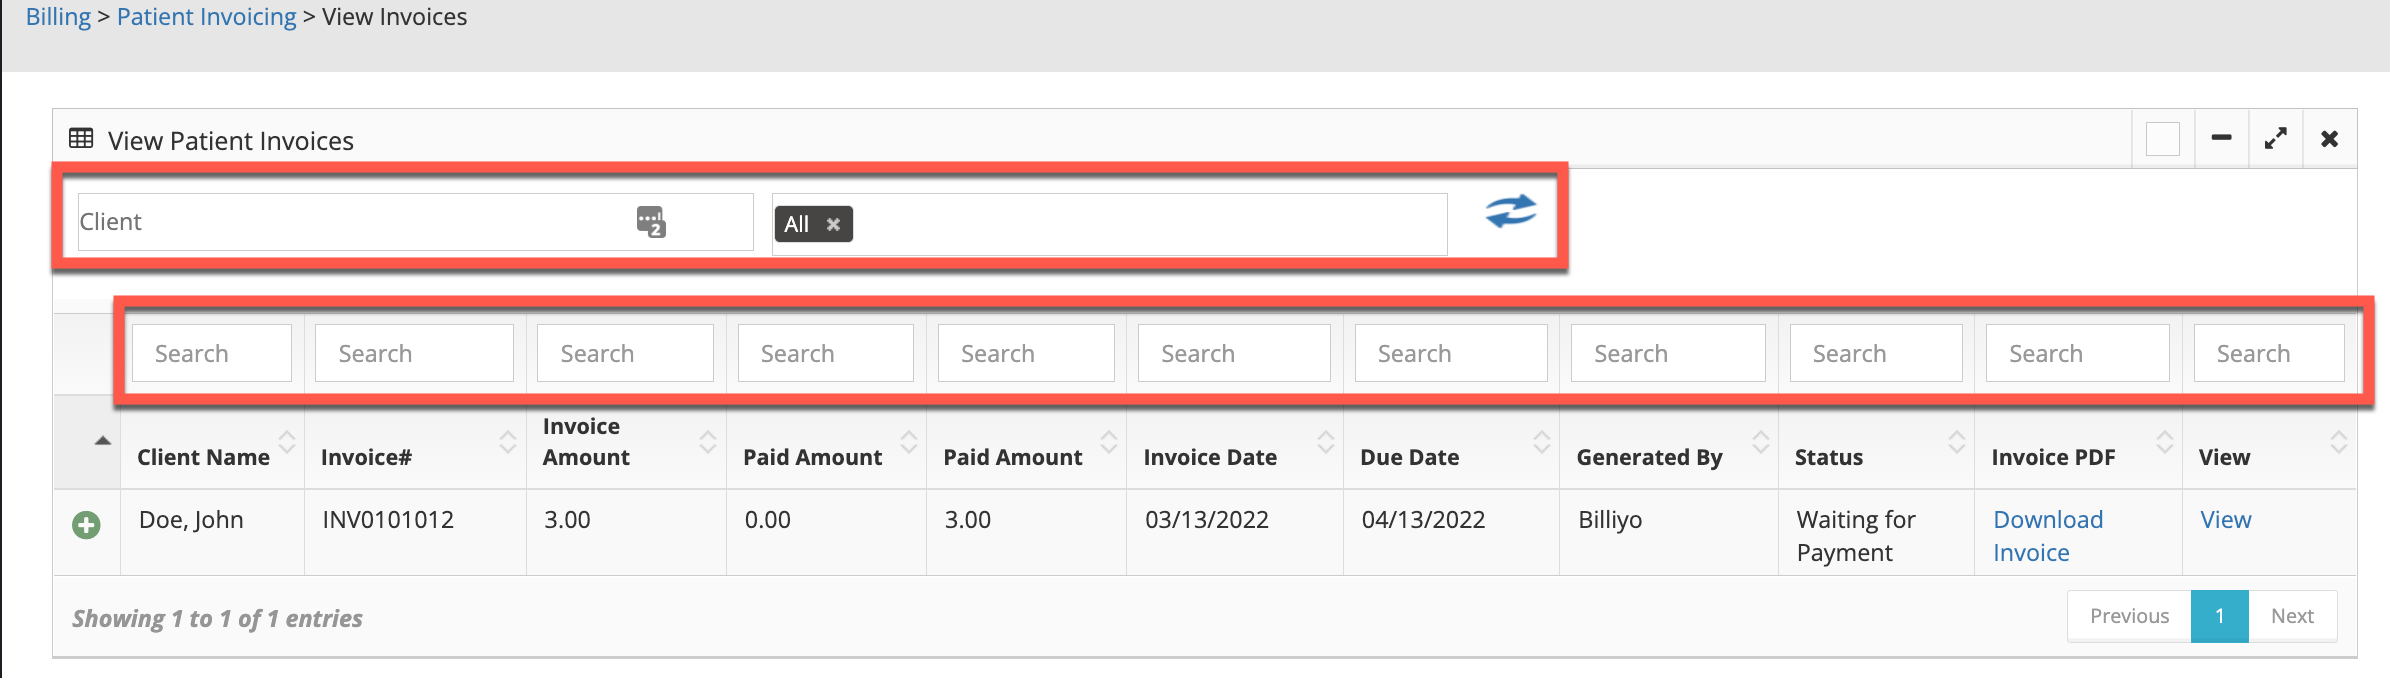
To view an invoice for the first time click on the green plus sign next to the client's name. Then select the blue View and Print option.
This will pull up the invoice that you created. To email this invoice to your client hit the blue print button and then select Print and send Email.

Downloading Invoices
After a payroll has been created you can download it in View Invoices page. After locating your invoice we can use the options on the right side of the screen to downloaded or view the invoice. 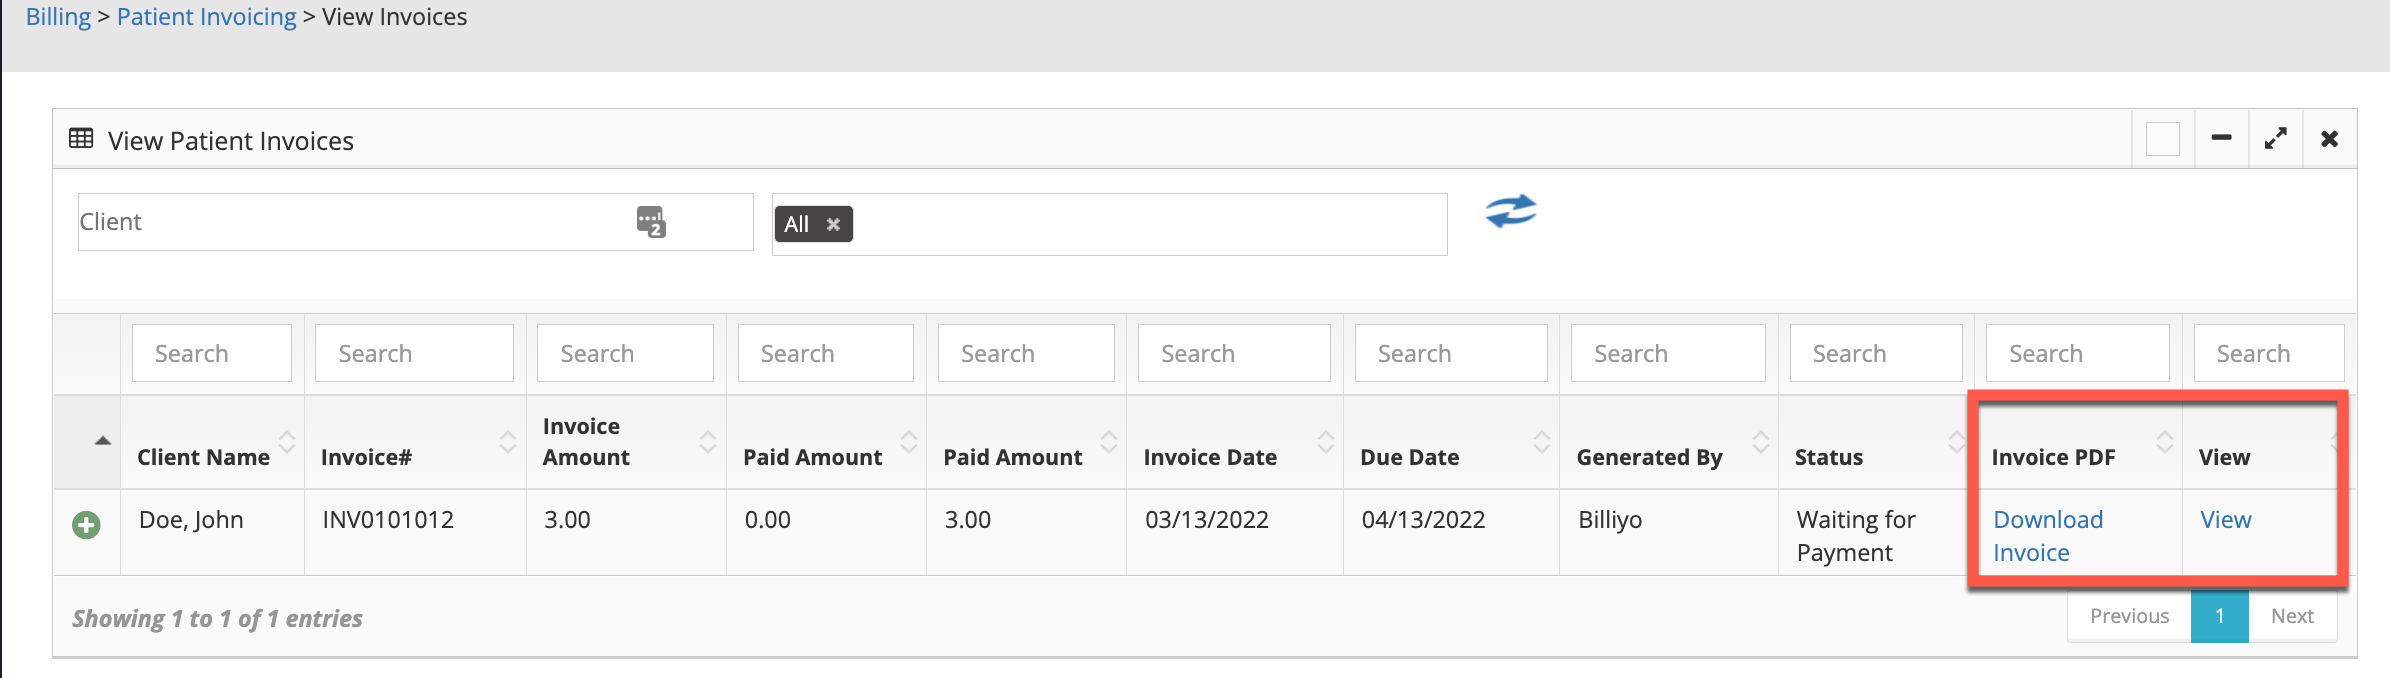
When clicking on "View", if you have signed up for the Billiyo communications package you can fax or email the invoice from this screen.
Marking Invoices as Paid
To mark an invoice as paid, head to the Clicking on the View Invoice page and locate your invoice. Then hit the green + sign to the left of the client's name, the options to mark the invoice as paid or delete the invoice will appear.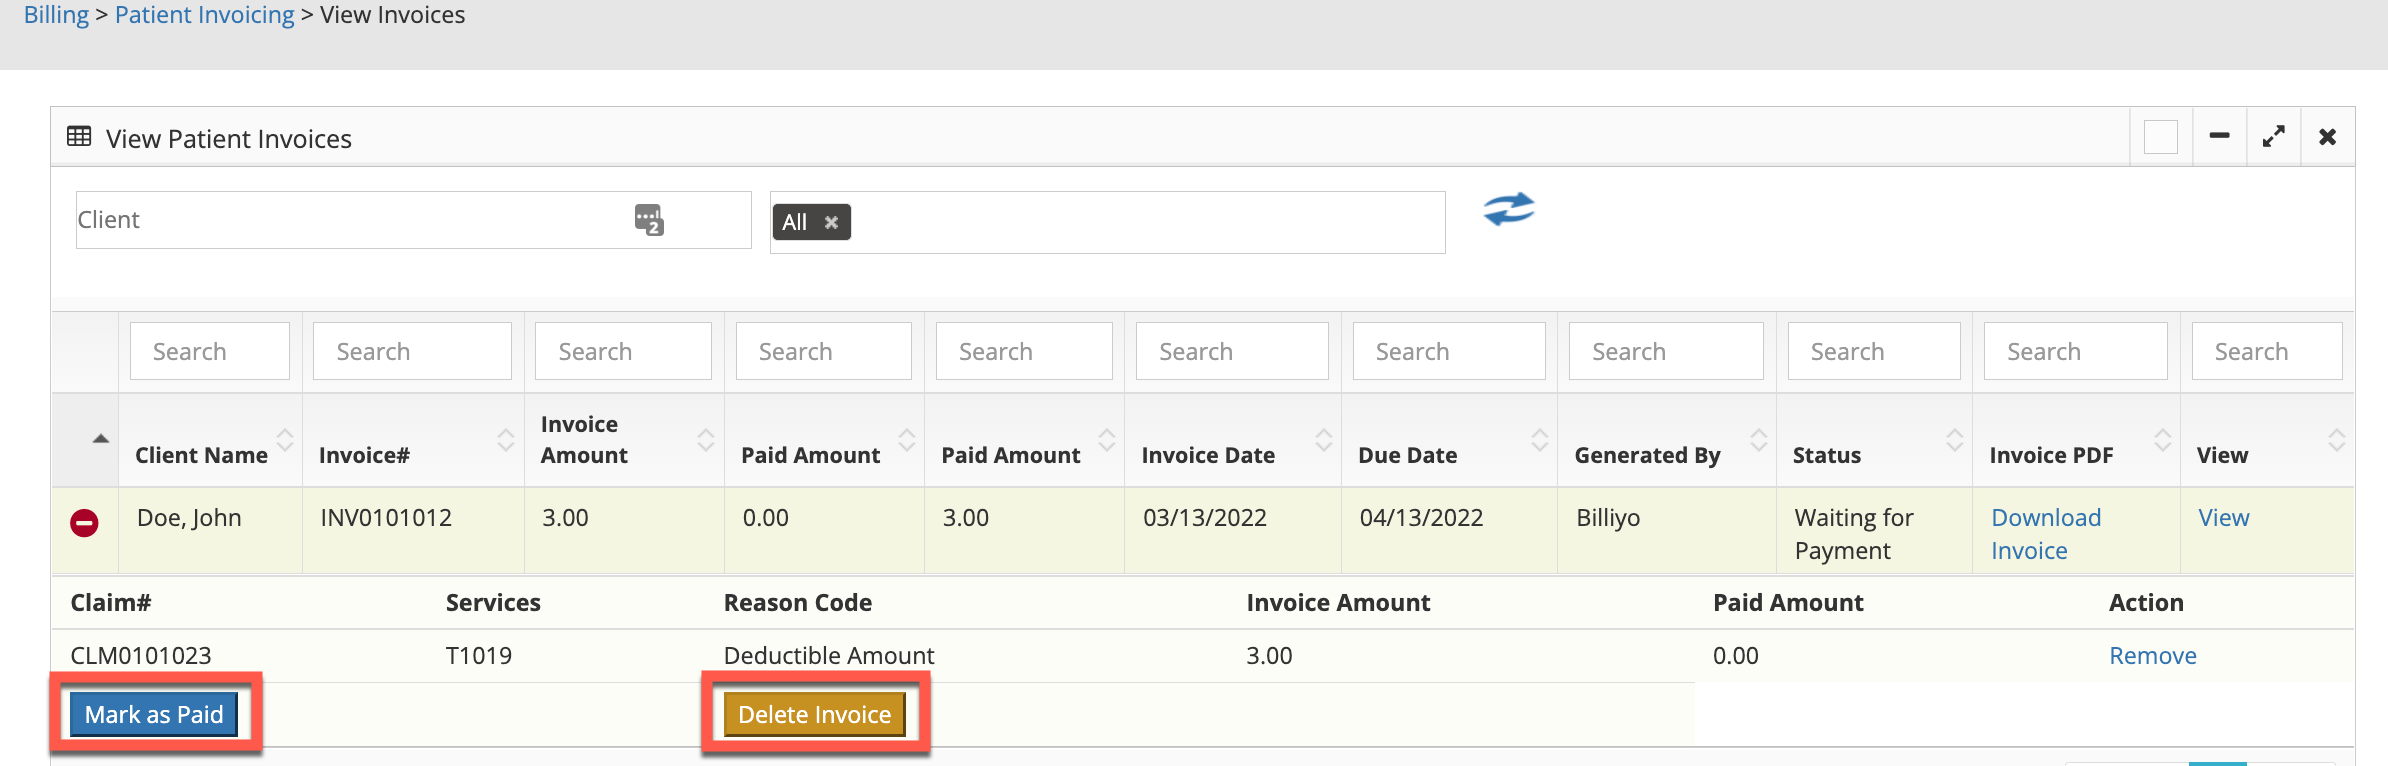
No real client or employee information was used.