Submitting Schedules without 'Clock In/Clock Out' (no EVV)
You can submit time without using the clock in/out (EVV) feature. Follow these instructions for Android and iPhone users.
Jump To:
Locating Visits
Editing Schedules and Adding Remarks
Working Non EVV-visits
Locating Visits
-
- First tap the 'Schedule' icon on the bottom ribbon.

- First tap the 'Schedule' icon on the bottom ribbon.
-
- You can filter by date and client by tapping on the Filter
 icon in the top right corner if required, otherwise your current pay period schedules will be displayed by default.
 - After tapping into the scheduling tab, you will see a list of scheduled appointments.

- You can filter by date and client by tapping on the Filter
Editing Schedules and Adding Remarks
-
- Click on an appointment to add details and notes if required by your agency.

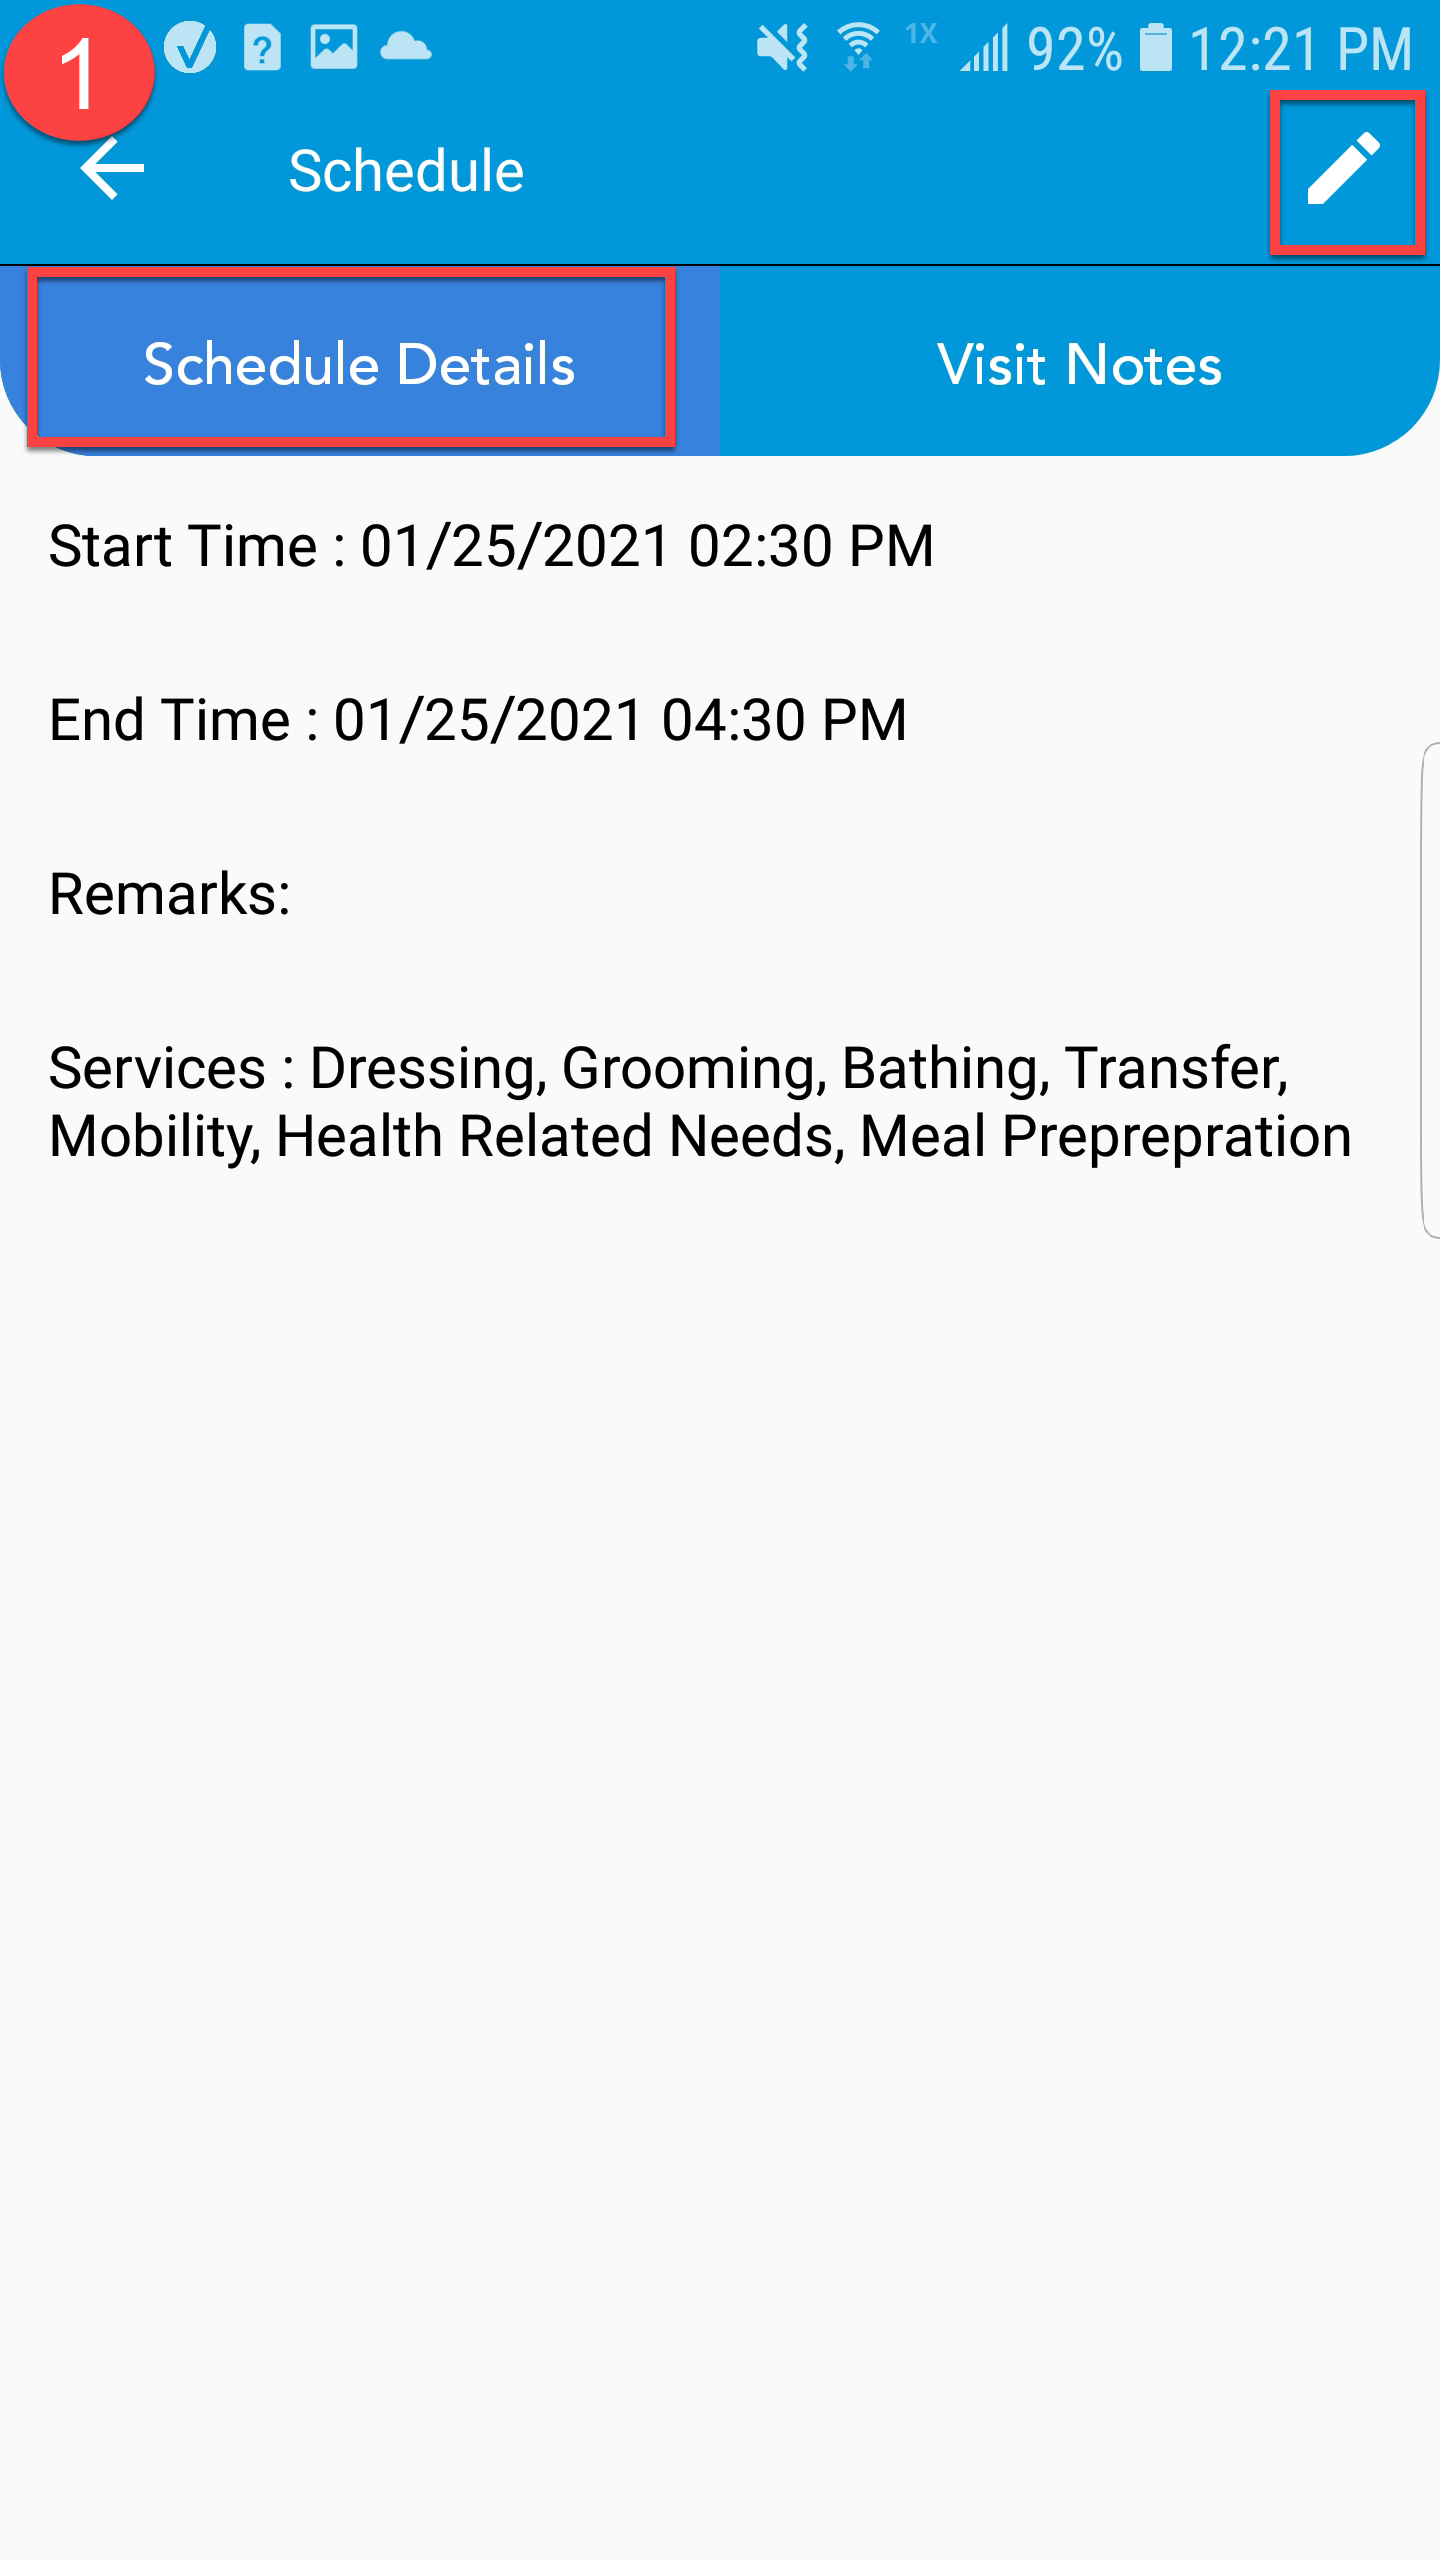
- This will pull up a new page where we can see the 'Schedule's Details' which include the appointment start and end time, written remarks, and services that are listed in the client's care plan. To add or edit these details tap the pencil
 icon.
icon. 
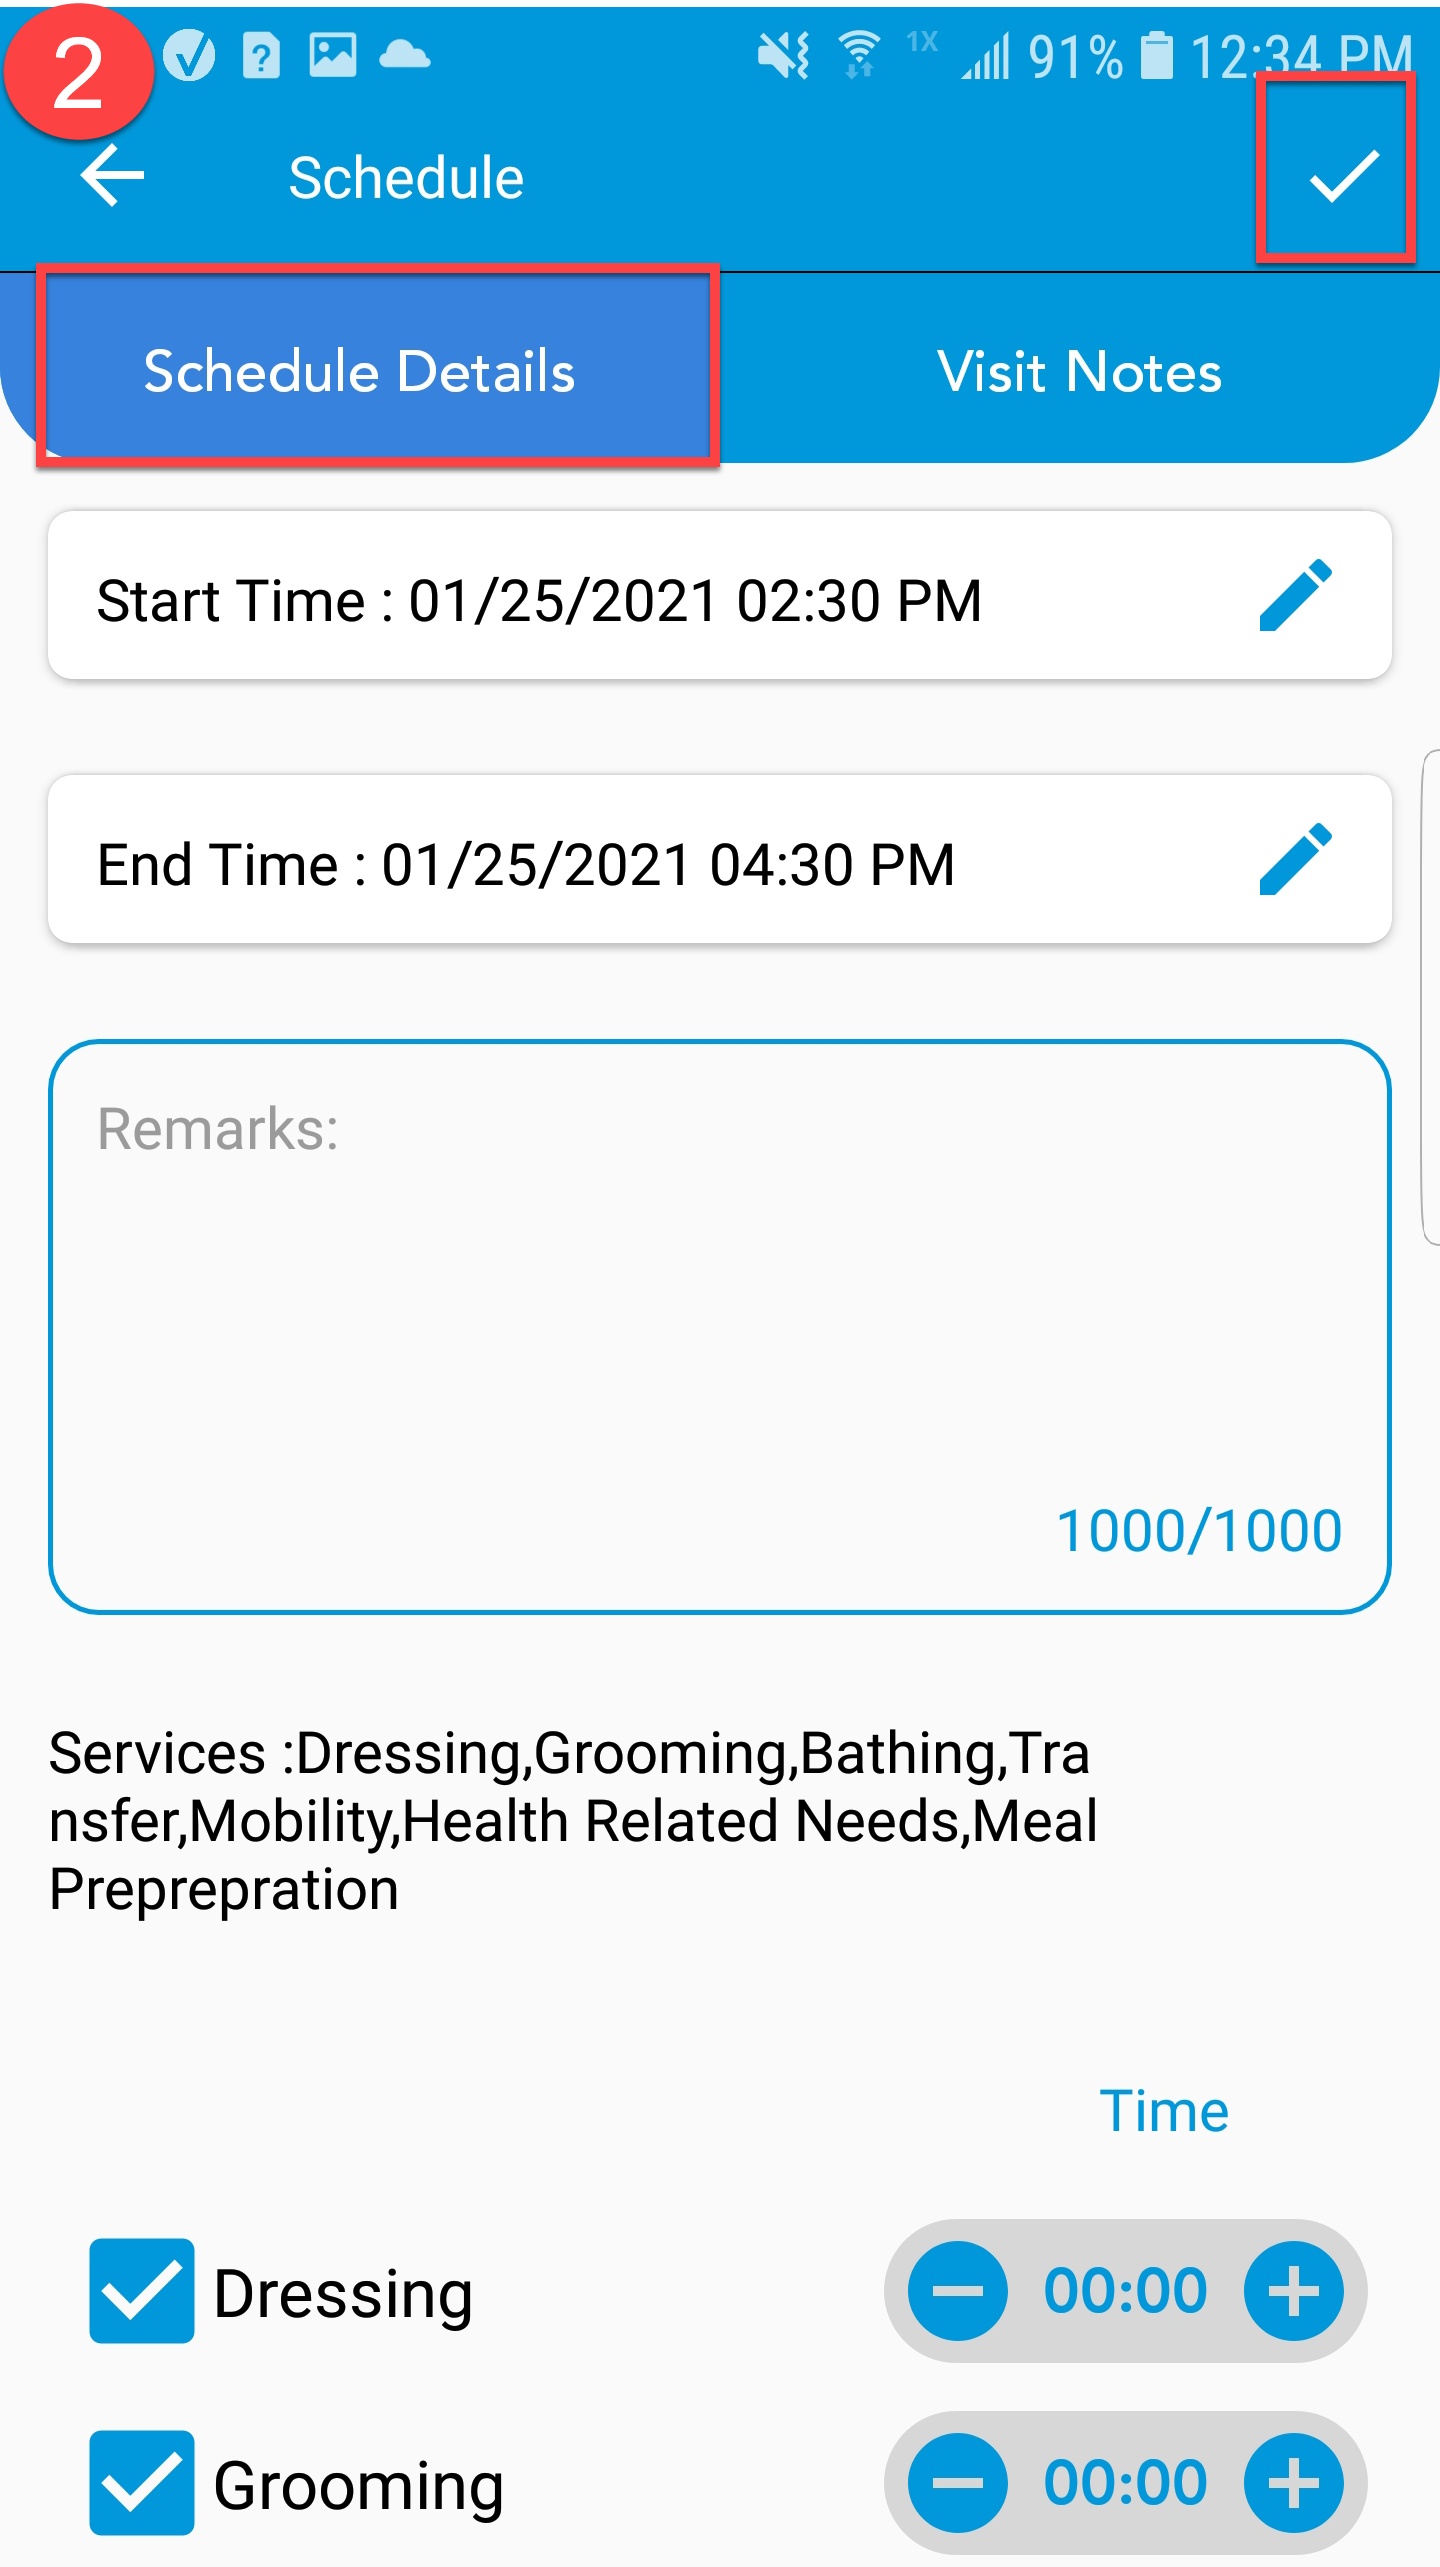
- We can now edit the visit and enter remarks by typing into the Remarks field. When complete, tap the checkmark
 icon.
icon. 
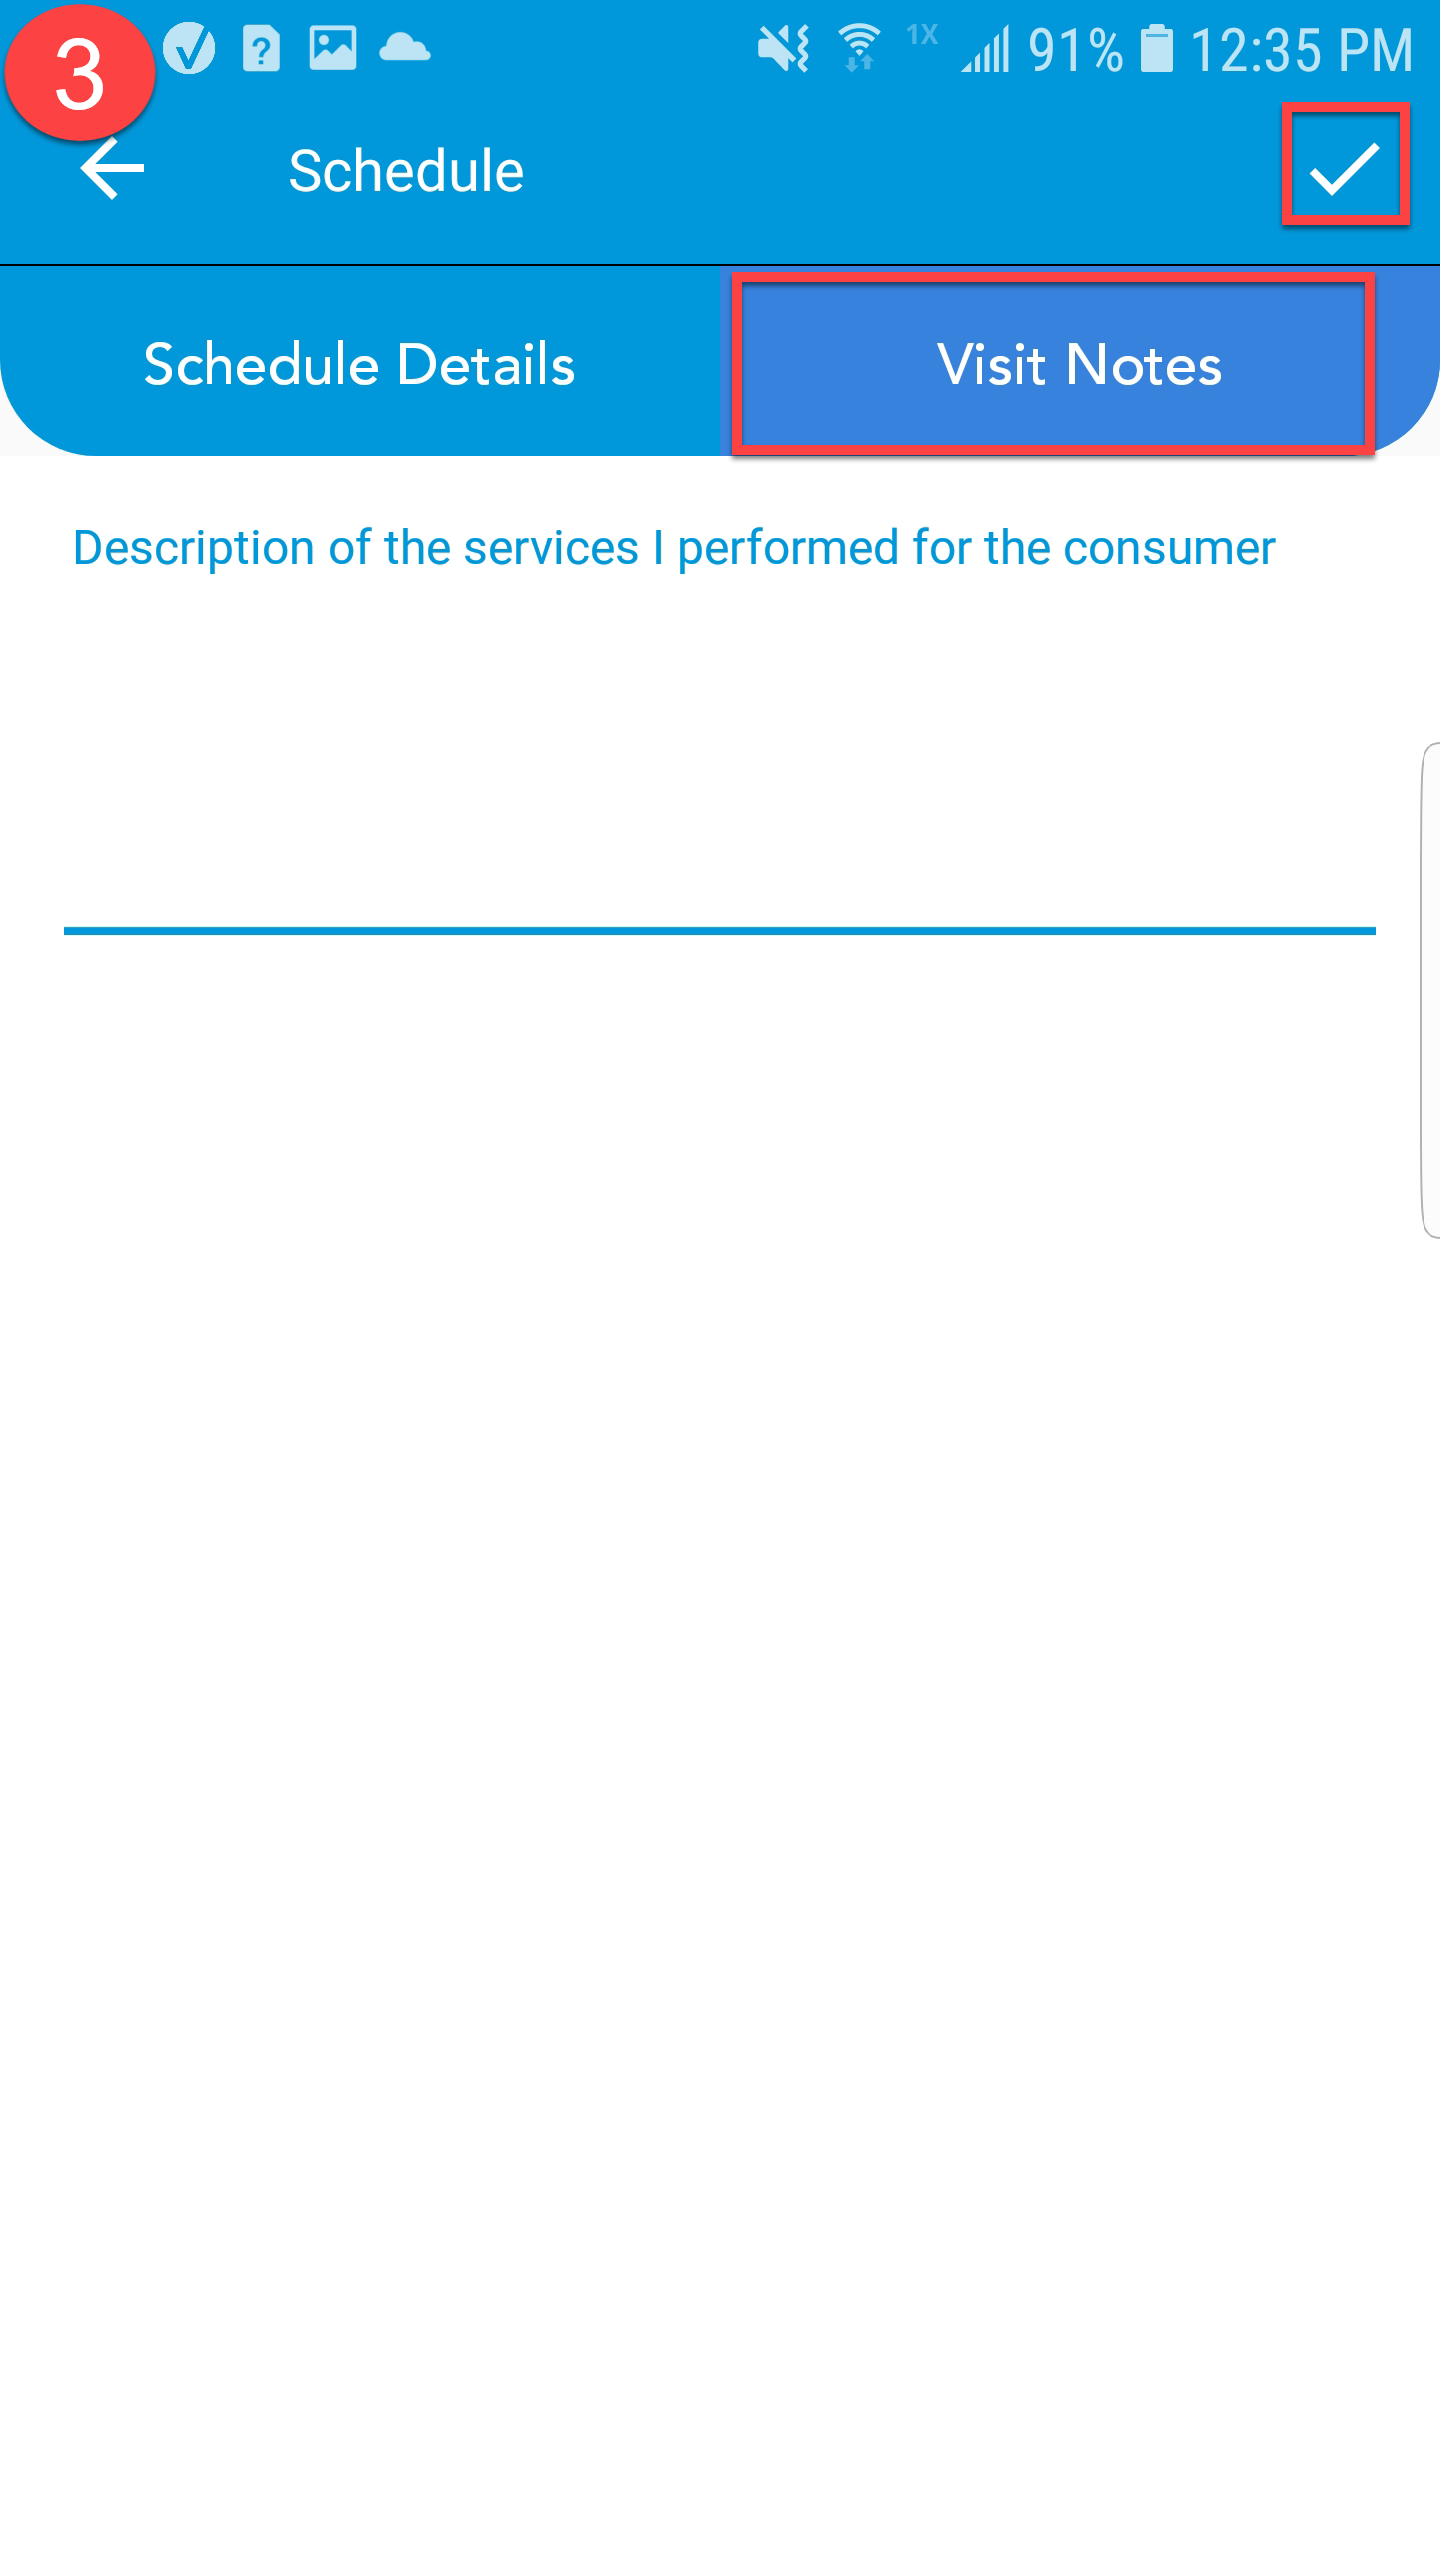
- In the next tab, add Visit Notes. This can include a description of services performed. When complete, tap the checkmark
 icon to save your changes.
- This will pull up a new page where we can see the 'Schedule's Details' which include the appointment start and end time, written remarks, and services that are listed in the client's care plan. To add or edit these details tap the pencil
- Click on an appointment to add details and notes if required by your agency.
Note: Some agencies do not require or use the 'Visit Notes' tab.
 |
 |
 |
-
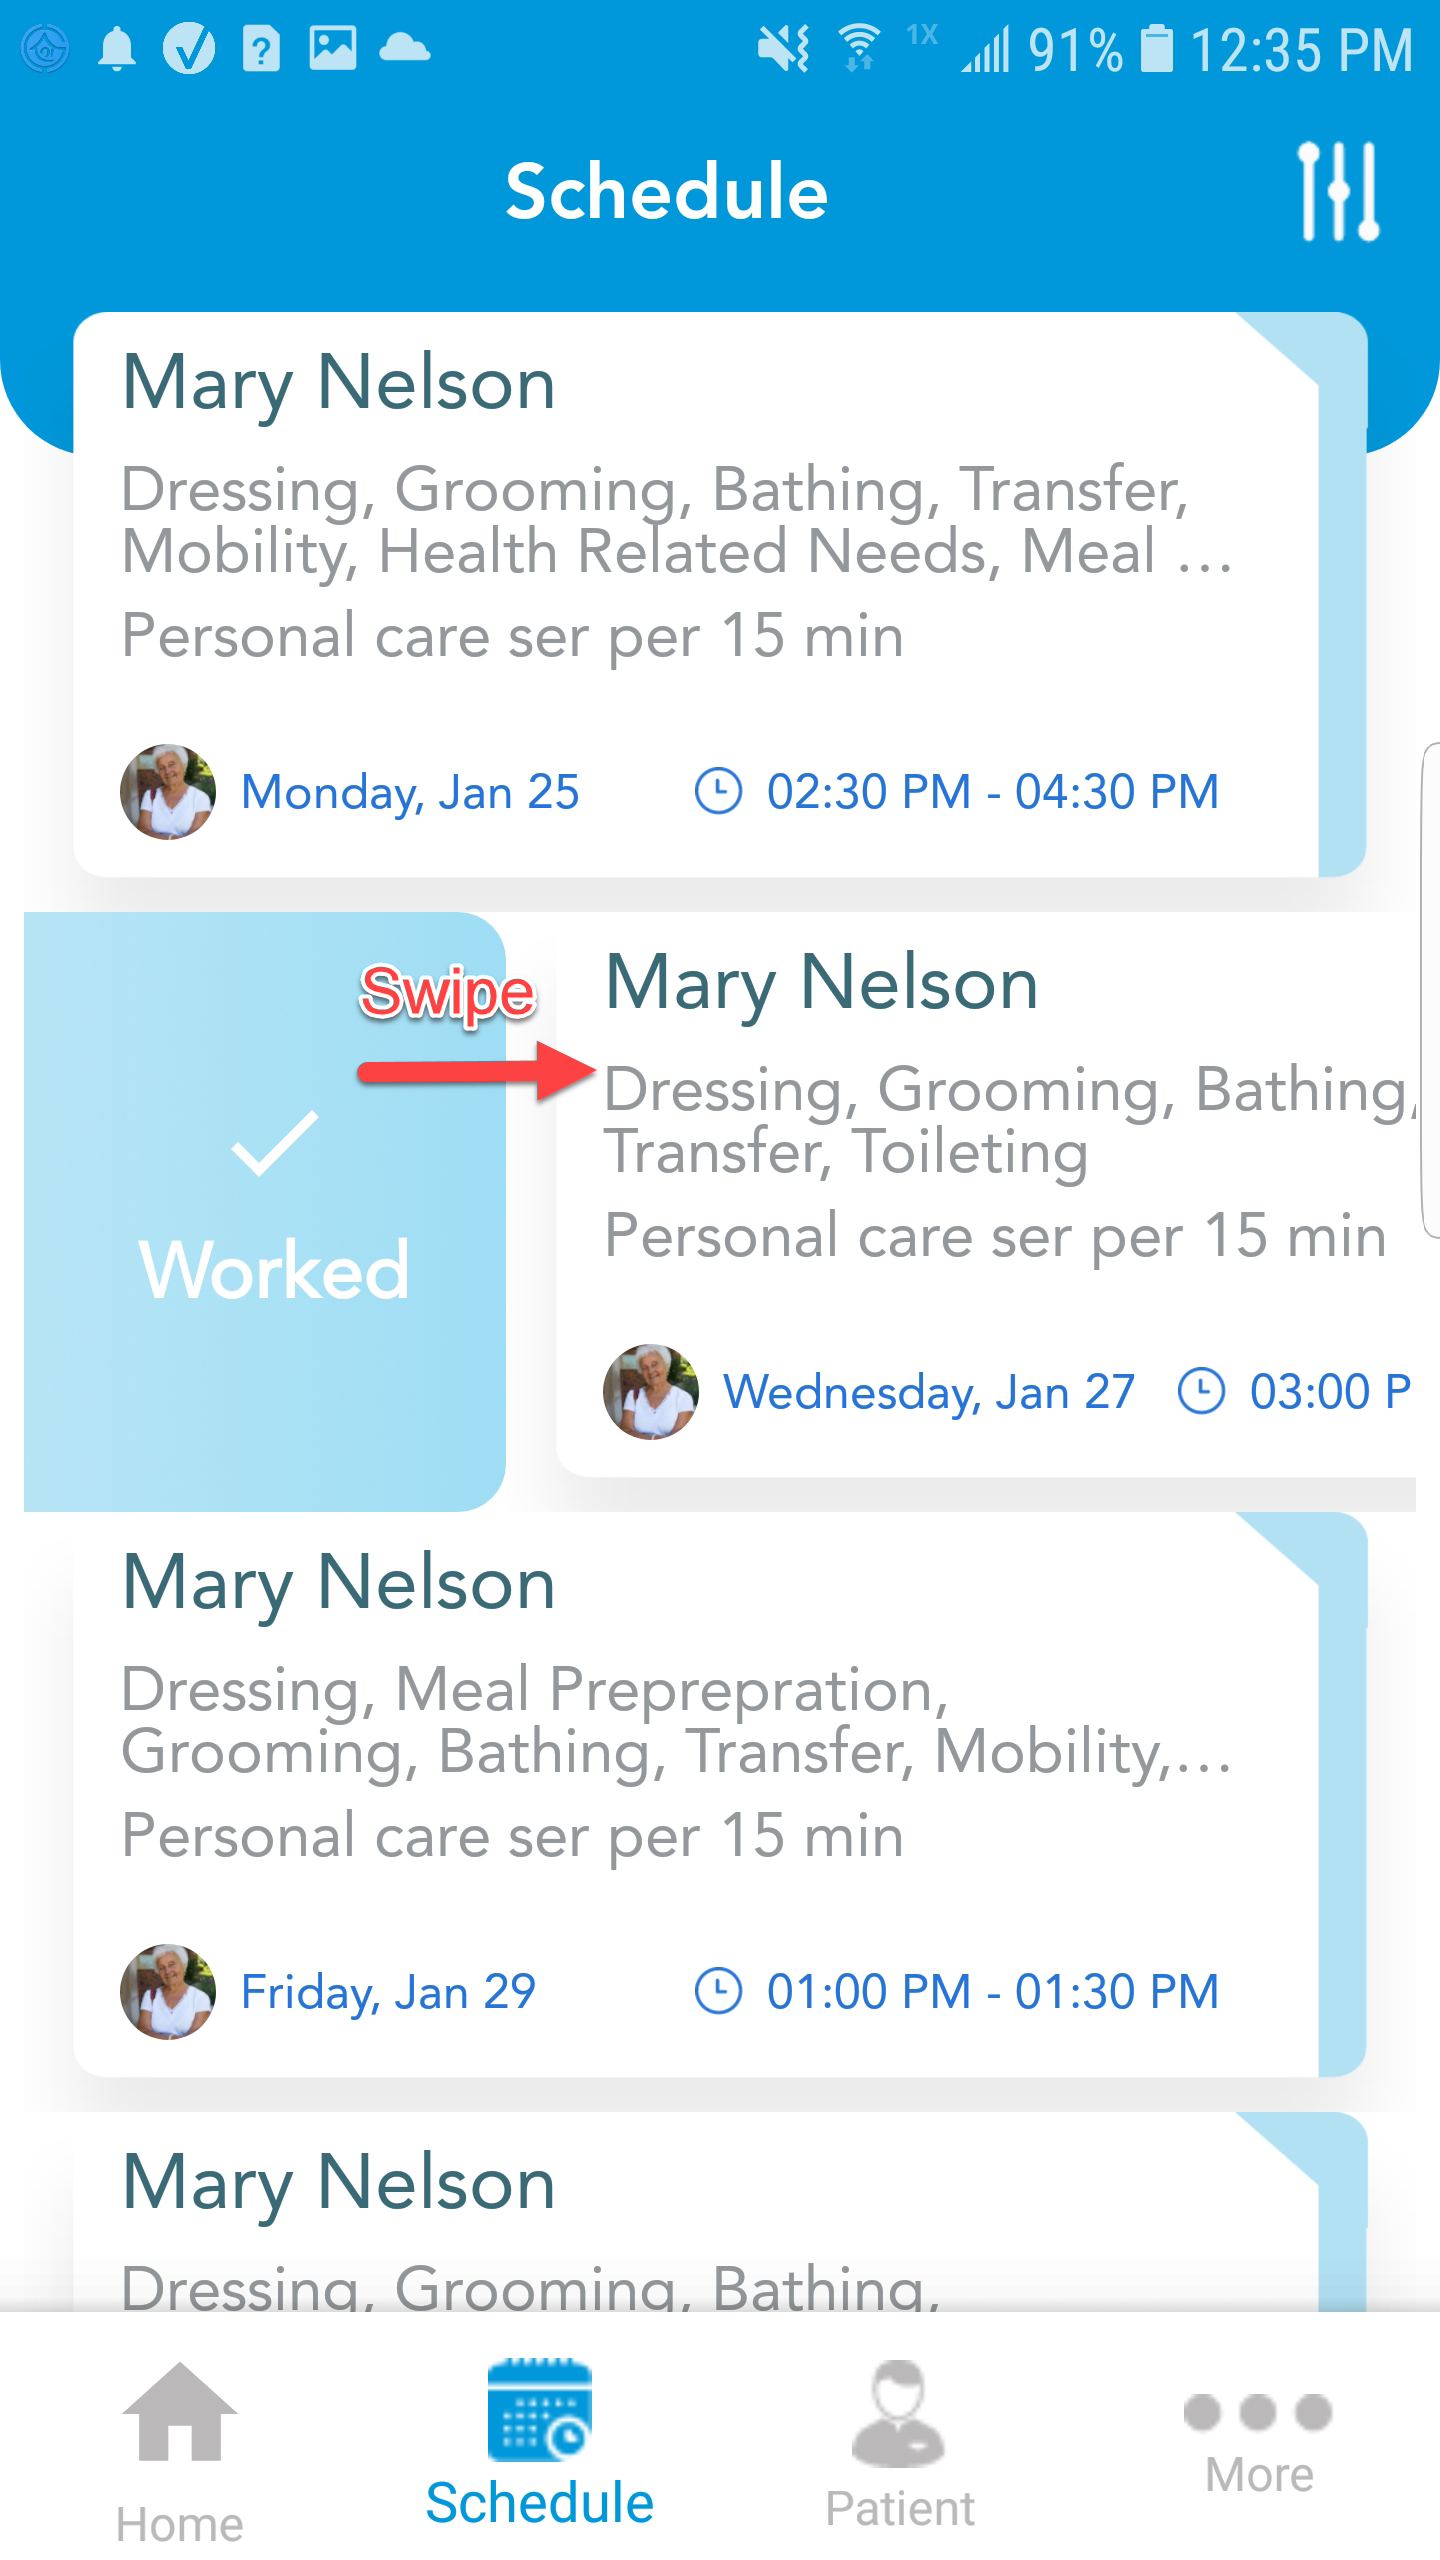
Working Non-EVV Visits- Swipe the appointment box to the right to mark the schedule as Worked.
- Swipe the appointment box to the left to mark the schedule as Not Worked.
- If the appointment was not worked, you will be prompted to provide a reason.
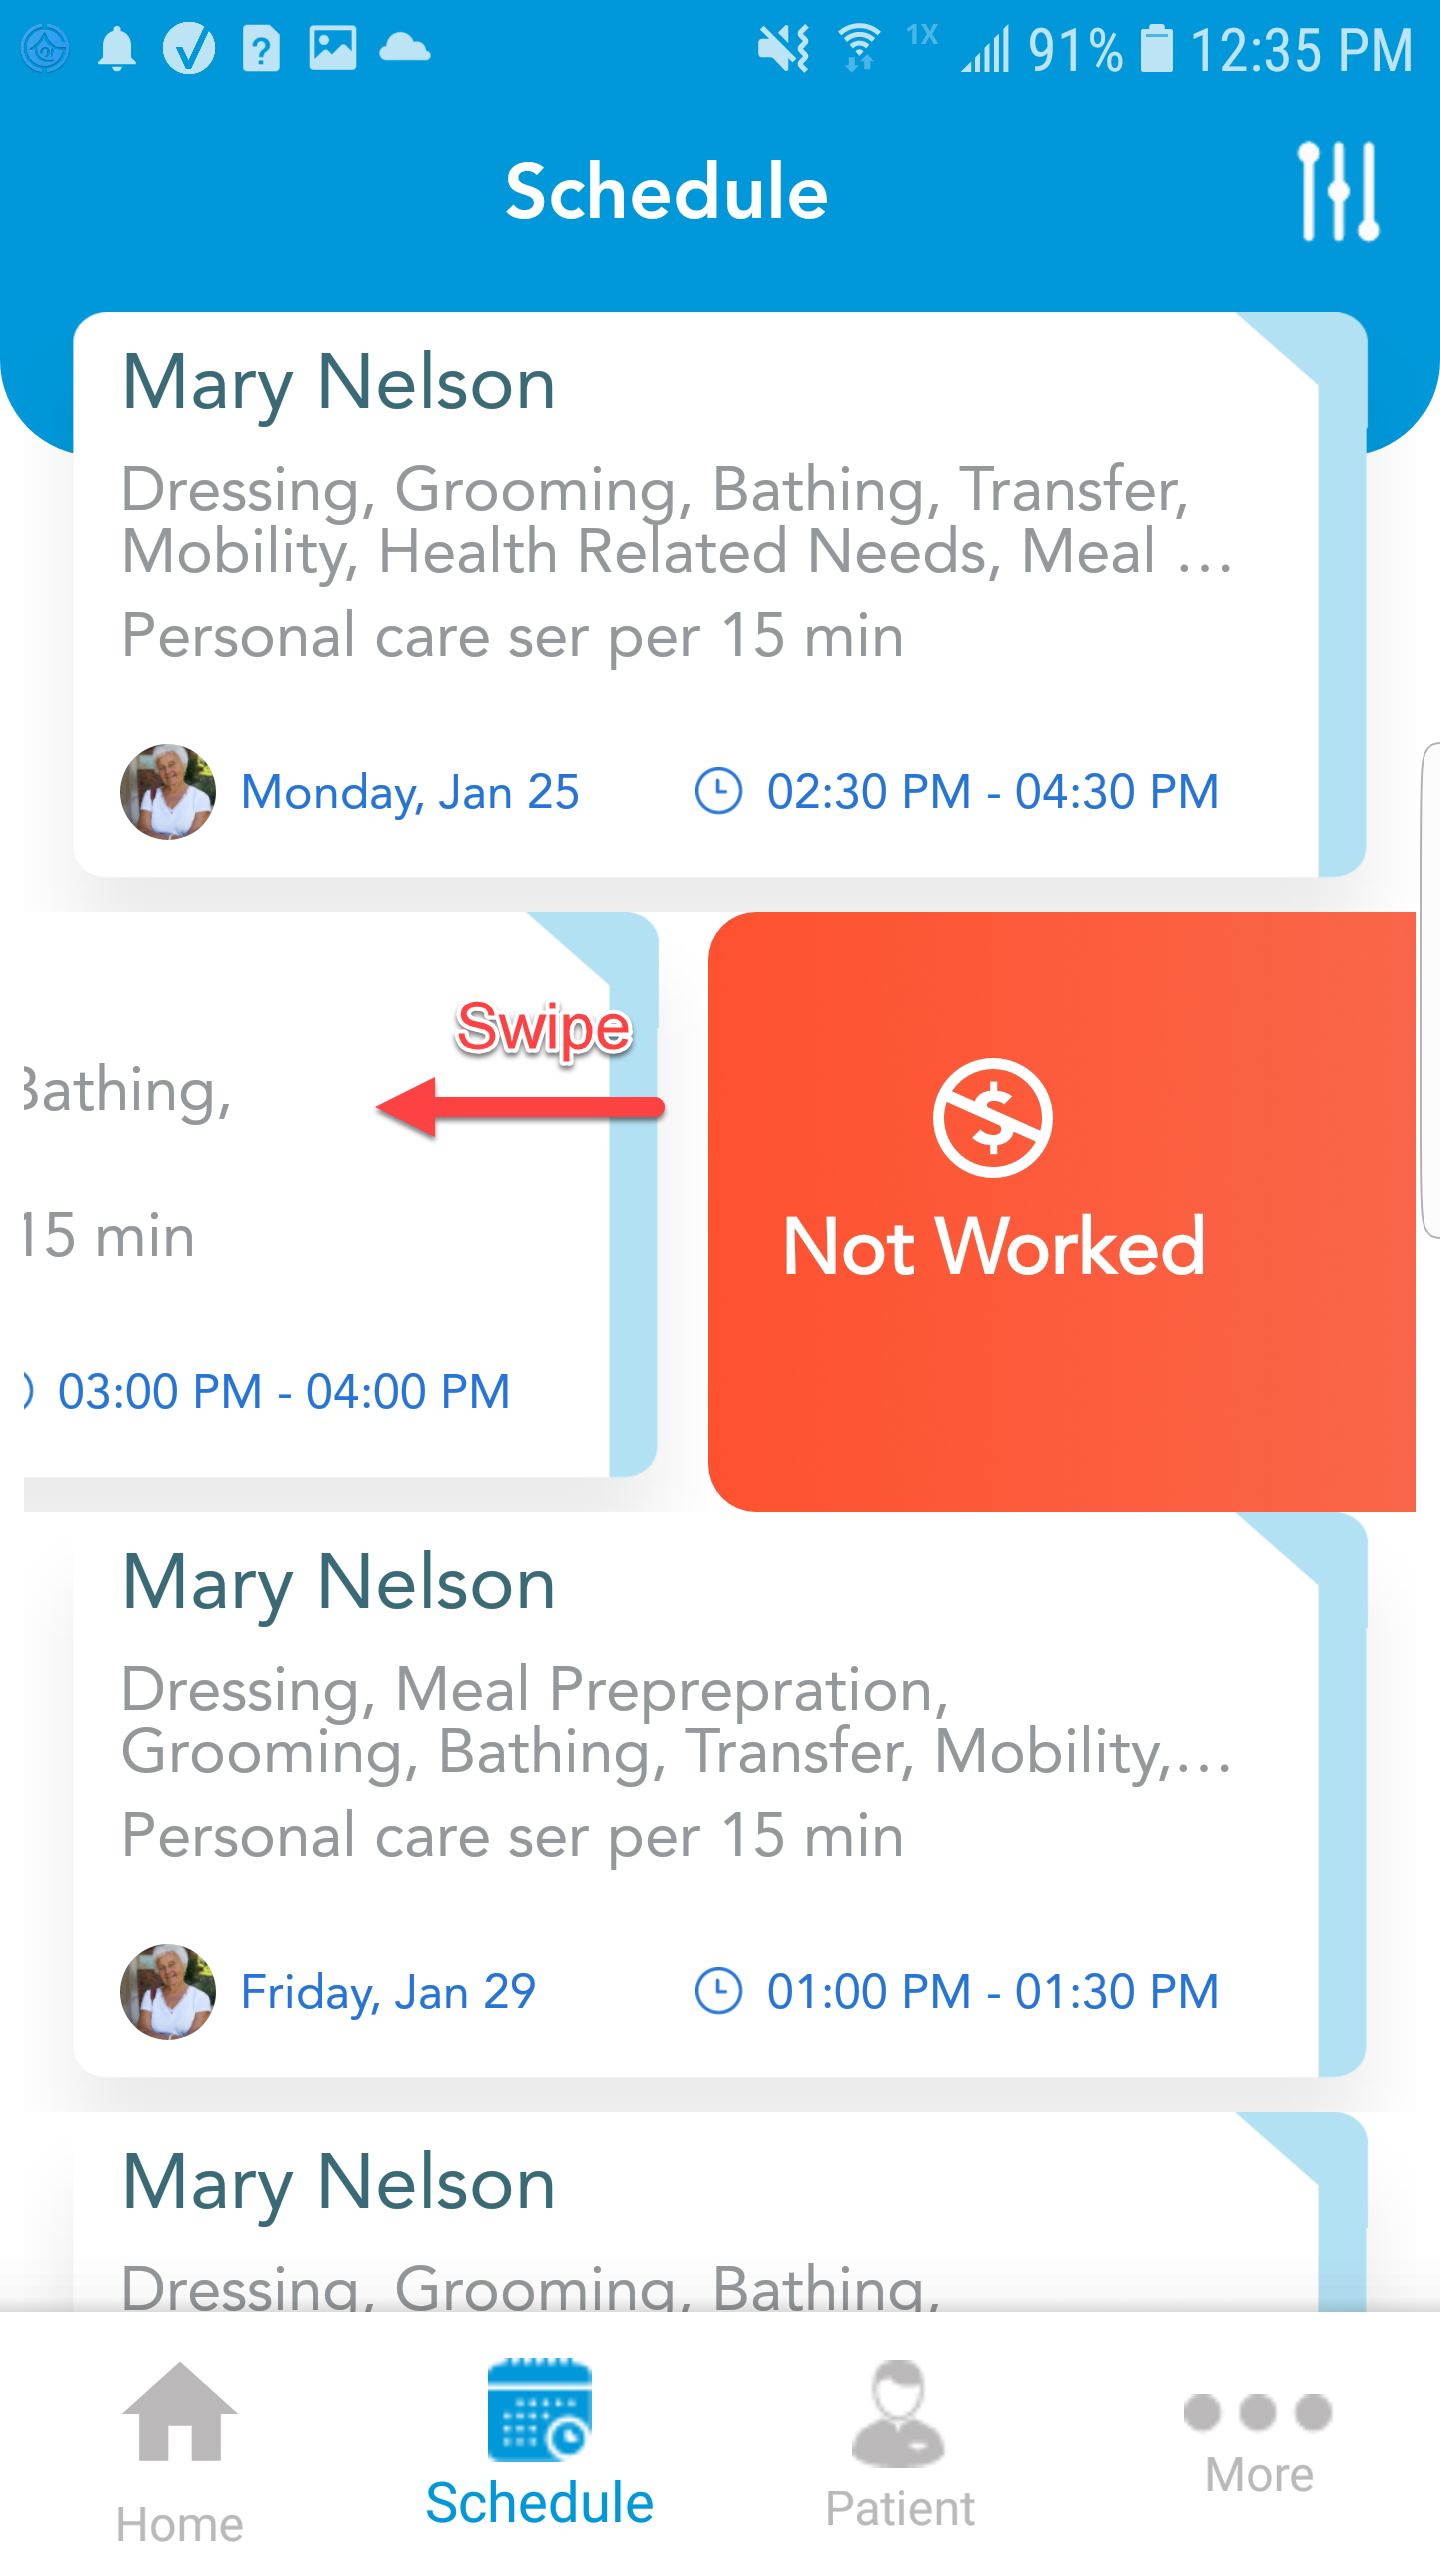
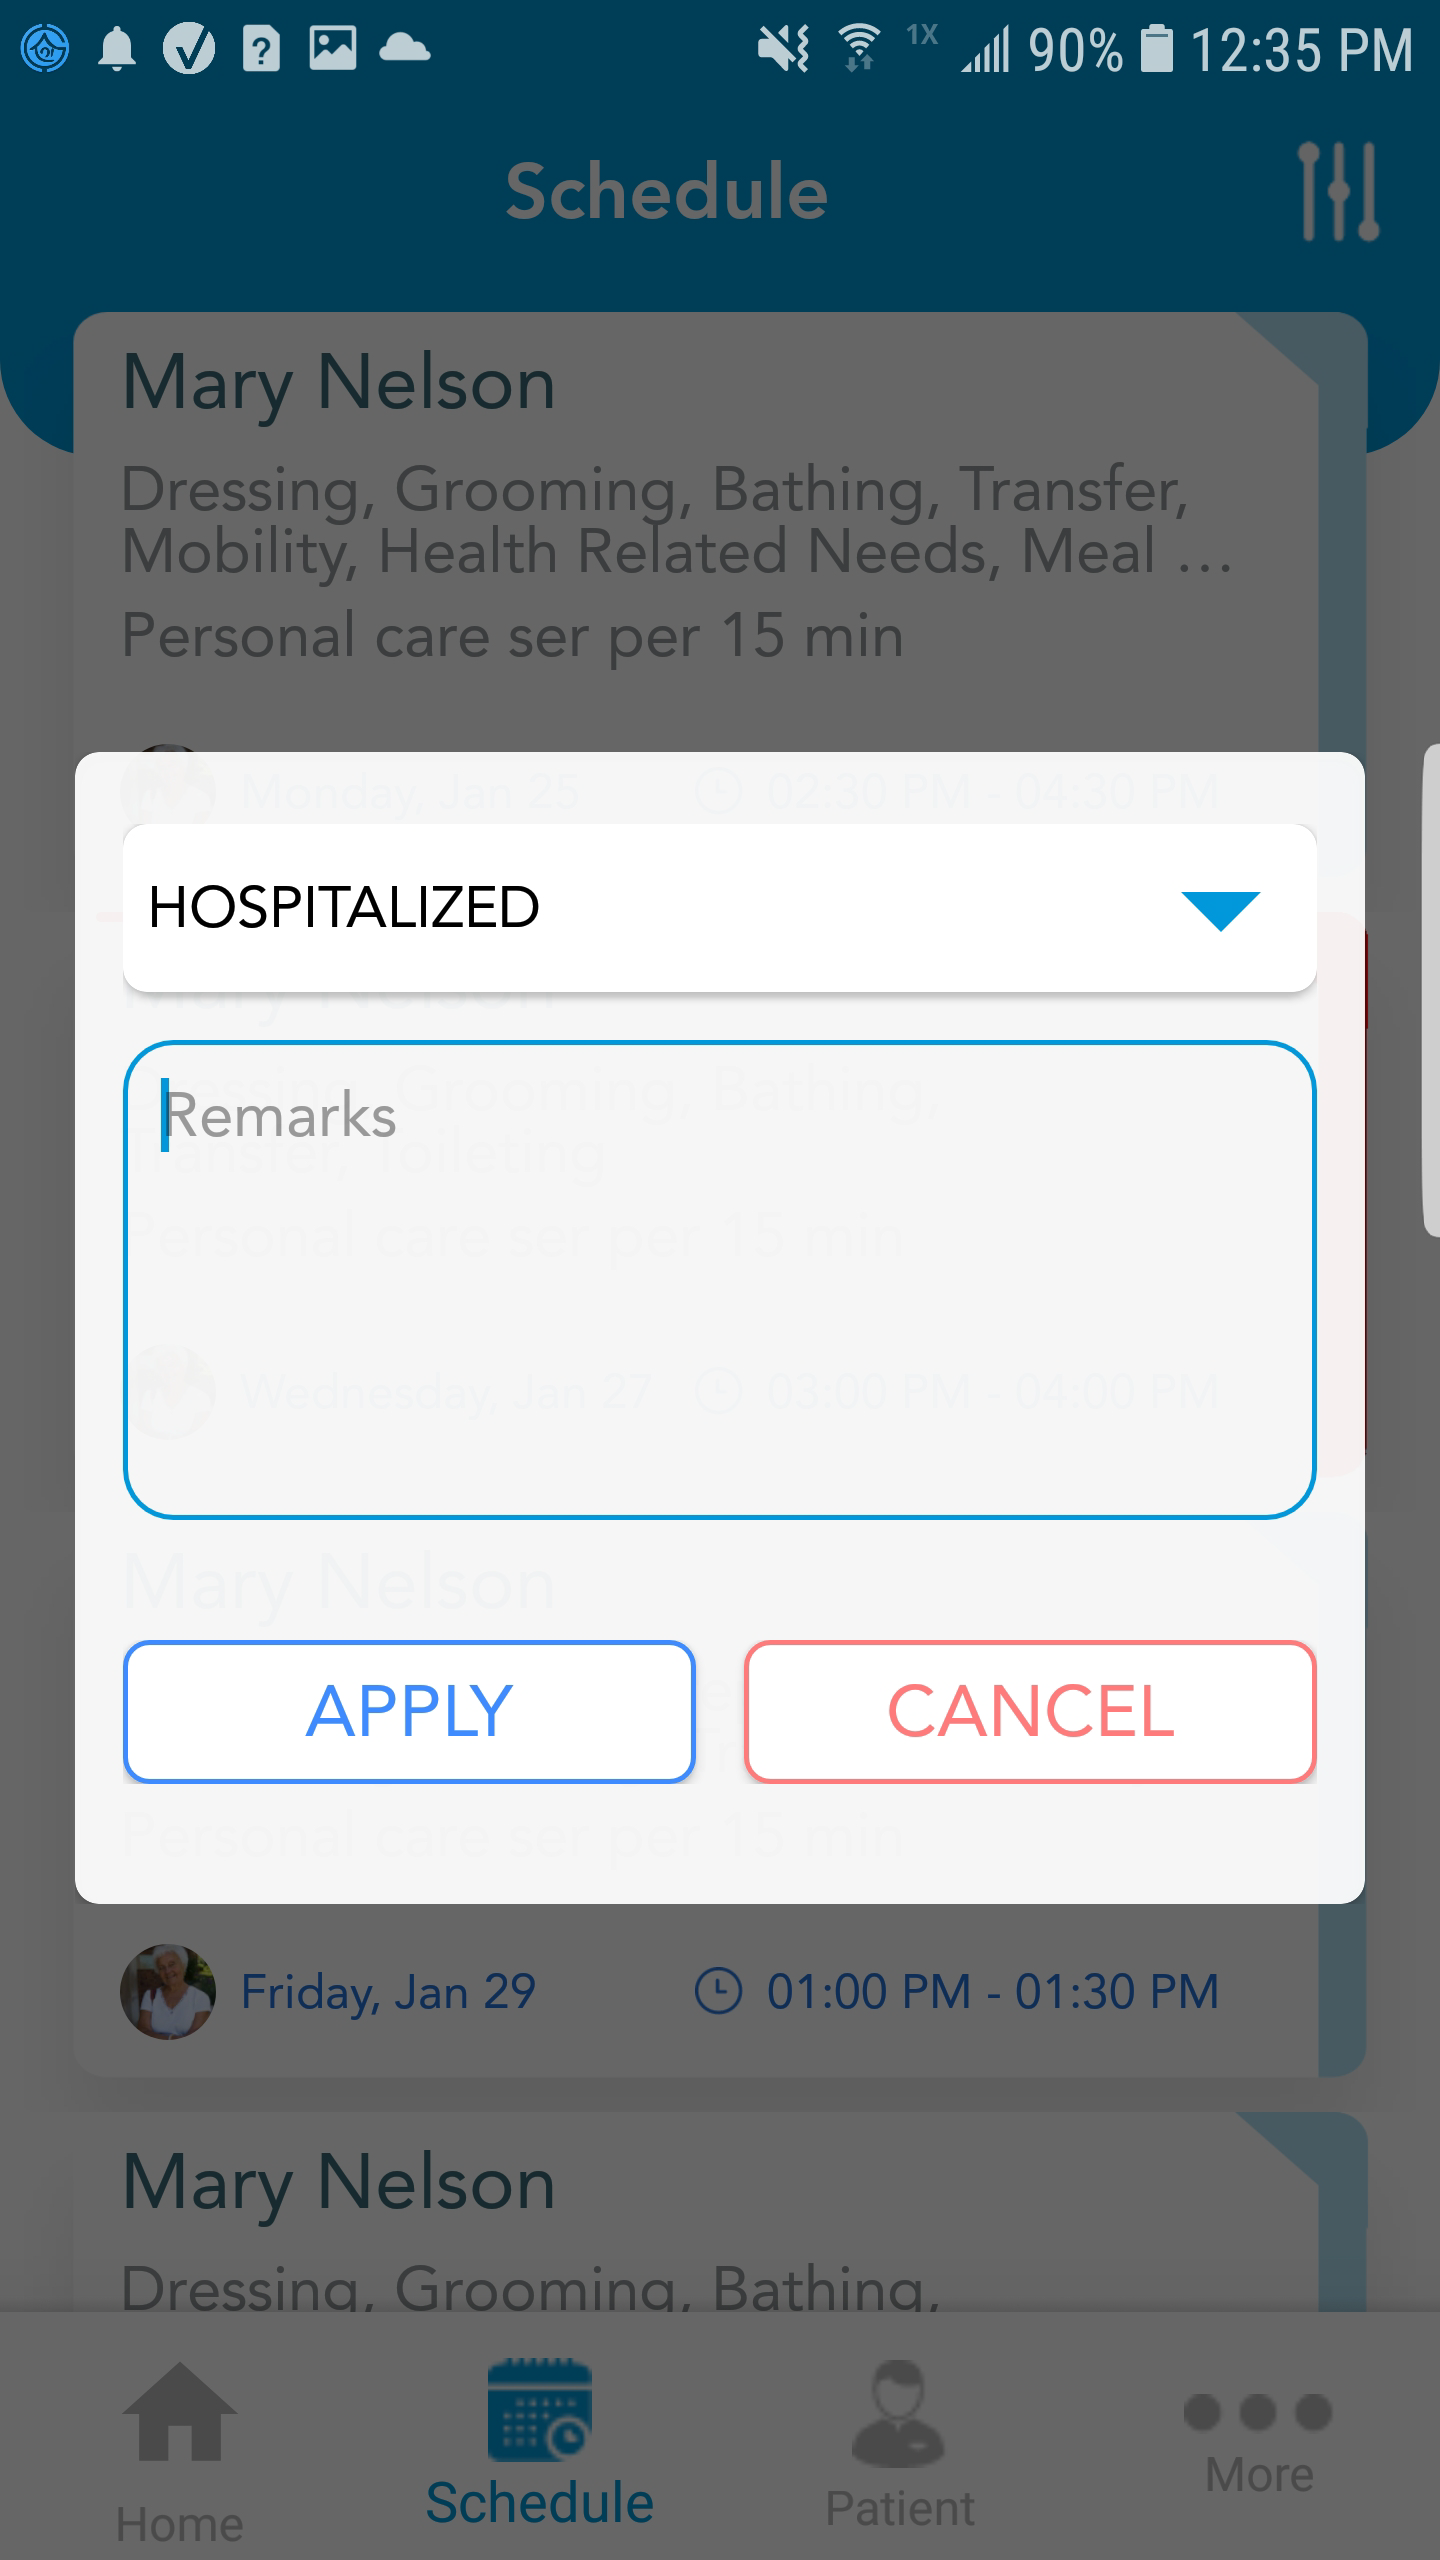
- If the appointment was not worked, you will be prompted to provide a reason.
- You can swipe multiple schedules to submit at the same time.
- Once you have swiped the schedule and selected Worked or Not Worked, the appointment box border will be dark blue or red.

- You will see the number of schedules you have marked as "worked" in the top right corner.

- Tap the checkmark
 icon to submit your time once you finish swiping all of the schedules you want to submit for review.
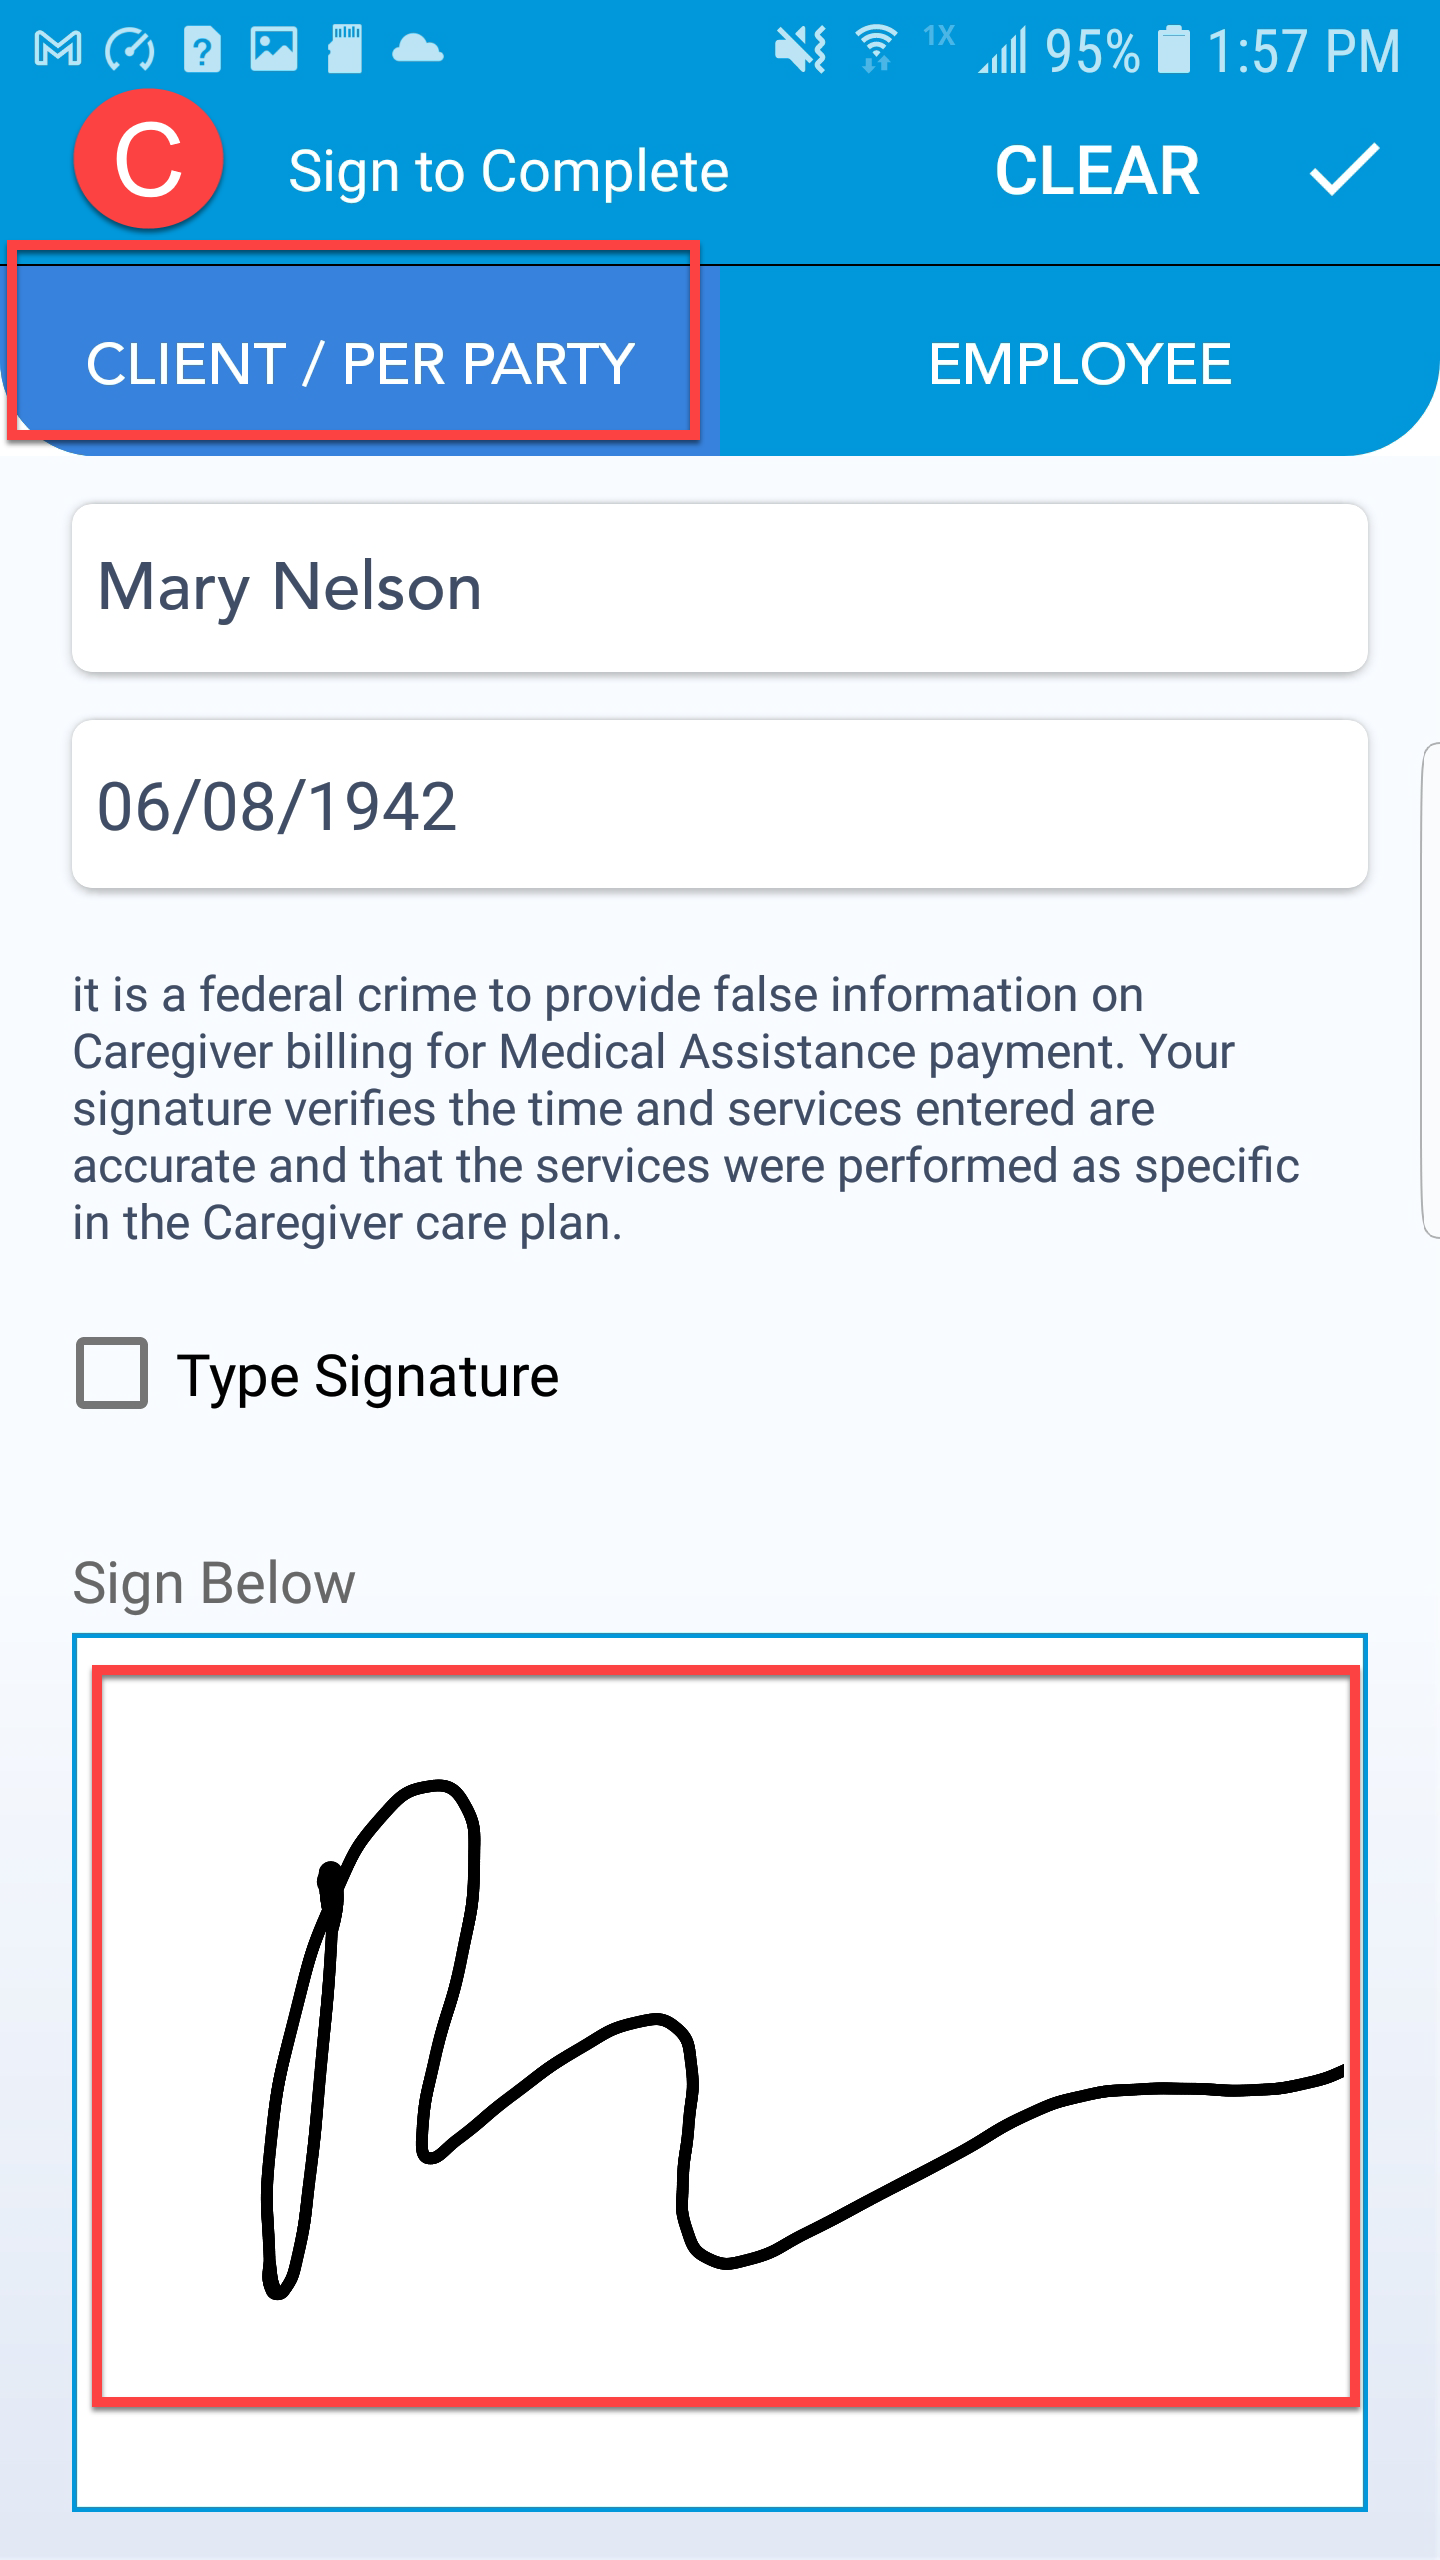
 - Request a signature from the client on the Client/Rep Party tab. This is to indicate that they are successfully signing off on the shift.

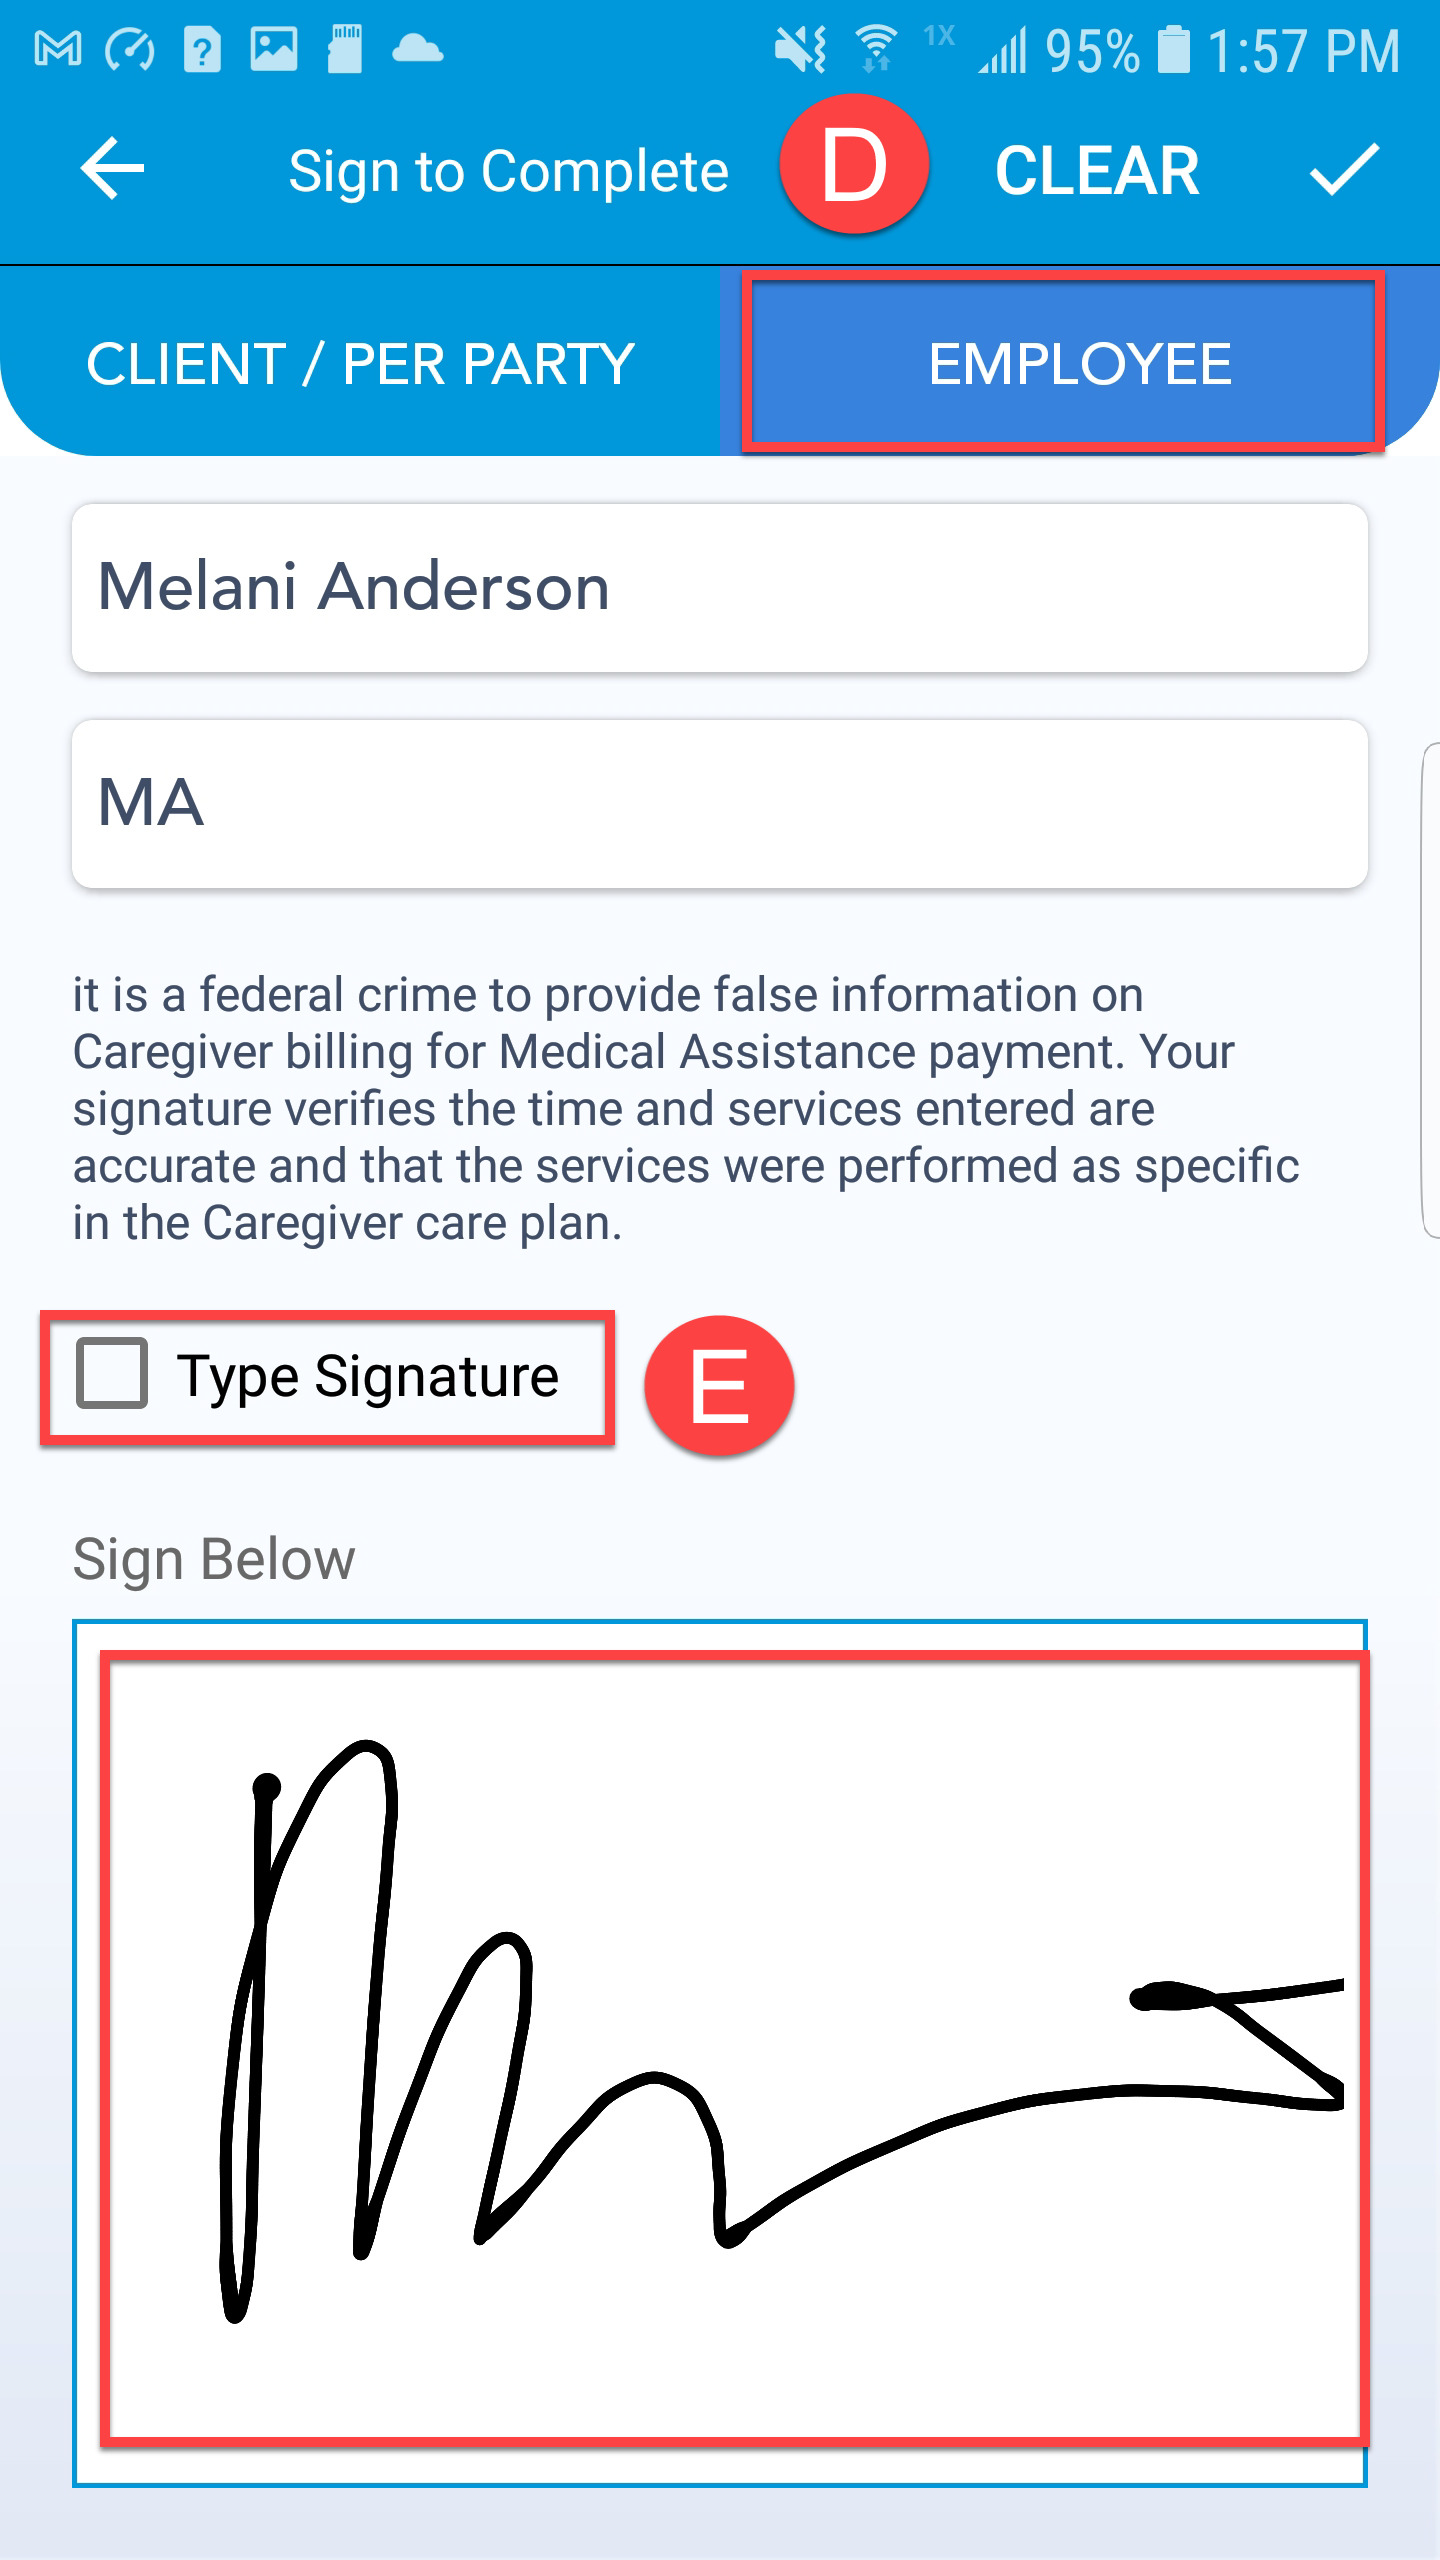
- You (as a caregiver) will then sign and initial on the Caregiver tab, indicating that all of the information you have provided is accurate.

- If you and/or the client cannot provide a written signature, you may type the signature by checking the box next to Type Signature.

- If you do not see the Type Signature field, then please reach our to your back office.
- If you and/or the client cannot provide a written signature, you may type the signature by checking the box next to Type Signature.
- Tap Done.
 |
 |
 |